If you’ve ever used a chainsaw, you know that keeping the chain sharp is essential for making clean, efficient cuts. A dull chain can cause the saw to kick back, making cutting more difficult, dangerous, and time-consuming.
The best degree to sharpen a chainsaw chain is between 25 and 35 degrees, with the file’s pitch about 5 degrees from horizontal. This angle provides the best balance of cutting efficiency and durability. Maintain a consistent angle, as even a tiny deviation can reduce the saw’s performance.
This comprehensive guide discusses the best degree to sharpen your chainsaw chain. It covers the importance of maintaining a consistent angle, file types, and how to sharpen your chainsaw’s chain properly. Buckle up, and let’s dive right in.
What Angle Do You Sharpen a 3/8 Chainsaw Chain?
The best angle to sharpen a 3/8 chainsaw chain is between 25 and 35 degrees. For the best results, always file at right angles to the cutter. However, the angle varies depending on the chain type and the wood you are working on. Harder woods require greater angles.
For instance, if you’re cutting oak or hickory, you’ll need to use a steeper angle than when cutting pine or cedar. The type of chain also makes a difference; low-profile chains require a shallower angle than standard chains.
Chainsaw Chain Angles
Before sharpening your chainsaw chain, you need to understand the different angles involved. There are two angles to consider when sharpening a chainsaw chain:
- The cutting angle
- The depth gauge setting
Cutting Angle
The cutting angle is the angle between the face of the tooth and the plane of the cutter bar. Each cutter has three different angles that need to be considered:

- The top is usually the easiest to see. It’s the slant of the tooth you see when looking at the chain from the top. It should be between 30 – 35 degrees.
- The top plate cutting angle: This is the bevel below the top plate. It’s where the sharpening file goes and has an optimum setting of 60 degrees.
- The side angle: This is the arc on the side of the tooth plate. You can see it when looking at the chain from the side. It’s typically between 85 degrees or less.
These angles vary from saw to saw, so you need to check your manual or the manufacturer’s website for the specific angles for your saw. The best cutting angle will depend on the wood you’re cutting and the desired finish.
Depth Gauge Setting
A chainsaw chain’s depth gauge is a component of the cutter tooth that controls how deep the cut is. It also provides a guideline for filing the teeth to the correct height. The depth gauges should be set at 0.025″ – 0.050″ (0.64 – 1.27mm) below the top of the cutter.
You can use a depth gauge setting tool or a flat file to set the depth gauges correctly – the chain will not cut as deeply if the depth gauge is too high. When set too low, the chain will start to “ride” on the wood surface and will eventually dull. An incorrect depth gauge setting is also one of the leading causes of kickbacks.
Types of Chainsaw Files
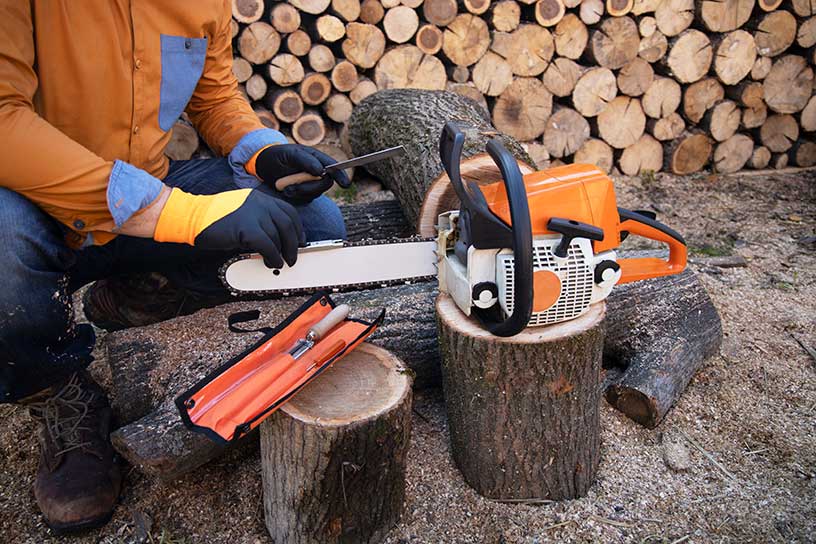
You will need a file designed explicitly for chainsaw teeth to sharpen your chainsaw chain. These files are different from regular files in a few ways:
- They have a much smaller diameter – usually 3/16″ or 4.8mm.
- They have a different tooth pattern optimized for filing a chainsaw chain’s narrow, angled teeth.
- They have coarse teeth for filing quickly and efficiently.
Chainsaw files come in different sizes, so you must choose the size that matches your chain’s pitch. The pitch is the distance between any three consecutive rivets divided by two. It is usually stamped on the side of the bar near the spur sprocket.
Here are the main types of chainsaw files:
- Round files: These are the most common file types and can be used with all kinds of chains. They have a round cross-section and come in different diameters to match the chain’s pitch.
- Flat files: These have a flat cross-section and are used on low-profile chains. They are available in different widths to match the chain’s gauge.
You can always check the chainsaw file size chart to find the correct file for your saw. Using the wrong size file can damage the teeth and make the chain ineffective.
Benefits of Maintaining a Consistent Angle
One often overlooked aspect of chainsaw sharpening is maintaining a consistent angle. Many chainsaw users don’t realize that even a small variation in the angle can significantly impact the chain’s performance.
Here are the benefits of maintaining a consistent angle when sharpening a chainsaw chain:
- It extends the life of the chain as the teeth wear out evenly. This saves you from having to replace the chain prematurely.
- It improves cutting performance since the teeth are at the same angle, cutting more evenly and producing a cleaner finish.
- It reduces kickbacks, which can be dangerous to the user.
To ensure a consistent filing angle, use a sharpening guide. This specialized tool helps you hold the file at the correct angle while sharpening, taking the guesswork out of the equation.
How To Sharpen a Chainsaw Chain – Step-by-Step Guide

Now that you know all about chainsaw files and the importance of maintaining a consistent filing angle, let’s look at how to sharpen a chainsaw chain. Follow these steps:
- Safety first. Before doing anything else, ensure the chainsaw is turned off and you are wearing the proper safety gear. This includes gloves and eye and ear protection. Additionally, you may have a first-aid kit close by in case of accidents.
- Prepare the area. Find a level spot to work on, and make sure there is enough light so you can see what you’re doing. It’s also a good idea to have a few rags on hand to wipe away any sawdust.
- Check the chain. Take a closer look at the chain to check for any damages. If any teeth are cracked, chipped, or broken, they need to be replaced. Check the depth gauges to see if they need to be filed down.
- Clean the chain. Use a brush or rag to wipe away any debris from the chain. This will help you better view the individual teeth and make sharpening easier.
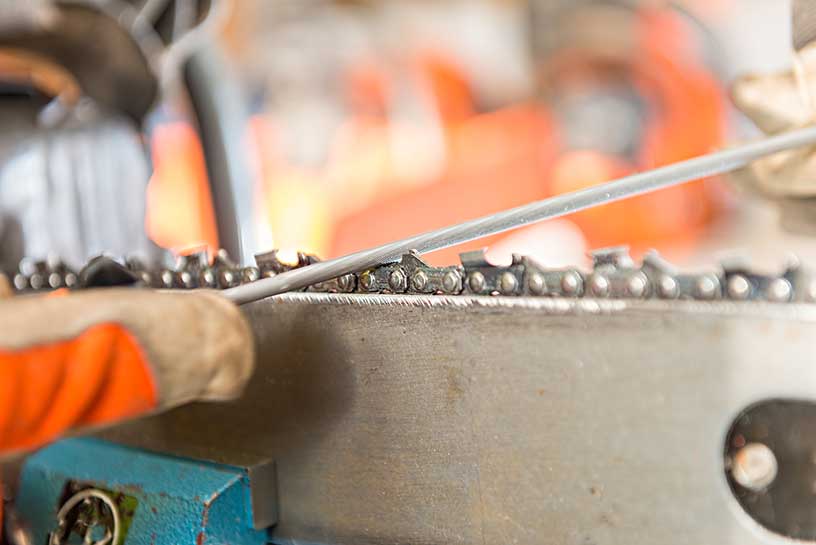
- Clamp the chainsaw bar into a vice. You’ll need to secure the chainsaw bar in a vice so it doesn’t move around while you’re sharpening. Mark the starting position of the bar with chalk so you know where to stop.
- Attach the guide to the chainsaw bar. To ensure a consistent filing angle, use a sharpening guide. Most guides come with instructions on how to attach them properly, though you can always consult the user manual for your specific model.
- Position the file and start sharpening. Once the guide is in place, it’s time to sharpen the teeth. Position the file at the correct angle (refer to the guide or user manual) and start filing away. Remember to apply equal pressure to each tooth and move the file forward and backward in a sawing motion. 3-5 strokes should be sufficient.
- Sharpen the depth gauges (if necessary). If the depth gauges are too high, they will need to be filed down. To do this, use a flat file and position it at 90 degrees to the bar. File down the gauges with a flat file until they are level with the cutter teeth.
- Check the sharpness of the chain. After sharpening all the teeth, it’s a good idea to check the chain’s sharpness. The best way to do this is by cutting through a piece of wood. If the chain cuts cleanly and smoothly, you’re good to go. If not, you’ll need to file the teeth a bit more.
- Remove the guide and bar from the vice. Once satisfied with the chain’s sharpness, you can remove the guide and bar from the vice. Don’t forget to unclamp the bar!
And that’s it. You now know how to sharpen a chainsaw chain like a pro. Just remember to stay safe and take your time sharpening the teeth. With a little practice, you’ll be able to do it in no time.
Final Thoughts
The ideal degree for sharpening a chainsaw chain is between 25 and 35 degrees. However, you can also use a guide to help you maintain a consistent filing angle.
When sharpening the chain, applying equal pressure to each tooth and filing in a sawing motion is essential. 3-5 strokes should be sufficient. Don’t forget to file the depth gauges if they are too high.

