DIY bookshelf is a great project to build over the weekend. The problem is that many of the bookshelf plans on the internet are not free to use or take several steps to gain access.
The eight reviews that follow look at some of the best free bookshelf plans out there, each of which offers unique opportunities to practice new woodworking skills.
1. Family Handyman: DIY Bookshelf
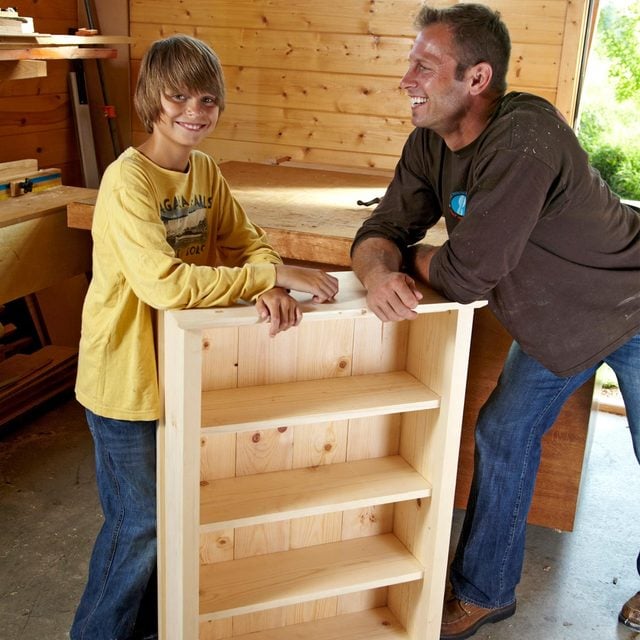
I will start this off with a set of plans that will provide a fun challenge to beginners. The basic bookshelf built from these free plans will measure 26.5 inches L x 11.0 inches W x 39.75 inches H. It is organized, with pictures and drawings highlighting the 12 steps needed to make the four-shelf cabinet.
A stand-out here is the use of a biscuit jointer. Some woodworkers feel that biscuits or dominos add little or no strength to a butt joint. I find they help with alignment, and the extra glue surface from the biscuit inserts will not hurt the joint’s strength or performance.
The build uses Pine, and the material sizes allow you to buy prefabricated framing lumber here. You will use minimal amounts of hardware, with wood screws adding extra hold. These factors, along with a simple assembly, keep the project in the beginner range of complexity.
A novice woodworker with no experience can finish this project in a day. Anyone with some experience and a selection of power tools listed by the author can get it done in six hours.
It is a one-day build. Any glue added will need 24 hours to cure, however.
Bookshelf at-a-glance
- Level of project complexity: Beginner
- Suggested tools you might need: A selection of clamps, tape measure, framing square, biscuit jointer, drill, miter saw, sander, router, and table saw
- How long it will take: Six hours/One day
- Approximate cost ($$ – $$$): $$
2. Ana White: Henry Bookshelf
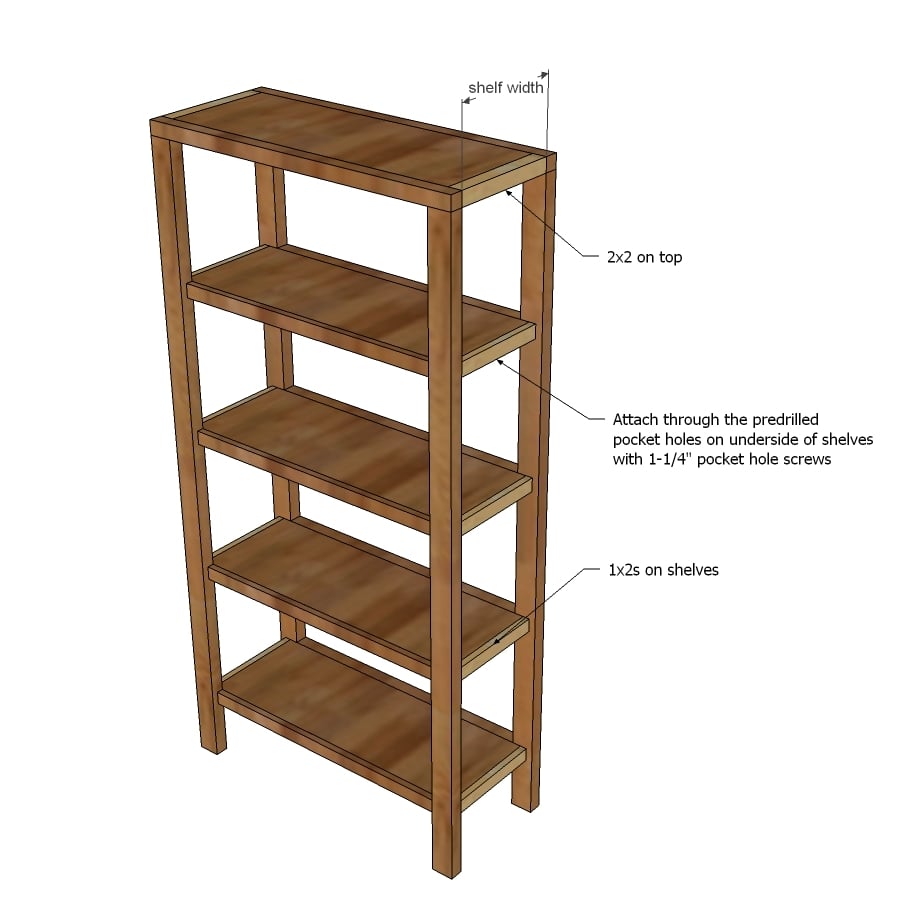
Ana offers you a simple but sturdy build for a four-shelf display that novice woodworkers can try. It provides good practice for alignment and cuts as you build a cabinet frame that measures 36 inches L x 15 inches W x 72 inches H. The plans come in six steps that are clear enough to understand, with several computer images offering visualization.
I like that the author makes use of the Kreg jig. Using pocket-hole joints keeps the project looking clean while providing secure fastening with screws. A Kreg jig will save woodworkers a lot of time in their woodshop, which is advantageous when you have limited time for your hobby.
The cut list is simple to follow, and you can use whatever materials you want. I have found that using wood with a strong grain pattern is ideal for light-colored projects, but you can use anything for a bookshelf that will be stained dark or painted over. Plywood will suffice for the back panel since it is against the wall, and items will block the full view on the shelves.
It is another day in the shop for most, but someone with experience will complete it within a few hours. Add an extra day for staining or painting.
Bookshelf at-a-glance
- Level of project complexity: Beginner
- Suggested tools you might need: A selection of clamps, tape measure, framing square, drill, circular saw, brad nailer, sander, and Kreg jig
- How long it will take: Six to eight hours/Two days
- Approximate cost ($$ – $$$): $$
3. Jen Woodhouse: Rustic Bookshelf
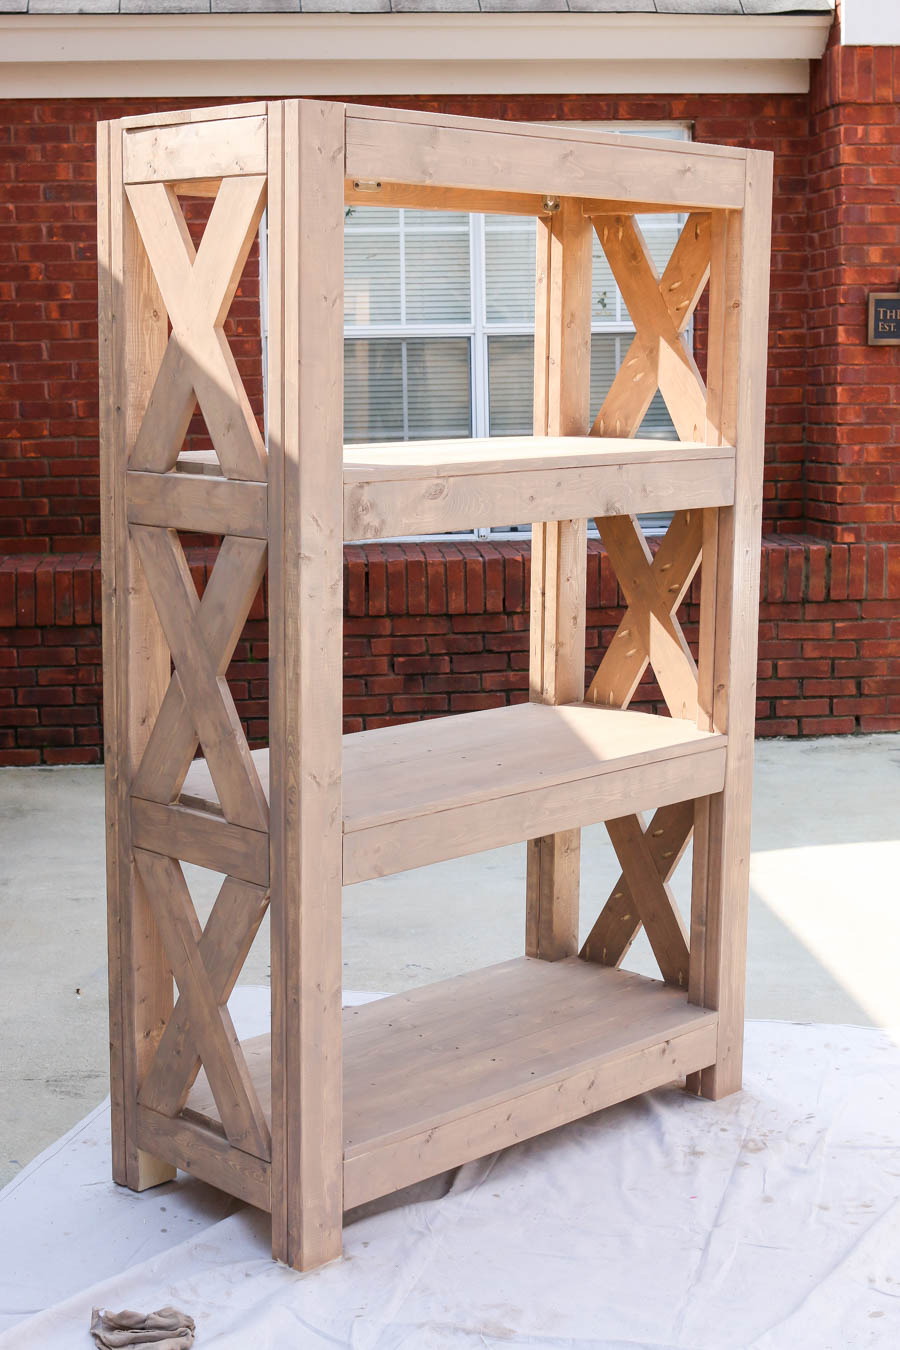
These plans from Jen will create a three-shelf display that provides more function than looks. The instructions are sparse and include discussions about brand-name decorations that you can ignore. It builds up to a cabinet that measures 45.5 inches L x 20.0 inches W x 71.0 inches H.
The lack of an actual tool list is a disappointment, especially for a novice builder making one of their first projects. I have included a small list of tools that can help. Her specific mention of pocket-hold joints on the side angle supports demands I include the Kreg jig again.
One assembly point worth noting is the “X” support brackets on the sides of each shelf. These require that you measure each one as you build, as pre-cutting the components will surely leave you with wood that will not align properly. Also, they use half-lap joinery, which you might not see unless you have some assembly experience in the woodshop.
You will spend a day building this bookshelf. Cutting the slats of wood for the shelves, along with the half-lap joints and individual measuring for six “X” supports, takes time.
Bookshelf at-a-glance
- Level of project complexity: Beginner
- Suggested tools you might need: A selection of clamps, tape measure, framing square, drill, circular saw, sander, and Kreg jig
- How long it will take: Eight hours/One day
- Approximate cost ($$ – $$$): $$
4. Popular Woodworking: Contemporary Bookcase
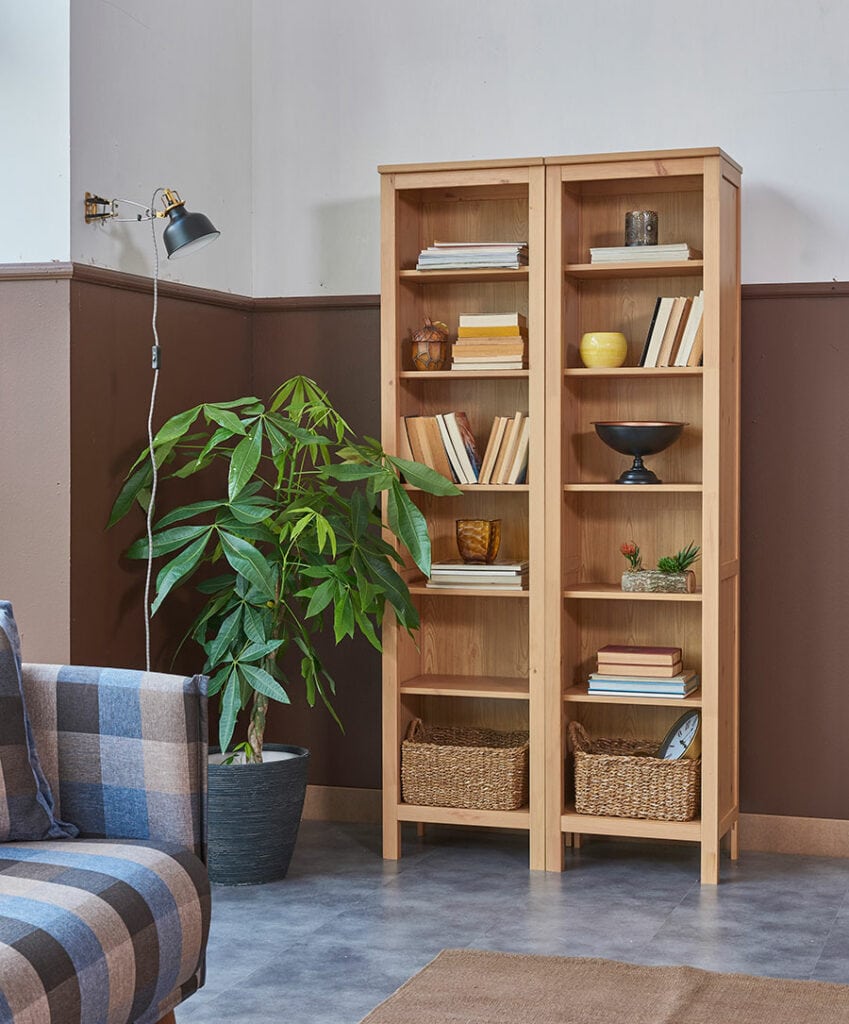
The complexity of this display goes to intermediate, as the instructions are more intricate. Your final result is a unique-looking bookcase secured against the wall and provides you with five shelves separated into two compartments for books or knickknacks.
You will need clamps for this project. They will be holding the banding in place as the glue dries. The project will also allow your table saw to start as the tool of choice for dimensioning your laminated wood.
The project makes use of laminated sheet goods. Several steps help provide a solid wood look, including adding banding to the edge of your pieces. Quality laminate, like Birch sheet goods and matching banding, will increase the overall cost.
A solid wall anchoring system presents a unique hardware requirement for this bookcase. You do not need carpentry or drywall experience here, but learning how to install wall anchors is advisable.
The project will take you two days in the woodshop. Assembly is more complex with these instructions, and the glue-ups will take time. Trimming the banding with a router bit and matching the wood grains save on the time needed for finishing, though.
Bookshelf at-a-glance
- Level of project complexity: Intermediate
- Suggested tools you might need: A selection of clamps, jig saw, circular saw, miter saw, sander, and table saw
- How long will it take: Two days/Week minimum
- Approximate cost ($$ – $$$): $$$
5. Shanty 2 Chic: Sawhorse Bookcase
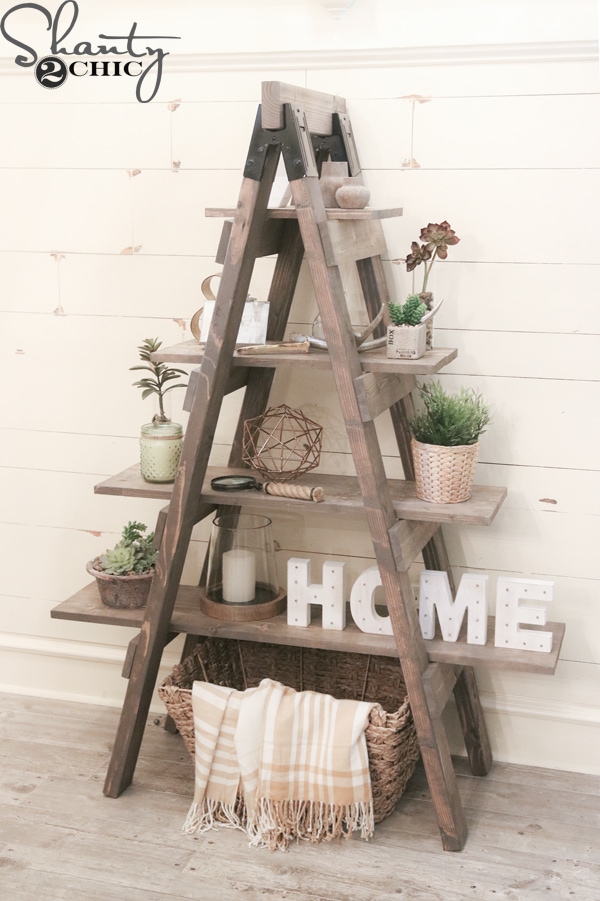
Ashley and Whitney offer a simple build that you can finish in just a couple of hours. While a minimalistic approach is fast, you can add paint to the hardware and stain your wood. The “A” frame shelving built here measures 45.625 inches L x 20.0 inches W x 61.625 inches H.
One thing that stands out here is the tool list. The authors highlight this as a three-tool build, and for the most part, they are correct. You will also need measuring and safety equipment along with the brad nailer, drill, and a miter saw.
The “star” of the show is the sawhorse brackets. These will provide you with the ladder-like frame that the shelves sit across. You can use whatever type of material you want, but I would recommend simple framing lumber. It keeps the price to a minimum while providing enough strength for support.
The shelf system built from these plans will only take a novice woodworker a couple of hours in the shop. You can paint the sawhorse brackets and stain or paint the wood while coming in under a day’s total work time.
Bookshelf at-a-glance
- Level of project complexity: Beginner
- Suggested tools you might need: A brad nailer, drill, miter saw
- How long it will take: Two hours/One day
- Approximate cost ($$ – $$$): $$
6. Popular Woodworking: Simple Barrister Bookcase
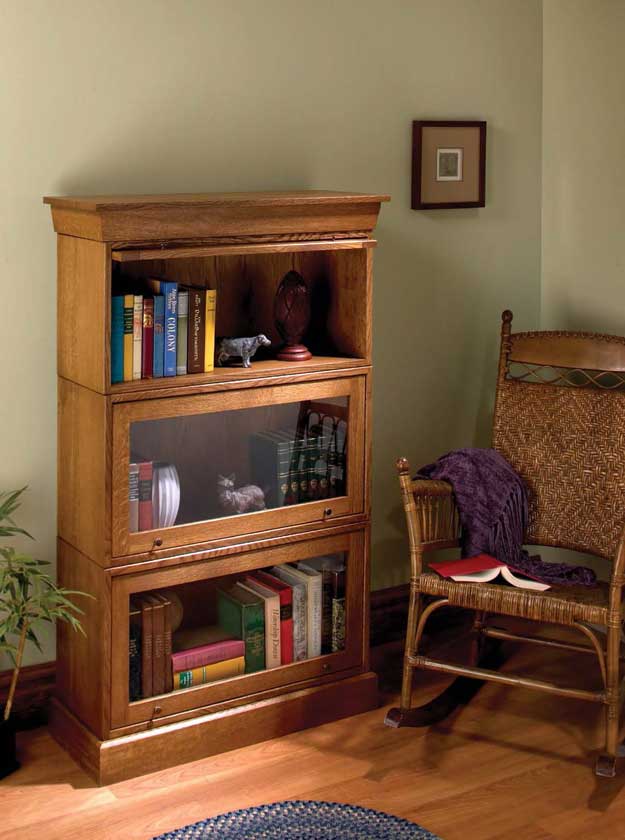
The plans listed here come from an April 2007 issue of Popular Woodworking and build a barrister bookcase with three shelves. It consists of three separate boxes that are stacked, with the lids functioning like doors.
You can use whatever materials you like, but I find that hardwood with a strong grain pattern will look nice. Using the same boards for the sides of each box will create consistent wood grain, no matter how many boxes you stack. That is key to creating a shelving system that looks like a single piece.
A table saw equipped with a Dado blade set will help create the grooves and rabbets required for this build. That joinery is used on the box frame and with the glass inserts on the “lids.”
I consider this advanced in complexity due to the grain matching, glass inserts, and dimensioning. If you want to build some boxes taller than others, consider stepping down the length and width for balance. Each box could take a beginner a weekend to assemble, so this project will take longer to complete.
Bookshelf at-a-glance
- Level of project complexity: Advanced
- Suggested tools you might need: A dado set, circular saw, router, sander, table saw
- How long it will take: Two days/More than one weekend
- Approximate cost ($$ – $$$): $$$
7. Canadian Woodworking: Hidden Compartment Bookshelf
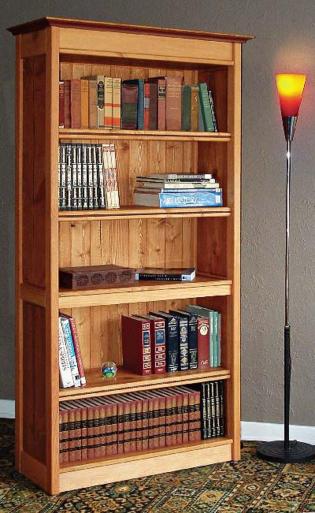
The five-shelf bookcase built with these plans has two hidden compartments you access by lifting panels. Aligning the pieces is needed to provide the “hidden” look, increasing the difficulty of this project.
The plans consider the use of framing lumber, so you should find pre-dimensioned Douglas Fir accessible. An extensive materials list stands out here, but the components will make a durable bookcase that should last longer than any of us.
You can use a table saw and a thickness planer to dimension most of the materials. Chamfering using your router table and a bit of your choice will provide the rounded edges you need.
The project will take you a weekend if you have experience with it. New woodworkers will find it will take longer. You might get staining done during that time but plan for an extra day to be safe.
Bookshelf at-a-glance
- Level of project complexity: Advanced
- Suggested tools you might need: A drill, dado set, circular saw, miter saw, router table, sander, thickness planer, and table saw
- How long it will take: Two days/Two days at minimum
- Approximate cost ($$ – $$$): $$ – $$$
8. Instructables Craft: Tree Bookshelf
The bookcase built with these plans will require wall anchors to function. It creates the most unique-looking project on this list. You can design it to your size specifications, adding “branches” for shelves where you wish.
The project uses a sheet of plywood that you paint for the tree to connect, and it provides some stability. Some might use it as is, but I suggest that you anchor it to a location to prevent accidents.
It uses laminated sheeting for the branches and shelves. You will need to add banding on the edges to give the tree a solid wood look.
The stand-out feature here is the angles that you need to create for a tree branch effect. These instructions list cut angles on each piece. Cutting each branch will add to the build time and complexity, especially if you are new to cutting outside 90 or 45 degrees.
Bookshelf at-a-glance
- Level of project complexity: Advanced
- Suggested tools you might need: A few clamps, drill, sander, miter saw, table saw, and brushes
- How long it will take: Two days/Two days
- Approximate cost ($$ – $$$): $$$
Plans Hold More Than Books
A bookcase is a good choice for a functional woodworking project. You can make it simple or complex, matching your skill level to the build.
The key here is to have fun. Most bookcases are built in a weekend or two, allowing you to gain experience while enjoying your woodworking hobby.

