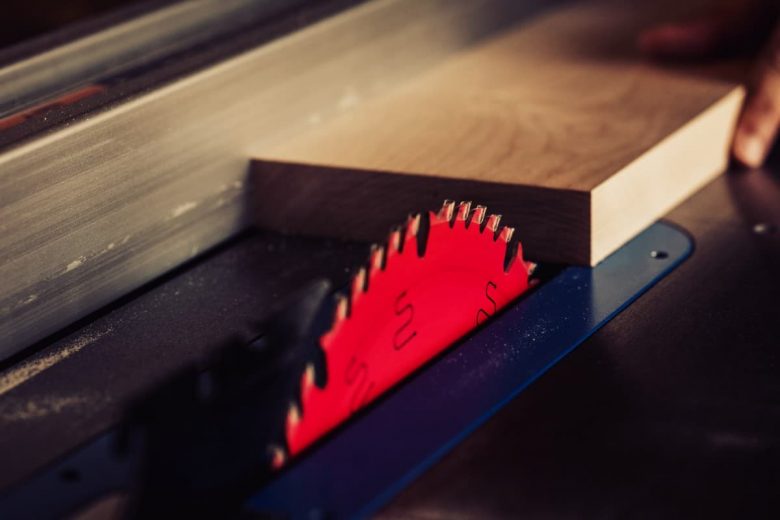
A table saw is one of the more popular purchases among craftsmen who decide to step up their woodworking game. As I prepared to buy my first one, I realized that operating it was more complex than I anticipated.
Taking the time to understand how it works will help you make an educated purchase to begin with. It will also allow you to work effectively and safely.
In this article, you will learn the basic safety rules and tips that will teach you how to use a table saw safely and efficiently.
Table Saw Safety
Practicing shop safety is important no matter what type of tool you are using. The table saw, with its large cutting blade that can cut completely through your arms or fingers, represents a powerful tool that demands safe preparation and attention to detail.
Dress for Success!

Clothing might be something you would overlook, but it shouldn’t. Do not wear loose clothing to prevent anything from getting entangled in the moving parts of the table saw (or any other power tool, for that matter. Take the time to remove your jewelry and secure any loosely fitting clothes.
Do NOT wear gloves! While you might feel they could help, gloves are a hindrance when working with power tools such as a table saw. Gloves limit your ability to operate some control buttons, such as emergency shut-offs. More importantly, a glove can get caught in the turning blade, pulling your hand and even arm into the cutting path.
Not only do you want to keep your wits about you, but you will also want to keep your feet planted firmly on the floor. Therefore, NO FLIP FLOPS! Many work areas will have a hard floor with a smooth texture. Having a pair of non-slip shoes will help you keep a secure footing as you operate the table saw and move the wood through the cut.
Eye and Ear Protection is a Must!

Your table saw will generate dust particles that can really irritate your eyes. Even worse, a chunk of wood can split off or the whole piece can kick back and fly into your face. Your eyes are sensitive and easy to damage, so it will be critical to use safety goggles or a face shield while you work with a table saw.
Your ears are also sensitive and should be protected when you use your saw. A rule of thumb is, if you have to raise your voice to be heard at your arm’s length then the sounds being generated by machines are loud enough to damage your ears. Earplugs or noise-blocking earmuffs are easy to take on and off while providing you with plenty of protection.
Respiratory Protection
That dust I mentioned earlier will do more than irritate your eyes; it can affect your nose, throat, and lungs as well. A table saw is capable of creating a lot of dust, even when connected to a simple dust collection system. Use a simple dust mask or respirator to keep the airborne particles out, including wood that has been treated with chemicals.
Avoid Cutting Crooked Boards
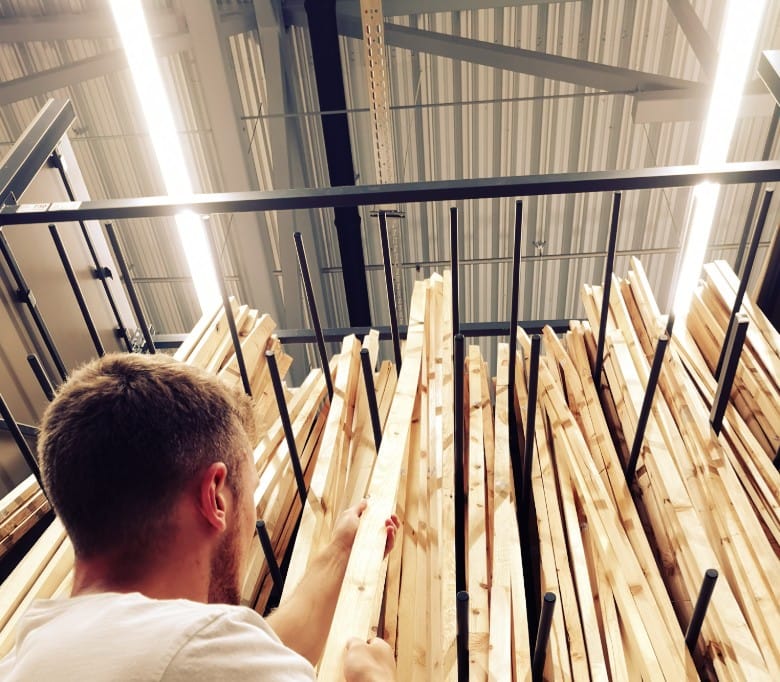
Crooked boards are difficult to work with and can be unsafe to cut. The uneven surface prevents adequate contact with fences or miter gauges, and ripping through crooked grain may generate binds or kickbacks. It would be best to square your stock first or use another board to aid with rip cuts.
Advanced Tips: How To Square A Board With A Table Saw
Check Materials for Unwanted Metal
Running your table saw blade into a random nail or similar fastener will do more than damage your blade. It could cause debris to fly into your body, causing bruising, cuts, or deep penetration that will require medical assistance.
You should perform a complete visual inspection of all the wood, including new stock from the store. With used timber, I use a handheld metal detector to search for bits of metal that may be hidden beneath a rough wooden surface.
Read Your Table Saw Manual
One of the simplest safety practices you can do will be to read the manual that comes with your table saw. The manufacturer will provide you with an array of safety advice involving the set-up, operation, and storage of the power tool itself. It will also teach you what safety equipment the saw is equipped with as well as how to use it to keep you safe.
A table saw must come with an easy-to-read, user-friendly instruction manual. Keep that in mind when shopping for a saw for your own workshop.
Table Saw Setup
Now, let’s learn the basic rules on how to tune up and maintain your table saw.
Keep It Clean
It is important that you keep the table surface clean and polished. This will allow you to run timber across it without catching on dirt and grime that could damage the wood surface or cause the project to sit at an angle on the table or the fence. Keeping your table saw clean will also prevent a build-up of dust that can cause issues with belts, gears, or motor vents.
Select the Right Blade
I am sure that you have noticed the vast array of table saw blades. There are characteristics that manufacturers incorporate into these blades, making them ideal for specific cuts or materials. Selecting the proper blade will extend the blade’s life, provide smooth cuts that do not waste material, and allow you to operate your table saw safely.
Remember to keep your table saw blades sharp. Dull blades increase the probability of table saw burning wood or dangerous kickback.
Unplug Before Swapping Blades
While it might seem like a hassle to you, I can not stress enough how important this step is. An accidental powerup while you are touching these types of blades could remove your fingers or cut deeply into your hand. Simply removing the plug from its outlet while you make these types of adjustments eliminates any potential issues.
Adjusting Blade Height
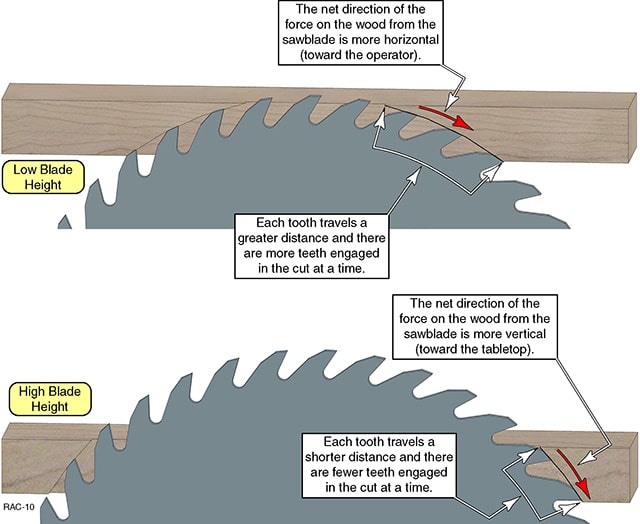
Blade height can be adjusted to make clean cuts through timber as it moves through the cutting path. A properly adjusted blade height will allow the teeth to clear the stock surface without extending far enough to go deeply into your hand or fingers should an accident happen. Proper adjustments can also be made with the blade to produce a dado cut at a certain depth as well.
Setting the blade to an optimal height will improve the quality of your cuts and reduce the risk of kickback. You want to set your blade height so that one full tooth clears above the workpiece. All in all, it should be raised to about 1/8″ to 3/8″ above the stock.
Throat Plate
A throat plate should fit securely into the throat. The standard plate that comes with your table saw will work adequately for most blades.
If you are making dado cuts, however, you will need to purchase or make a special insert to replace the standard plate. This type of plate will allow the wider blade set to clear the throat of the table saw while still providing support around those blades.
A zero-clearance table saw insert is cut to the exact width of your blade’s kerf to reduce the amount of tear-out on your stock. The downside to zero-clearance inserts is that you cannot make bevel cuts with it.
Check Your Safety Features
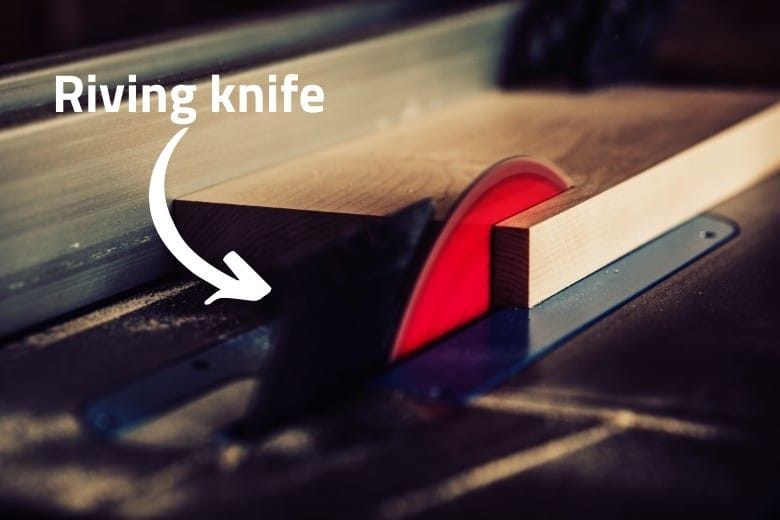
Unlike a splitter, your riving knife will adjust up and down with the saw blade. You need to make sure that it is moving properly and that it is clear from the blade teeth before operating.
With kickback pawls, you need to make sure that they provide enough clearance for the stock to pass under as you cut. They should have their teeth set in the proper direction so that the pawl will grab a board that attempts to kick back.
Blade guards are designed to keep your fingers away from the spinning saw blade. You need to make sure it will operate effectively while providing enough movement to prevent the guard from jamming on the wood or stopping it from feeding into the blade.
Fence Adjustments
When it comes to making rip cuts, the table saw fence adjusts to provide a guide as you feed the lumber through the blade. It is important to verify that the fence is parallel to the saw blade, as this alignment will provide a safe and true cut.
Outfeed Table
An outfeed table should be placed behind the table saw to receive larger boards and timber after it has been cut. This will offer you more support and control as you feed these larger pieces as well as help prevent potential problems with kickback.
Learn More: Table Saw Tune-Up Tips
Cutting
Now that you know how to set everything up for a cut, let’s learn the basic rules on how to actually execute it.
Avoid Making Free-Hand Cuts
Manufacturers include fences and miter gauges for a reason. They allow you to make straight cuts while safely supporting the material you are working with. Making cuts by hand lacks this support, and you can easily bind the wood on the saw blade or have the stock pulled from your hand as you work.
Use a Push Stick

Some cuts will put your hands close to the blade, no matter how you hold and feed the wood. Never feed your projects with your hands near the blade. Use a push stick to secure the material and move it along, providing needed support and pressure without endangering your fingers.
Position Yourself Correctly
The first thing that I do is to imagine the cut in my head. Planning ahead like this allows me to anticipate where my arms and feet need to be so that I can make a safe cut. It also clues me into potential problems that may require extra support from an outfeed table, for example.
One thing you will want to avoid is placing your body behind the blade. Standing in line with the blade as you work puts your torso and face in direct line with wood that could kick back. It also places your body parts in the blade’s path as you try to move your project through the cut, so make sure to stand off to the side of the blade a bit.
Also, make sure that you stand firmly on the ground. You will lose your balance and may fall into the blade if you are standing on your toes or on one foot. Keeping a solid footing will also allow you to control the timber as you move it through the blade.
Do not reach over the blade or behind it while you work. This will put your body in the path of the blade as it is cutting, and one slip could cause serious injuries. Keep your arms and hands out of the cutting path at all times.
It is best to keep your hands between you and the blade. This will allow you to control and feed the boards into the blade without reaching into the cutting path. Remember to use push sticks to keep this hand position when needed.
Push Wood Through the Blade
Do not drop your project onto the blade, as this can cause kickbacks or make the project fly out of your hands. Push the wood into the blade and then through the cut completely. That will help to prevent burning and blowout and will help to make a straight cut.
Do not use the Fence and Miter Gauge at the Same Time
If you use both at the same time, you will experience kickbacks. The wood between the fence and the blade completely fills the space between them. As you feed the material with the miter gauge, it will push the stock through the cut, and the piece between the blade and the fence will be caught by the blade’s movement and hurled back at you.
Only use the miter gauge and the fence if they are both on the same side of the blade.
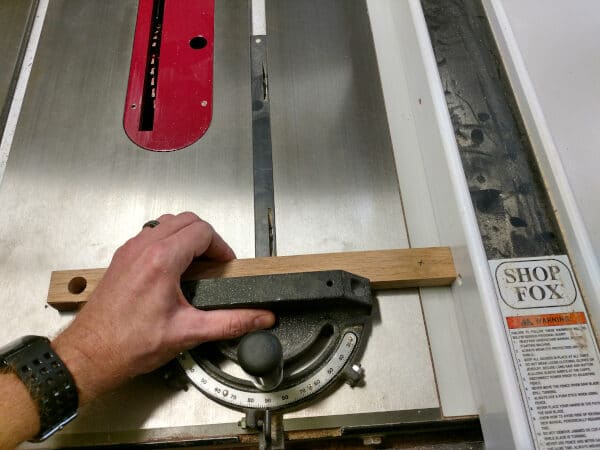
Release Stock Once it is Past the Blade
Once the lumber has been cut and moved past the blade, it should be free to move onto the outfeed table or fall to the floor. This will help you keep your balance and control. It will also prevent you from placing your body parts near the blade.
How To Make Specific Cuts
A table saw allows you to make a variety of different cuts.
Crosscuts
A crosscut is making a cut across the grain of the stock you are using. You will use a miter gauge to hold the wood securely, allowing you to make a straight cut on the end of a plank or board.
After planning your cut and making the necessary blade adjustments, you can position the wood on your miter gauge. You will want to line the blade up with the point you wish to cut at, keeping in mind the blade’s kerf so that it will not remove any extra material. You can then switch on the table saw and feed the stock through the cut.
Rip Cuts
A rip cut will cut along the grain of the board that you are using. Once you have made all of your preparations, you can adjust the table saw fence. Make width adjustments that allow the blade to cut on the outside of your marks to avoid cutting the board thin.
Once you switch the saw on, keep in mind your body’s position so that you are not directly in line with the blade. Make sure to use push sticks to keep control of the wood as it moves through the cut.
Related: 3 Tips To Make Your Table Saw Bigger
Bevel Cuts
These cuts are made along the edges of your timber, providing those edges with an angle instead of the standard 90-degree straight edge. This decorative cut is often found on the trim used on walls or with other fine woodworking projects.
Keep in mind that you will need to make angle adjustments to the blade as well as height adjustments when you set your table saw up for a bevel cut. This will require the use of the angle adjustment knob, many of which allow you to make precise settings below 90 degrees. You can make a crosscut or a rip cut with a bevel.
Feeding the wood through these types of cuts will be similar, but you want to keep in mind that the wood surface will be exposed to more saw blades as it is placed at an angle. That angle can actually lessen the change of kickback as the wood is not pinched between a fence and a blade that is standing straight.
One thing you should remember is that the rip fence of your table saw should be located opposite to the side to which your blade tilts. Otherwise, wood can get stuck between the fence and the blade, which can result in wood being thrown back at you.
In short, DON’T do this:

Dado Cuts
A dado is a cut that makes a trench in the wood that has 90 sides. This slot can be used to connect boards to make furniture or other products. They can be made against or along the grain, with many woodworkers calling dados along the grain “grooves.”
While you can cut a dado using a normal blade on your table saw, a dado blade can also be made using blades designed specifically for the task.
One type of blade is called a wobble blade, consisting of a blade placed on an adjustable hub. You can adjust the angle that the blade rests at, with wider dados being made by a greater angle of the blade. This will cut a dado as the blade wobbles and the material is fed into the cutting path.
Another style is called a dado set. This set consists of two saw blades that are placed around chipper blades. The blades create the dado walls, and the chippers remove the material between the blades as you move the project through the cut.
Further Reading: What Is A Table Saw Used For?
The Final Cut
As you can see, there are a few things about how to use a table saw that will increase productivity and safety as you work. Keep in mind all the instructions from the manufacturer of the table saw as well as the blades and accessories you purchase. That will keep you safe and your table running properly.
The best thing is, your projects will look better and fit properly as they are assembled!
So now you know how to use a table saw safely. If you have yet to buy one, make sure to read my in-depth buyer’s guide, which will explain everything you need to know about buying a table saw.

