How to waterproof wood is a common query we receive from our readers. There are a number of variables to consider. These include the type of wood, where you will use it, the desired finish and color, and the cost. We’ll run through four wood waterproofing options and guide you on the application methods.
I remember my early days of woodworking when my father was teaching me French polishing, and we used to make shellac using shellac flakes dissolved in denatured alcohol. There was something immensely satisfying and elemental about producing a wood finish from natural products and making wood look so beautiful.
Today, we’re spoiled with the range and types of products available. In this article, I’ll teach you four ways how to waterproof wood, helping you understand the advantages and disadvantages of each and some tips on applying them. Let’s get started.
How to waterproof wood?
There are four best methods you can use to make wood waterproof:
- Use a natural, non-toxic sealant like beeswax
- Use a natural wood oil such as tung oil
- Use varnish
- Use polyurethane
Keep reading to learn more about each of these methods.
Why waterproof wood?
Wood is an organic product and will ultimately break down if not protected. It’s also hygroscopic, meaning it soaks up water. While you will find naturally durable wood, even the most durable will last 25 to 30 years. The least durable lasts less than three.
While 25 to 30 years is a decent length of time, the wood will warp, swell, split, and discolor. Waterproofing assists in slowing down water ingress, helps maintain dimensional stability, and retains or enhances the natural color and grain of the timber.
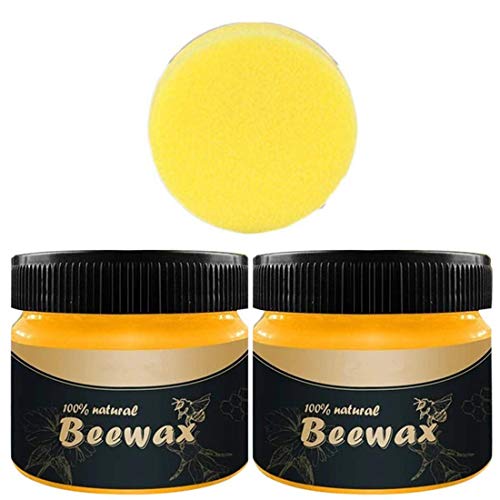
Using beeswax
Using beeswax as a surface finish to waterproof wood has several benefits. It’s a natural product, is food-safe as long as it has no artificial additives, smells nice, and adds a lovely finish to timber. It’s been used for centuries to protect wood and leather, and thankfully, it seems to be making a comeback in popularity.
Beeswax is good at waterproofing wood. It penetrates the wood grain while providing a waterproof surface. It also allows the wood to breathe and adjust to the environment while being antifungal and antibacterial. It also doesn’t change the natural wood color, although it makes it richer.
However, it doesn’t last forever. If you use it on chopping boards that get washed regularly, be prepared to reapply it monthly. For furniture or decorative items, reapply between 3 and 6 monthly. I wouldn’t use beeswax for exterior protection as it will need constant reapplication to maintain its weatherproofing abilities.
Be aware that some products on the market are advertised as beeswax furniture polish but contain additives, including silicone. Please read the check that the contents are 100% natural beeswax. Try to paint over a surface treated with a silicone wax product, and you’ll get the dreaded fish-eye problem. Fish-eye is a term used when the silicone repels the paint and creates round blemishes, hence the name.
How to waterproof wood with beeswax
- When applying surface protection to waterproof wood, always remove any residue, such as dirt or old paint. Use a scraper, hot-air gun, or paint stripper.
- Sand the surface, working from larger grit to smaller grit paper. You can do a final sand with 180-grit. However, don’t go too fine as the wood will not absorb as much of the surface protection.
- You can directly apply a beeswax paste with a lint-free rag. However, if the beeswax is solid, you’ll need to melt it in a double-boiler and then mix it with turpentine at a ratio of 100mls of beeswax to 300 to 400mls of turpentine.
- When applying the paste, don’t be too heavy-handed. Too much wax will leave an uneven surface. Apply many coats sparingly rather than one or two heavy coats. Rub the wax into the wood, working along the grain, covering the entire surface. Wipe off any excess wax.
- Allow each coat time to dry so that the surface is not tacky to your touch. Drying time should take no more than one hour.
- You will need to apply at least two coats, possibly three, depending on the wood type. Once the final coat is dry, polish the surface with a clean, lint-free rag.
PROS
- Good waterproofing abilities
- Anti-fungal
- Anti-bacterial
- Natural
- Cheap
- Attractive odor
- Lovely finish
- Food safe
CONS
- Requires some elbow grease to apply
- Needs frequent reapplication
- Not ideal for external application
My recommendation for a good beeswax product is here.
Related: Best Food-Safe Wood Finishes
Using wood oils

- Easy to Use - Tung oil is a natural oil recognized by craftsmen to offer the ultimate hand-rubbed finish for all fine woods; just wipe on and allow the oil to cure at room temperature
- Permeates - Unlike other finishes that form a film on the wood’s surface, tung oil penetrates deep into the wood fibers, cures to a flexible non-oily solid, and becomes part of the wood itself
- Protects - Resistant to moisture, alcohol, oil, and everyday wear for lasting beauty and protection; lasts many times longer than mineral oil and wax based products
Given that water and oil don’t mix, adding oil to wood repels any water. It also provides a nice darkening and sheen to the wood surface. As wood oils penetrate the wood’s surface, they regenerate and nourish it.
There is a confusing array of oils on the market today, with many of the newer generation oils containing waxes and varnishes. These products are great for specific applications; however, we’ll focus on pure and natural oils today. My oil choice for waterproofing is tung oil.
Tung oil is a drying oil, meaning that it hardens over time to a solid and tough film. It is extracted from the seed taken from the nut of the tung tree. When used in its raw state, it can form a crackle finish, but most of the tung oil available today is boiled to prevent this. After multiple coats, it dries to a matte or slightly satin appearance with a light golden hue.
Unlike boiled linseed oil, which does not offer protection against water, tung oil offers the best water resistance of all-natural oils and does not darken with age. Depending on the temperature, it may take anywhere from five days to thirty days to fully harden.
Beware, many products on the market sell themselves as tung oil yet have additives. If you intend to use the oil on wood exposed to food, be sure to get 100% pure tung oil!
Tung oil is thinned with a solvent for application, which evaporates as the oil dries. Be careful with rags soaked in tung oil, as the solvent can oxidize when exposed to air and spontaneously ignite. Always dry the rags on a concrete or non-flammable surface or wash them before disposal.
How to waterproof wood with tung oil
- Sand the surface, working from larger grit to smaller grit paper. You can do a final sand with 200-grit.
- Unless the product you are using is already thinned, thin the oil with turpentine or white spirit at a ratio of one to one.
- Applying liberally with a clean, lint-free rag. You can be quite heavy-handed in applying the first coat or two. Allow each coat time to be absorbed into the wood.
- Apply repeated coats of oil until the wood does not absorb any more oil but starts to pool. Allow the wood to sit for 24 hours, then remove any excess oil with a rag.
- Let the wood cure for up to 30-days. Do not allow water to contact the wood during this time, and do not allow objects to touch or sit on the surface.
PROS
- Natural
- Waterproof
- Flexible
- Dries to a hard film
- Less susceptible to mold than other oils
- Damage to the coating is easily repaired
- Food safe in its pure state, so good for chopping boards
CONS
- It can take some time to dry
- The odor while drying can be disagreeable
- Needs thinning to get good penetration
- The oil goes off if it is not stored properly
- Not suggested for outdoor applications
This product would be my pick of oils.
Using varnish

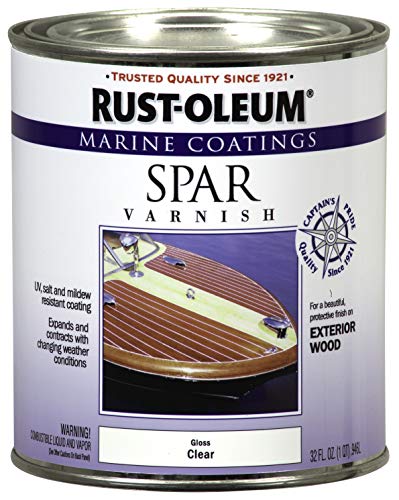
- Ideal for use on exterior wood surfaces above the water line, including trim, railings and wood furniture
- Oil-based formula expands and contracts with changing weather conditions
- Dries to the touch in 2 hours and covers up to 150 sq. ft.
Varnish is a generic term covering a range of products such as shellac, resin, polyurethane, and alkyd. However, lacquer is used in professional applications for larger projects, the resin is more a constituent in sealers rather than a product in its own right, and shellac, while beautiful, is more suitable for internal use than external. So we’ll focus on alkyd, which is the product you’ll find in every hardware store, usually carrying the generic name of varnish.
Alkyds are in many coating products, as they have high wear resistance, making them suitable for high-traffic areas. They are also very weather-resistant, ideal for internal or external use when exposed to dampness, and fairly insensitive to temperature. However, they take a little longer to dry than other products. Alkyd varnishes have good UV resistance and are used in marine varnishes for that reason.
Many varnishes have a hard-drying oil added, such as tung oil. These improve adhesion to some surfaces. They can also have non-drying oils added, which prevents the yellowing that can otherwise occur with varnish. While you can get oil and water-based varnishes, I’d choose oil-based if I were waterproofing wood for exterior use. However, I know many who swear by water-based products for convenience and environmental friendliness.
How to waterproof wood with varnish
- Be sure to use a mask designed to protect you from solvent fumes, and use eye protection to prevent yourself from splashes.
- Sand the surface, working from larger grit to smaller grit paper. You can sand along the grain, finishing with 200-grit sandpaper.
- You may wish to thin the varnish with turpentine or white spirit for the initial coat. Don’t go more than a ratio of one to one, as the thinner the varnish, the more coats you’ll need to apply. Thinning the first coat assists with greater absorption and helps seal the wood for the next coat.
- Apply the varnish along the wood grain with a brush, roller, or rag. Remove any excess and allow it to dry for a few hours.
- Lightly sand the dry varnish layer to give a rough surface for the next coat to bond onto, smooth out any drips or pooling, and apply the second coat.
- Apply a third coat using the same method, but do not sand the last coat; rather, allow it to dry off fully for at least 24 hours.
PROS
- Waterproof
- Flexible
- Not sensitive to temperature
- Less harmful to health than other products
- Good UV resistance
- Good for outdoor use
- Hard-wearing
CONS
- Dries slowly
- Requires clean-up with turpentine
This varnish product would be my choice.
Using polyurethane

- Protects indoor wood surfaces such as furniture, windows, cabinets, trim and more
- Water based formula dries fast and cleans up with soap and water
- Dries to the touch in 30 minutes with coverage up to 31.25 sq. ft., recoat after 2 hours
You’ll hear people use the terms polyurethane and varnish interchangeably, yet they are not the same, with each having very different chemical properties to the other. Polyurethane was a German invention from World War II when rubber was difficult to obtain. It’s now used globally in products, particularly foams, plastics, and coatings.
When used for coating wood, polyurethane provides a tough surface, protecting it from heat, water, and scratches. You’ll find a wide range of polyurethane coatings on the market today, mixed for interior or exterior use and with an oil or water base.
Water-based products are good for preserving the natural color of wood, as they’re clear drying. They also dry within a couple of days, and your brushes and rollers wash out in water. Be aware that you will need more coats to achieve the same weatherproofing as you’d get from an oil-based polyurethane.
Oil-based products are more common and used everywhere. Oil-based polyurethane enhances wood’s natural color and grain by slightly darkening and deepening it. It’s also very hard-wearing and often used for protecting flooring. The slight drawback of oil-based products is they take longer to dry, and brushes and rollers need cleaning with turpentine.
Waterproofing wood with polyurethane
- Be sure to use a mask designed to protect you from solvent fumes, and use eye protection to prevent yourself from splashes.
- Wash, dry, and sand the surface, working from larger grit to smaller grit paper. You can do a final sand along the grain with 180-grit sandpaper.
- Apply the polyurethane along the wood grain with a brush or roller. Polyurethane is notorious for including bubbles on the surface, so do not shake the can. Stir gently and apply with care.
- Apply three coats, allowing 24-hour drying time between each.
Summary
Now you know how to waterproof wood. There is no such thing as permanently waterproofing wood, with all the products mentioned requiring reapplication at some stage. However, to get maximum longevity from your coating, prepare the surface well and be diligent in applying the product to manufacturers’ recommendations. Many products are on the market today, yet these four will more than meet your wood waterproofing needs. I trust the information has been useful for you.


