Whittling is the easiest style of woodcarving to get into and possibly the oldest style of woodworking. Much before we had joinery, we had ancient humans whittling away at wood with sharpened stone to make weapons, markers, and much more. Soon it evolved into making art objects. And now we have a whole world full of whittling to dive into.
As a woodcarver, my earliest memory of woodcarving objects is of toys and figurines shaped out of wood using hand tools. I always found them beautiful and fascinating to hold. Since I got started, I have also gained a lot of respect for these craftsmen for their exquisitely honed skills.
In this article, we will go over all the basics that you need to know to learn how to whittle:
- Which knives to use
- Which wood to use
- The main whittling cuts
- How to whittle safely
- Sharpening and maintaining your knives
- Common mistakes and pro tips
- Inspiration for getting started
Choosing a knife for whittling
You can get started with almost any pocket knife, but a specially-made wood whittling knife will be more effective and easier to use.
What Makes A Good Whittling Knife
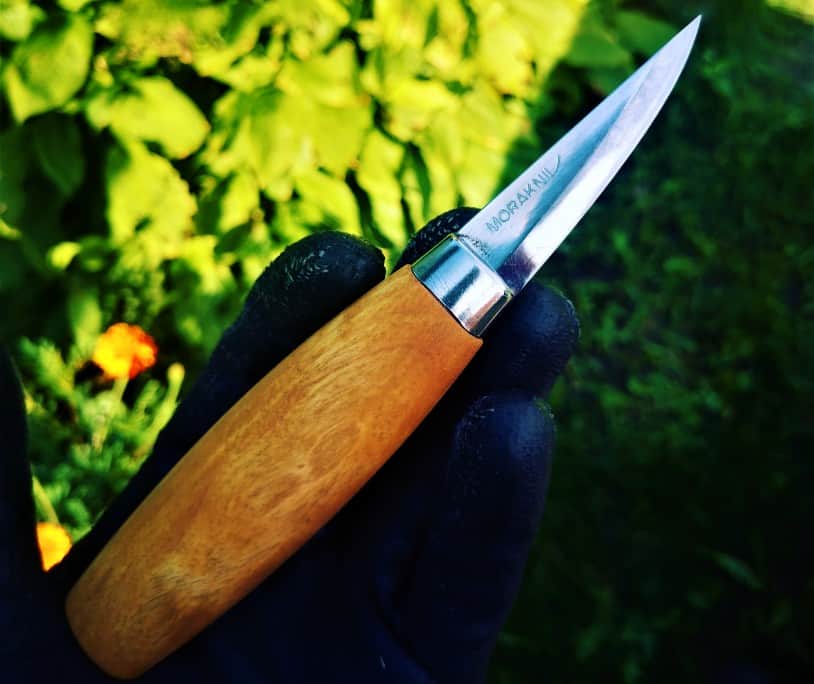
- It has a large, comfortable handle with a relatively short blade.
- A straight edge ends at a fine point instead of a curved edge.
- Thin blade with a fine edge without a micro bevel.
- Hardened carbon steel that doesn’t flex. Rockwell hardness scale score should be between 50 and 60. It is too soft, and it will become dull quickly. Too hard, and it will break easily.
Types Of Whittling Knives
General Purpose Small Knife
Any knife with a good grip and a straight edge will be good to get started with whittling. If you have one lying around the house, just grind and hone it properly before using it, and you are good to go.
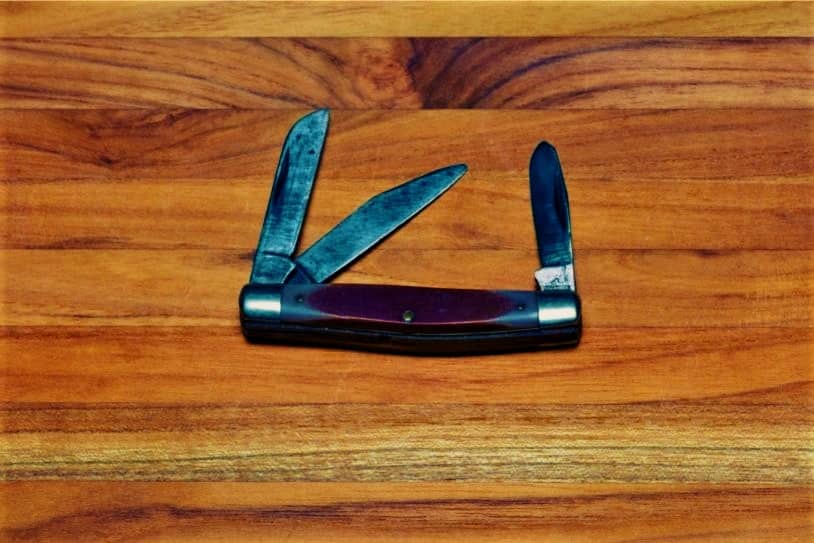
Multi-Blade Folding Pocket Knife
A regular folding pocket knife is your best friend if you are looking for a set that you can just take with yourself and take off. Most have 3 to 4 blades of different types. Get a portable knife sharpener, too, and your set is complete.
Single Blade Whittling Knife
There are plenty of affordable whittling knives on the market to choose from. They vary in their designs to fit certain purposes like chipping, detailing, etc. Check out my review of the best whittling knives of 2024 to find out more.
Hook Knife
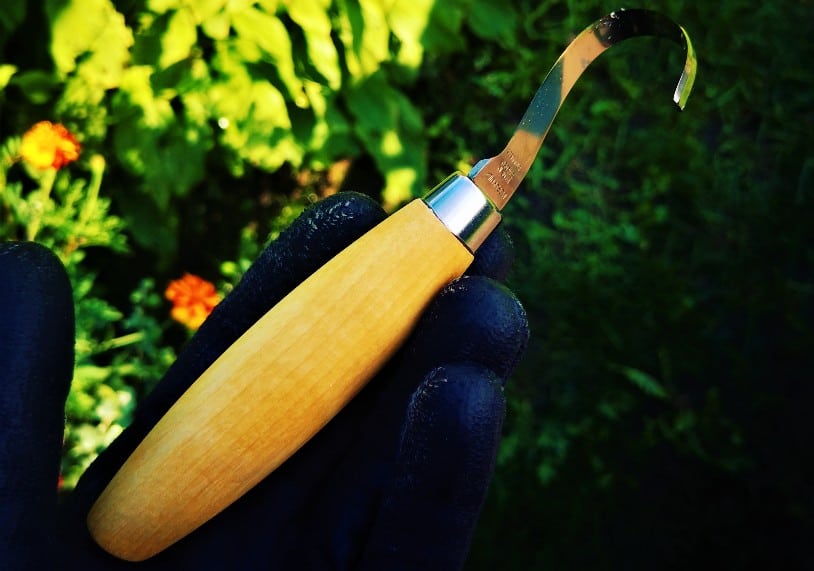
Most sets will come with a curved knife or a hook knife. You can buy them individually as well. These are designed for creating depressions, like when you are carving a spoon. You get left-handed, right-handed, and both-sided varieties. The last one has an edge on both sides and is the one that I would recommend because they are the most versatile.
There’s no end to it once you start exploring, so just get started with what you already have lying around the house or buy a beginner’s set of 3 or 4 knives.
Wood Selection For Whittling
Without wood, there’s no whittling. So, once you have selected your knives, it is time to find some wood for your first whittling project.
Greenwood vs Dry Wood
Greenwood is what we call wood that is fresh from the tree. It is soft and easy to whittle with, but it takes time to dry and might crack and warp in the process.
However, with a bit of care, greenwood carvings can be easily dried without any adverse effects.
Dried wood is harder to use for whittling, but once it is done, it is ready to go. This makes it the choice of many whittlers, but it can be hard for beginners.
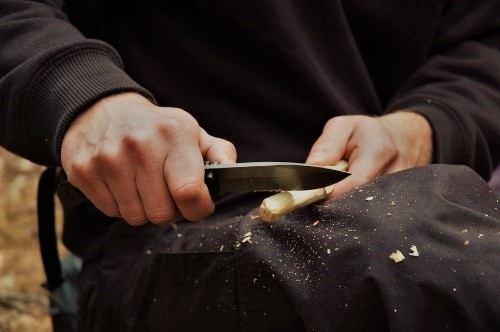
Best Wood for Whittling
Balsa is a soft and lightweight wood ideal for beginners to get started on their whittling journey. The grain is easy to work with, and the softness makes it easy to cut, slice, and groove. It is also easily available.
Basswood is another common one favored by most whittling artists because of its straight, tight grain. It is a fast, softwood to work with. It has a fine, even texture with moderate shine.
Pine is one of the most accessible woods for whittling. It is easily available and smells nice, too! Just avoid the knots. Those will destroy your knife and are almost impossible to carve without a machine.
Cedar is a popular option for the same reasons as Basswood and pine. And it smells fantastic, to boot!
Butternut This wood has a lot of grain, but it carves well. This unique feature gives butternut wood pieces a distinct look that you might like.
Birch is a favorite amongst spoon carvers. Super easy to carve when green, but it dries very hard. It tends to crack at the pith, so be careful to exclude that in your pieces if using greenwood.
Oak is a difficult one, both for you and your knife. However, it has a beautiful color and shine to it once you get used to it. It will last for a very long time, so if you are looking to make something for the long haul, this is your wood. Just don’t attempt fine work on it because that might take much longer than you anticipate. If you can do it, though, it will maintain detail like no other wood.
Cherry is harder to carve than Oak, but once done, it will hold the detail and will not chip while you carve. Be prepared to pour hours into your cherry wood carving, though. It is not for the faint of heart (or hand).
There are a lot of other options. So you should get out there and explore. Start with your backyard, and you might just be surprised with what you find!
Further Reading: Best Woods To Use For Wood Carving Projects
Where To Buy Your Wood
Construction stores are good places to get your 2x4s, etc. Look for trim pieces that tend to be softwood, like pine. Be careful not to end up with construction timber like Spruce.
Sawmills and lumberyards are my favorite haunts. These places have a lot of off-cuts and unusable pieces that they will just give away to anyone who wants them. Build a good relationship, and you might even get notified by your friend when there’s good wood that is up for grabs! Hobby stores and local lumberyards are also great places to get pieces from.
Sustainability
As a woodworker who cares about the environment, I am always very aware of the fact that I am using a material that can lead to deforestation. My love for woodcarving goes hand in hand with spending time in nature. So please spend a few minutes finding out which wood is sustainable in your area.
There will always be wood that is easy to regrow and wood that is rare and protected. Only buy wood that you know has been sourced ethically and sustainably. Future generations of woodworkers and woodcarvers will thank you for it.
Whittling Cuts
The common point to remember with all types of cuts is that you will have to take out a little bit of wood at a time. Shaving after shaving is the way to do it. If you try to cut too much at a time, you will damage your blade, the wood, or even your fingers, hands, and arms.
Always maintain firm control of your blade and never try to hack at the wood or speed up the process. It takes the time it takes.
Push Cut
Hold the knife firmly in your dominant hand, with the blade pointing away from your body. Push the blade with the thumb of your supporting hand.
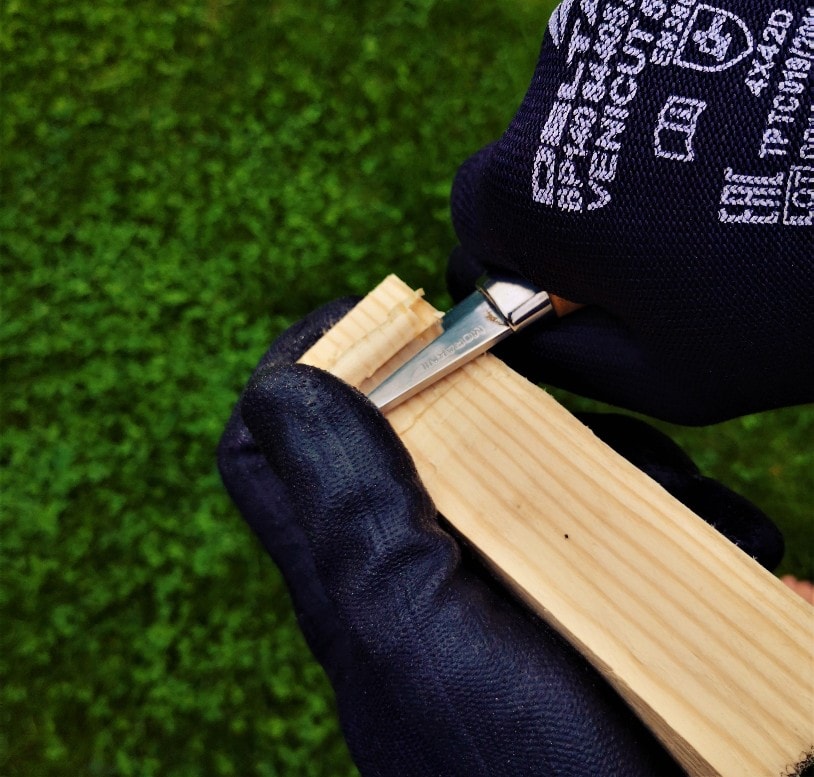
Paring Or Pull Cut
Same as the push cut but in the opposite direction. The sharp edge is pointing at you, and you are pulling the blade towards yourself. Keep your thumb and fingers well away from the line of movement. This cut is used to create a nice curve that is not as easy to get with the push cut.
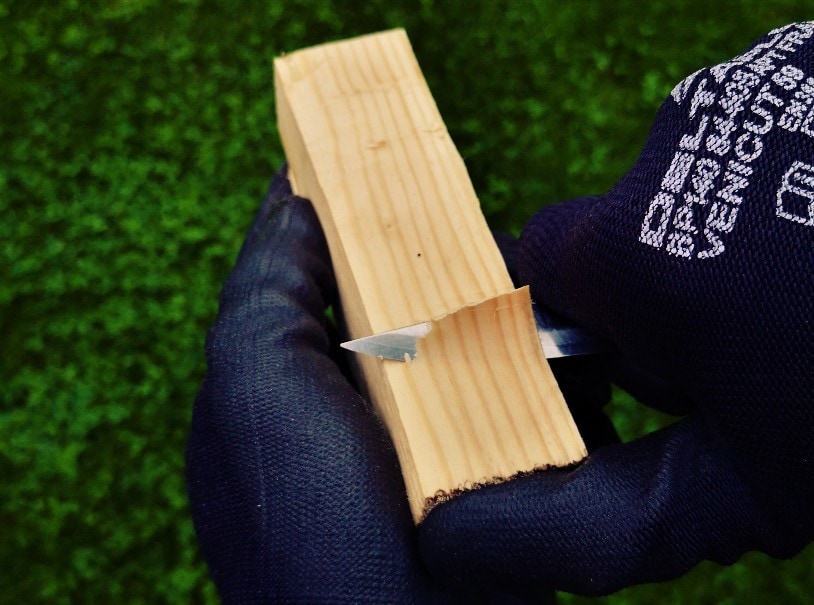
Stop Cut
This is usually done on the edges where two faces meet. Push the knife into the wood to make an incision.
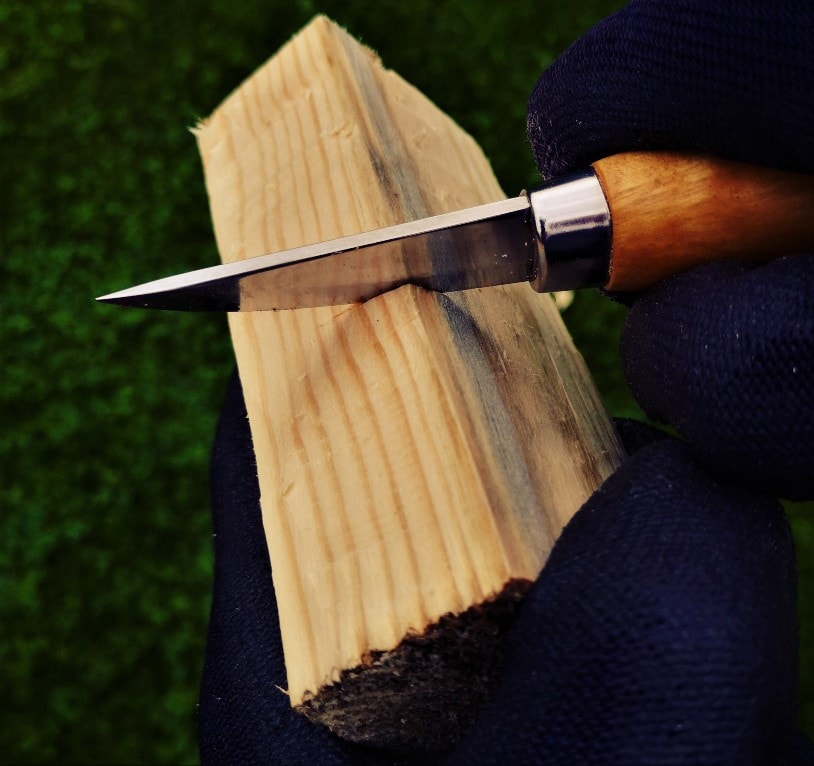
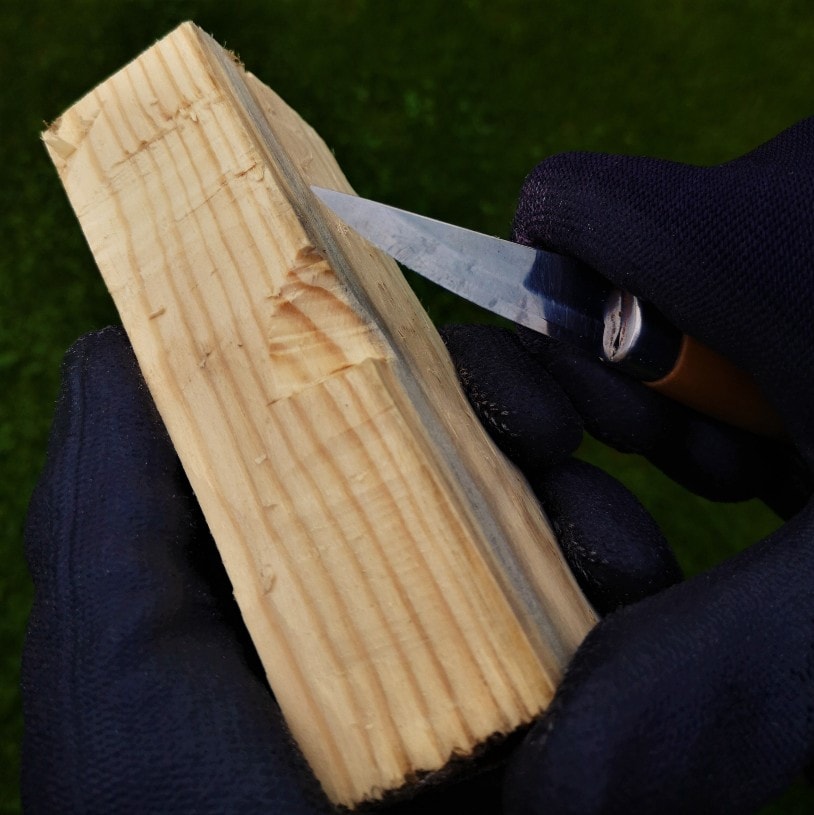
Then, push at an angle to the initial cut to create a notch.
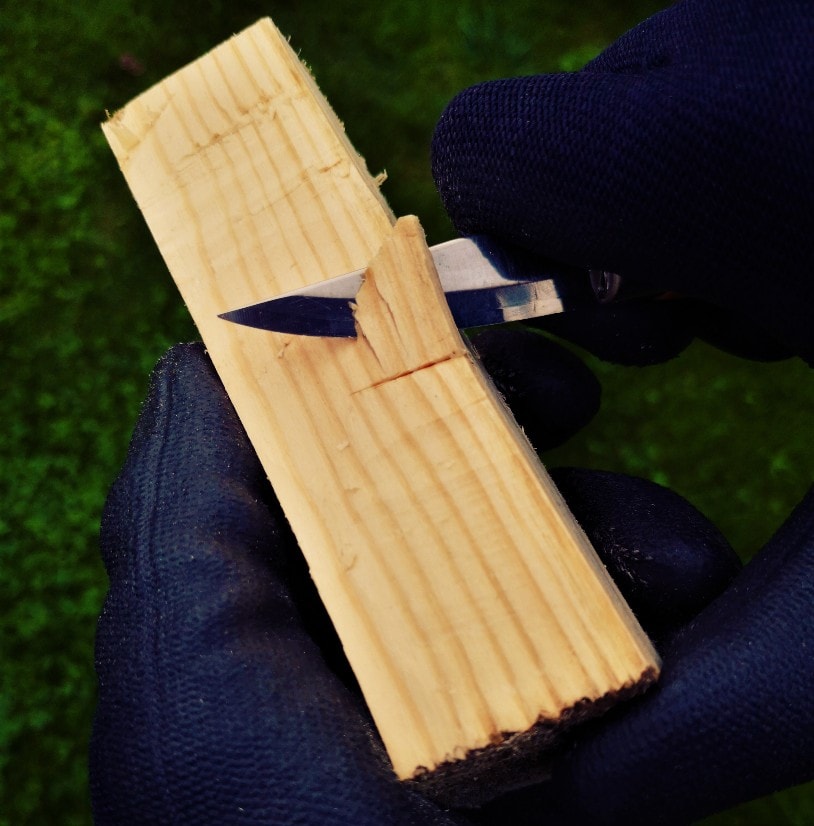
Then push or pull from the other side of the cut to end up with a wide v-like shape.
V Cut
Score a line on the wood at a slight angle to the surface using the sharp tip of the knife.
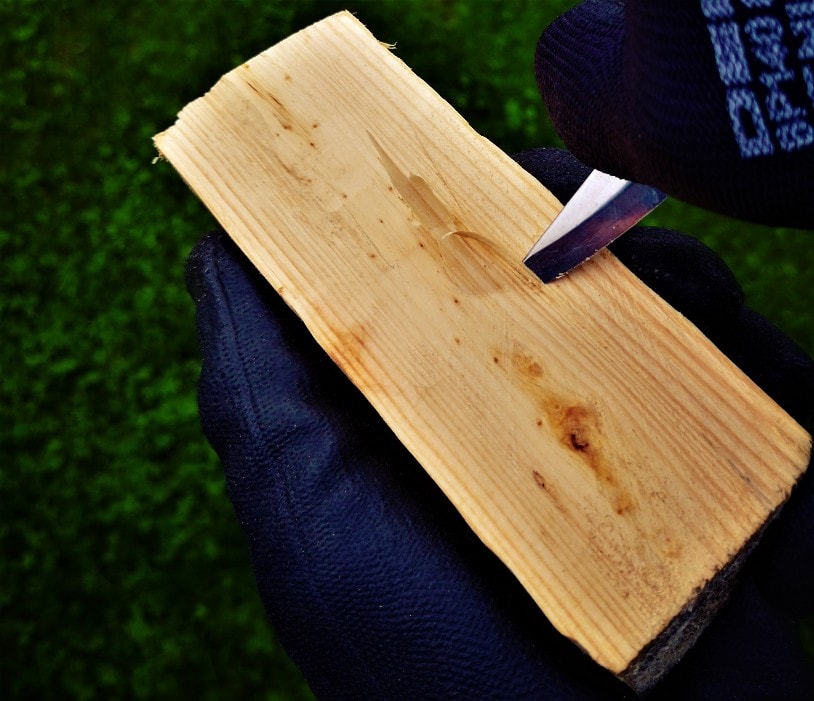
Now, cut out a narrow strip along with this initial cut by holding the knife at a slight angle to the other side.
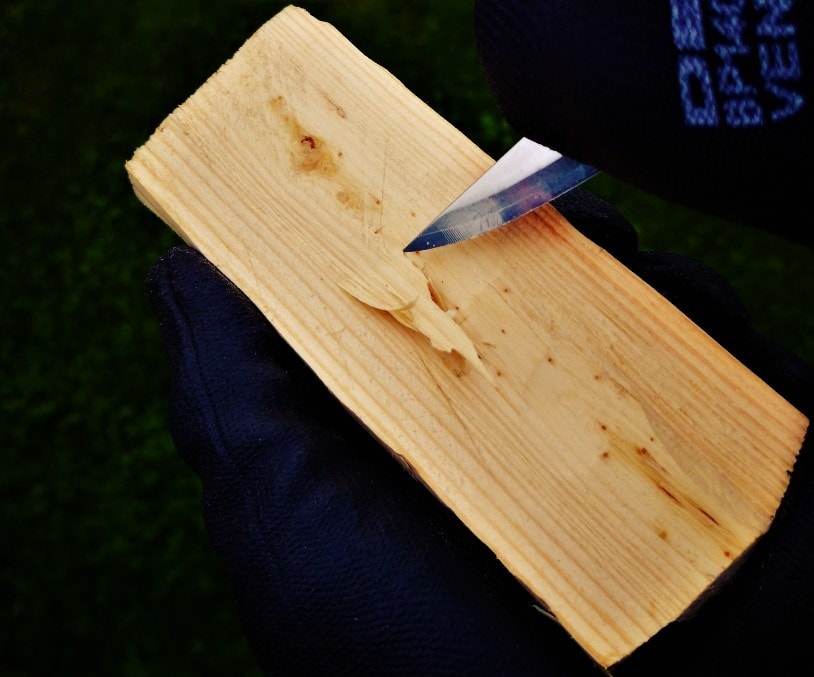
What you get is a narrow groove with a V-like contour.
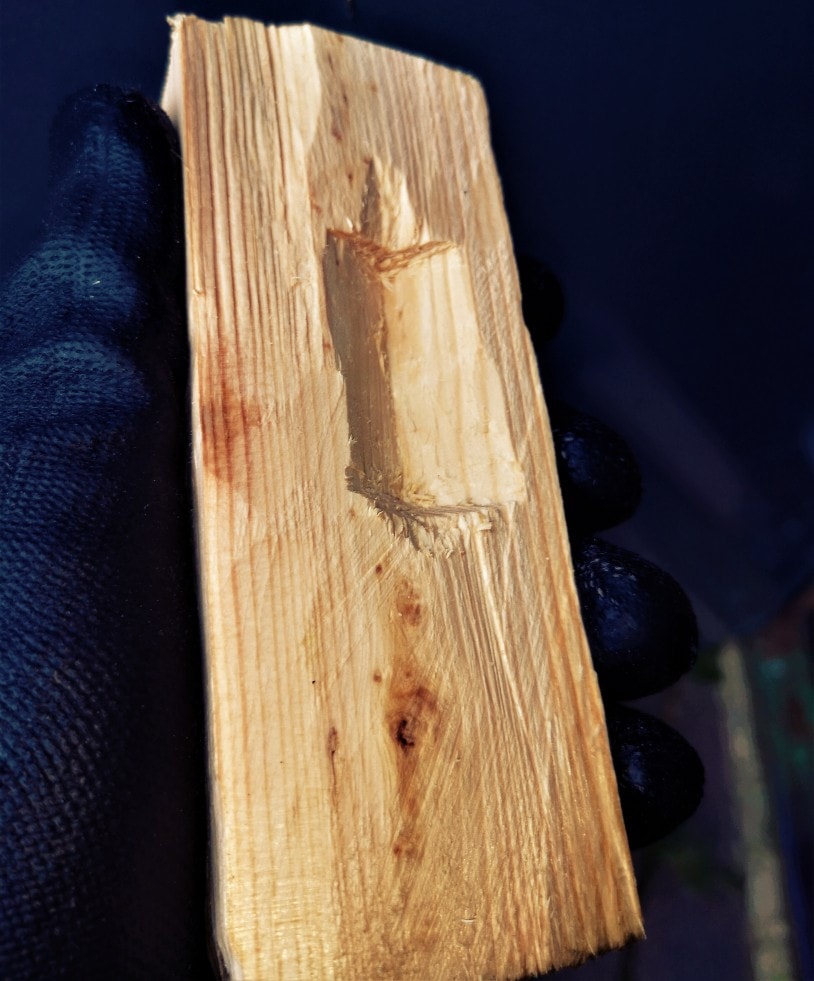
With all cuts, you go sliver by a sliver to make deeper cuts. It cannot happen in one go. Patience is a must for whittling wood. Learn to enjoy the process, and you will have a rewarding hobby for life.
Keep your knife sharp
A sharp knife is a whittler’s best friend. A dull one just won’t do if you want to whittle.
Why You Need To Sharpen Your Knives
It is safer to use a well-honed knife because there’s less chance of losing control or making a bad move. It will also make for a more enjoyable time as it cuts smoother, faster, and more accurately.
How Sharp To Make It
As long as you can cut and slice through wood smoothly, you are good to go. There’s no need to go overboard and get it ‘wind-whittling’ sharp.
Tools to use
Stone
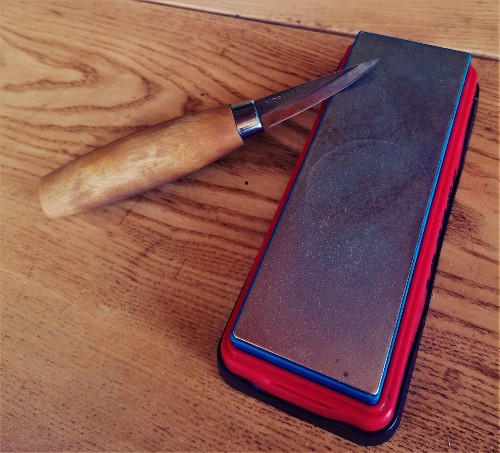
The stone has been used, well, since the Stone Age, to grind out tools and make them sharp. This is the rough part of the sharpening process, where you can take out any irregularities and deformities on the blade and even change the angle of the edge profile. Fine grit stones can also be used to hone the edge to usable sharpness.
There are various types of stones to keep your knife sharp. You will mostly be looking at these types of stones: diamond stone sharpeners (diamond-coated metal plates), natural stones, and artificial composites like aluminum oxide stones. They come in various grits, and a two-sided one that has both coarse and fine grits is easily available.
Lubrication
You will need to lubricate your stone when grinding and sharpening. You can use water, water-based lubricants, or petroleum-based ones. Just remember to stick to one type because if you move to oil, water will no longer be a feasible option on the same stone. Keep a visible amount of lubricant on the stone, and when it gets murky, pat it or wipe it dry. Then, add fresh lubricant before continuing.
Leather Strop
This is for getting and maintaining a fine edge. Use it with a stropping compound that you can buy as a set with your leather strop. Use it once every half an hour of whittling to maintain the edge as you go. Take care to get the correct polishing compound to use with your strop. There are special ones and general-purpose ones. For beginners, the general-purpose one will work just fine.
Sandpaper
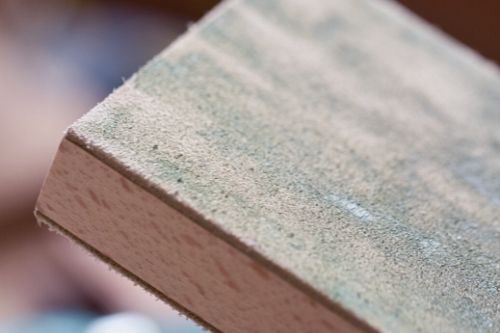
You can also use fine-grit sandpaper of 1000 grit or higher as a replacement for your leather strop. You can easily DIY this with a block of wood and some adhesive.
Note – When using the strop or sandpaper, only move away from the edge when sharpening. Otherwise, you will be cutting into the material. So start with a coarse stone, then end with fine-grit stone, sandpaper, or leather strop. Always start with coarse and move to progressively finer grits.
Edge Profile
Try to get an edge profile of about 20 to 30 degrees. This means the angle at which the sides of the blade meet to create the sharp edge. If there is a micro-bevel on the edge, it is a good idea to grind it out. Research this a little bit and practice on some cheap or damaged knives before attempting it on your brand-new whittling knives. You can get honing guides to get precise angles, but you can also just eyeball it with some practice.
Honing
Hold your knife on the surface, but don’t push down on it. Lift the dull edge just a hair and pull away from the sharp edge. Repeat this for both sides and soon, you will have a fine, razor-sharp edge. Use a compound for strop or lubricant for diamonds or stones. Sandpaper can be used wet or dry, depending on the type.
How To Whittle Safely
Best Practices
Always have your thumb and fingers away from the line of motion. Practice this with the intention of developing a safe whittling habit from the very beginning. When doing cuts with the edge coming towards you, do not stop it with your thumb. Just let it slide off or stop into the wood.
Protective Gear
Tape
There are protective, non-slip tapes that you can wrap around your fingers. They are ideal for creating thumb and finger guards.
Thumb Guards
There are purpose-made thumb guards meant for whittling and wood carving. These cover just enough to keep you safe while giving you full mobility.
Gloves
There are specialty gloves made of Kevlar, Nitrile, or chainmail that will protect your whole hand while whittling. Go to a store to get a feel of each of them and choose the one you like the best. Each has its pros and cons, but they all do a good job of keeping your fingers and hands protected.
Common Mistakes
- Don’t use your whittling knife tip to pry out wood or anything else for that matter. It breaks easily.
- Don’t scrape the knife on the wood. Scraping will ruin the edge. Always cut and slice into the wood.
- Don’t cut into the grain; otherwise, you will risk chipping and ruining your work.
- Don’t use a dull blade. It will make things slower and ruin your accuracy. It might even slip and hurt you.
Pro Tips For Easier Whittling
Use thinner knives – They will glide through wood more easily.
Use slicing cuts – Make it a habit to slice the wood as you are pushing the knife. This will make your whittling smoother and faster.
Use the grain – Go with the grain to get smoother and easier cuts. If you want to take off a large chunk at once, cut into the grain and split the wood.
Plan smartly – Find the correct angles and sides to cut from depending on your design and piece of wood. You don’t always have to start from the face. The corners are much easier to work with, for example. Look for efficient angles to cut from using more of the wood and achieve your basic shape quicker.
Get precut blanks – These are pieces that have already been shaped for certain whittling projects. The most common example is a spoon blank. These already have a rough shape so that you can get into the main carving right away and save time. You can get various shapes from stores, including eggs, animals, people, and sometimes even special ones for holidays, etc.
Get into woodcarving gouges – You can supplement your whittling knives with gouges and chisels so that you can rough out and achieve larger cuts quickly. Check out my chisel-buying guide to know more.
Invest in different knives – Once you have decided that you are ready to invest more time into whittling, start to build a collection of various sizes and shapes. You can even look at various sets that are available on the market.
Practice – Practice your basic cuts as much as you can because those fundamental moves are what come together to make whittling projects.
Whittling Projects to Get Started
Take any piece of wood and try to make a cube. Get it as perfect as you can. This will make use of all the basic movements, and it will serve as a baseline for your progress moving forward. Keep it with you as you continue your journey. It will always make you smile when you see it years down the line.
Spoons
One of the easiest whittling projects you can make is a simple spoon. Rough-cut spoon blanks (templates) are easily available at stores, and the hook knife is part of every beginner knife set.
Exploring Blanks (Templates)
You will get blanks for a wide variety of projects, as I mentioned earlier. The wood is already selected and pre-cut for you, making these the ideal beginner’s whittling projects.
Books
Visit your local library, and you might find a book or two on how to whittle for beginners. These have easy-to-follow projects that you will enjoy making on your own. The best part is that you don’t need to be near a power outlet to follow along. So sit by the riverside and enjoy the quiet while you whittle away.
Videos
The internet is full of great videos for beginner-friendly wood carving projects. You can find projects to finish in 15 minutes, 1 hour, or a day and more. Search online and get inspired. Find a few people whose work inspires you. Following their journey is a great way to stay inspired and continue leveling up your skills.

Editor’s Note
An easy whittling project for a beginner is carving out a small dog. This video by Carving is Fun provides simple step-by-step instructions on how to whittle a sitting dog.
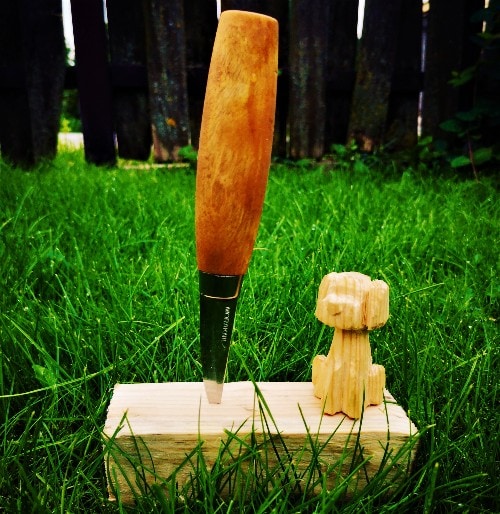
I carved one out from a scrap of Pine the other day, and it took me around 2 hours to complete. My four-year-old niece loved it!
Traditional Whittling Styles
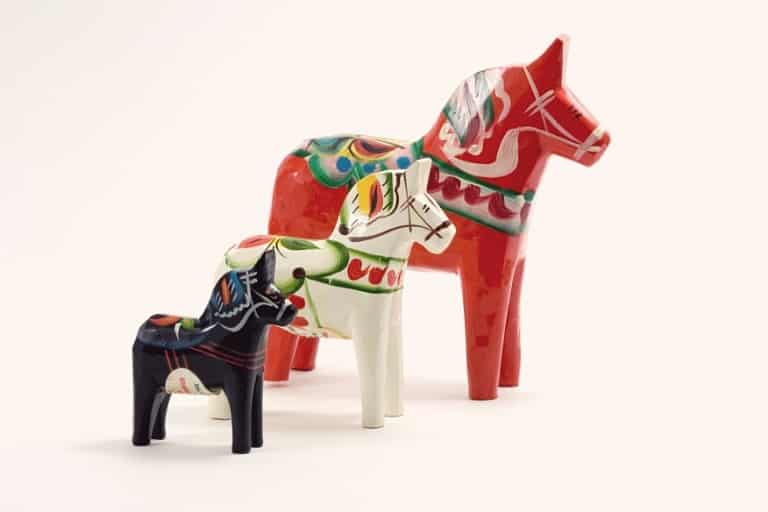
This style is called the Dalecarlian or Dala horse, and it originates from a province in Sweden. This is one of the many examples of traditional designs that are made of whittling wood. The best part about them is that the steps for making them are usually easy, well documented, and easy to find, making them ideal for beginners.
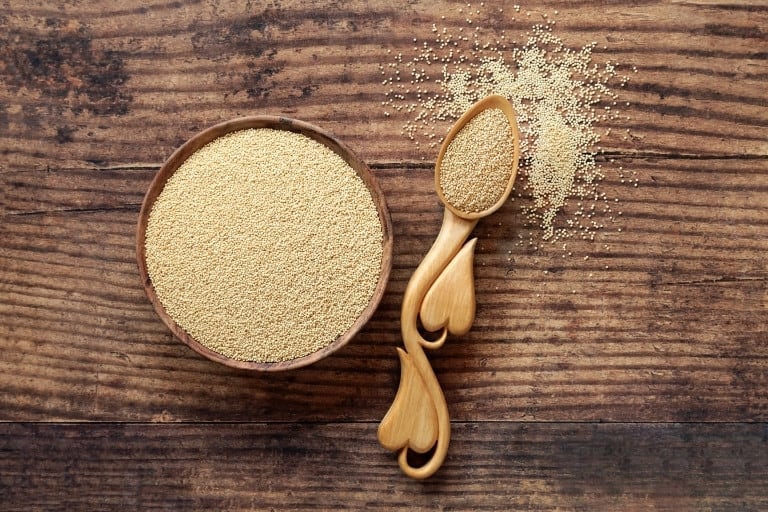
The Lovespoon comes from Italy, where they were used to profess love and show off skill in one go. While they can be very intricate, you can start with a simple one for your loved one.

Carving a face and figure out of the corner is a common style all over the world. These owls are traditional in India and Bangladesh.
I hope this article has given you enough information and inspiration to go out there and start whittling away. Do drop me a comment below and tell me about your journey. Are you already into whittling, or are you still on the fence? Share your projects and tell me what inspires you.

