There comes a time in every woodworker’s life when your table saw surface isn’t big enough to cope with the job you’re doing. Short of buying a new table saw, how can you make the saw bigger to safely make the cuts you need?
I recall the first table I saw, which I bought over 30 years ago. I was so proud of it, but the table was so small. Excellent for small cabinet-making jobs, but when I was renovating the various houses I lived in then, it was not good to rip a long board or cut a full-size sheet in half. I quickly learned what not to do if I wished to cut safely and accurately and keep all my body parts intact.
In this article, I’ll run you through two temporary methods to safely make your table saw bigger, then talk about a more permanent solution. First, let’s talk about the two most common scenarios you can encounter.
Problem #1 – Timber Outfeed Support

When we speak of infeed and outfeed on a table saw, we refer to the timber movement in relation to the blade. As we push a single piece of wood onto the blade and begin cutting, that’s the infeed side.
After the cut, the now two pieces of wood pass the blade, moving toward the rear of the table. That portion to the rear of the blade is called the outfeed side. The area to the rear of most table saws provides sufficient support for small pieces of wood, but as you begin to cut larger pieces, they will protrude over the back edge of the outfeed table.
Safety Note! If the wood is too long, the weight of the wood hanging over the back of the table is more than what you have remaining on the table, and it tries to lift the infeed end of the wood.
Such a situation is dangerous, as you find yourself leaning your weight on the small piece of wood left on the table to provide a counterbalance. It rapidly becomes impossible to continue feeding the wood while keeping the wood flat on the table. If you’re lucky, your knee can find the off switch, and you hold the timber still until the blade stops. If you’re unlucky, the blade jams and you get a violent kickback, potentially damaging you and certainly damaging the timber you were cutting. Don’t ask me how I learned this.
Problem #2 – Large Sheet Side Support

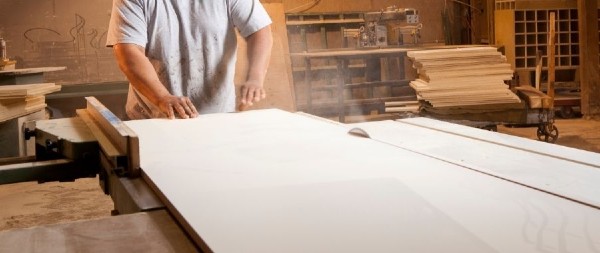
There is a limit beyond which the rip fence will not extend on small table saws. If you wish to cut larger sheets, you need to remove the rip fence, but if you’re cutting the top off an 8′ x 4′ sheet, you can have the best part of 7 feet of sheet hanging off to one side of the table saw. Even if you manage to feed the sheet evenly, which I doubt, you will certainly tip a small table saw on its side with the overhanging weight of the sheet.
How, then, do you provide the support necessary to allow a smooth and accurate cut? The problem is the same as you have with the outfeed support, except this time, it’s off to the right (or left if your saw is set up for left-handed operators)
Temporary Solutions
If you plan to be cutting timber that will overhang the tabletop, you need to provide an extension to the outfeed to safely support the wood at the same level as the tabletop. You have a couple of options.
The first solution is to use adjustable trestles. You have two possibilities with these. You can use them individually and adjust them to the level of the saw table to allow the wood to transfer onto them after leaving the back edge of the table or slide across the top if supporting a sheet to the side. Otherwise, you can use two of them to create a temporary table extension by clamping some ply to them and adjusting the trestles so that the top of the ply sits level with the table saw top.

- Durable steel - heavy-duty sawhorses are constructed of durable steel for lasting reliability
- Folding design - unique sawhorse design folds down to a compact unit that is easily portable and takes up minimal space
- Adjustable height - legs are independently adjustable with eight 1-inch height increments
PROS
- Very stable
- Fold away when not in use
- Wide support for sheets
CONS
- Not cheap
- Trestle height adjustment increments may not align closely with the table saw top
- Cumbersome to set up – particularly if clamping ply to them
- Timber can drag on the trestle surface while feeding
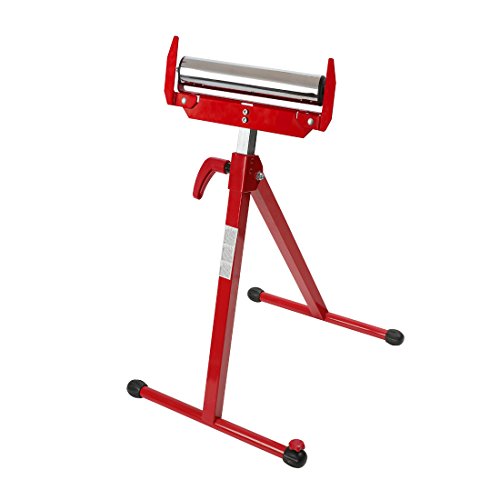
The next solution is the use of one or several roller stands. These are adjustable stands with rollers on the top that support the wood while allowing it to move freely.

- Adjustable Height From 27-In To 43-In
- Highly Visible Edge Guides Keep Work In Place
- Eccentric Foot Keeps Stand Stabilized On Uneven Surfaces
Set these up to ensure that as the end of the wood begins to pass off the back of the table outfeed area, it slides onto the roller, which continues to provide support. For a longboard, you may need several of these. If they are used off to the side of the saw, the roller needs to allow free travel in the direction of the feed.
PROS
- Cheap
- Fold flat for storage
- Adjustable for different height tables
- Smooth-rolling
- Optional edge guides flip up if needed to guide the timber straight
CONS
- The height needs to be set up accurately to ensure the wood doesn’t hit them
- Longboards will require a few of these
- The rollers must be parallel to the table saw’s front and rear edges, or it must try to track the wood sideways
Issues To Monitor
When using either of these methods, remember that accurate height adjustment is essential. If your board is long and flexible, it may try to dip as it goes off the back of the table, hitting your trestle or roller. You may need to have the height of your temporary support just slightly below the tabletop to allow for this. Such bowing is not a problem on stiff, heavy boards, and you can set the support up to the exact table height.
Conversely, if the support is set too low, the board will bow, making feeding difficult and potentially lifting the board as it passes over the blade. Such a movement will cause an inaccurate cut and might cause a kickback.
Using these support methods to the side of the table saw, ensure support is provided to the sheet or board throughout the whole cut. You don’t want the sheet edge coming off one of the supports while feeding the timber, as it will jam on the blade and potentially tip the table saw.
Important Safety Tip!
For either outfeed or side support, wind the blade down out of the way with the saw turned off and do a practice run. Feed the wood as if the saw was operating, and make sure the trestles or rollers are set to height and placed correctly, supporting the wood throughout the full cut length.
A More Permanent Solution
If you are continuously cutting very long boards or large sheets, you can build a more permanent solution without buying a larger table saw. I have seen workshops where the woodworker has built a workbench into which the table saw is bolted.
The front of the table saw and the front of the workbench is flush, with the workbench providing support surfaces around the left, back, and right sides of the saw. The workbench’s construction is such that the top of the workbench and the top of the table saw are both flush and level, providing a flat, stable, and safe solution, with a bonus of allowing drawers for storage while having more work surface when not using the saw.
An extra benefit of doing this is that you can set up a temporary fence at any position on the workbench by clamping a piece of 2″ x 4″ parallel to the blade across the width of the workbench. Such a method is great for getting accurate cuts on a large sheet.
In Summary
There will always be times when your table saw is not quite large enough to handle the job that you’re currently doing. Rushing in and trying to make do will not only ruin your timber, but it’s also a considerable table saw safety risk. You may end up tipping the table saw while it’s running, jamming the blade and getting a kickback, or losing your grip on the wood with the possibility of your hands and fingers contacting the rotating blade.
Take time to set up supports behind, to the side, and possibly even to the front of the saw. Then, do a dry run with the saw off and the blade wound down below the tabletop. Only when you are convinced and have proven that the wood feeds evenly and that you can execute the cut safely and accurately should you endeavor to make the cut.

