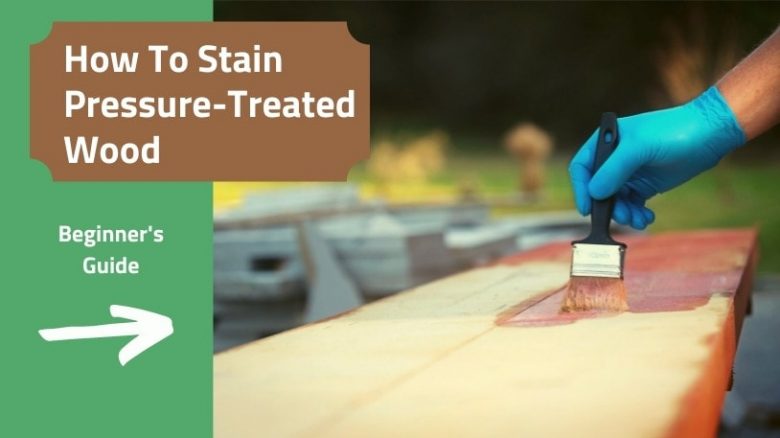
When wood has been pressure-treated, people are often unsure whether they can apply stain to it and how to proceed. Applying stains to items made from pressure-treated wood is a simple process, although there are a few points to be aware of to ensure you get a quality result.
I’ve built a lot of fences, decks, and outside furniture from pressure-treated wood, and occasionally, clients wanted them stained or painted to suit their house decor. I quickly learned that rushing the process can produce indifferent results or reduce the time between reapplication.
If you understand a few principles behind the pressure treatment of wood and observe a couple of easy rules, you can comfortably apply most types of surface finish. We’ll quickly introduce you to the how and why of treatment before stepping you through the process to apply a quality, long-lasting stained finish.
Can You Stain Pressure Treated Wood?
Yes, you can. You need to know a few tips before you start to ensure you get a long-lasting and quality finish. The moisture content of the wood is important, particularly since it’s been treated with preservatives. The type of stain you use is also crucial to get maximum protection. The following step-by-step guide will take you through the process to ensure you end up with the best possible outcome.
What Is Pressure-Treated-Wood?
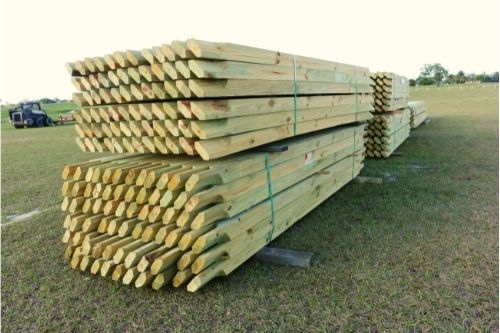
While wood varies in durability depending on the type, most common softwoods used for decking and fences have a low resistance to fungal decay and insect attack. While this is fine for indoor projects, exposure to the elements will quickly cause them to decay. Pressure treatment is a process that forces a preservative into the wood under pressure—the preservative seeps deep into the wood structure, protecting against fungal decay and insect attack.
The preservatives commonly used have copper as a base and other additives depending on the preservative brand. Two common preservatives are Alkaline Copper Quaternary (ACQ) and Copper Azole (CA-B or CA-C). These have largely replaced an older treatment known as Chromated Copper Arsenic (CCA) due to its arsenic component. CCA is still used for areas requiring comprehensive protection, but wood treated with CCA is treated as hazardous waste in some countries.
Be aware that wood treated with ACQ has high copper levels, making it extremely corrosive to steel, even if it is galvanized or stainless steel. If you’re using wood treated with ACQ, be sure to use fasteners designed for treated wood. They’re usually ceramic coated.
How To Prepare Pressure Treated Wood For Staining
If you’ve just purchased your timber from a supplier, it’s likely to have a very high moisture content due to the pressure-treatment process. If you try to apply a stain to the wood, you will compromise the longevity of the finish. If you think about it, adding a liquid stain to an already saturated timber will not allow proper absorption.
While the finish may initially look good, it won’t last very long before you need to reapply it. Too often, however, the finish ends up looking very blotchy or patchy and will require remedial action to repair. We’ll shortly run you through what you need to do to restore the finish if this has happened to you.
Before staining, you must ensure the moisture content of the timber is less than 14% and preferably around 12%. There are two ways of checking the moisture content; one is scientific, the other is less so, but it gives a good rule of thumb. The scientific method is to buy a cheap moisture meter, which gives you a percentage moisture reading when applied to the timber. The meter comes in two types, pin or capacitive (pinless), with the latter used when you don’t wish to mark your wood.
The other method to check for moisture content is to place a few drops of water onto the surface of the wood. If the wood absorbs the water, it is dry enough to stain. If the water beads on the surface and is still there a few minutes later, the wood is too wet to apply a finish and should be left longer to dry.
How Long To Wait Before Staining Pressure Treated Wood
If your wood is too wet with pressure-treatment chemicals, you’ll need to stack it undercover and allow a couple of weeks to let it dry. Place thin strips between each piece of wood to allow air to circulate through the stack.
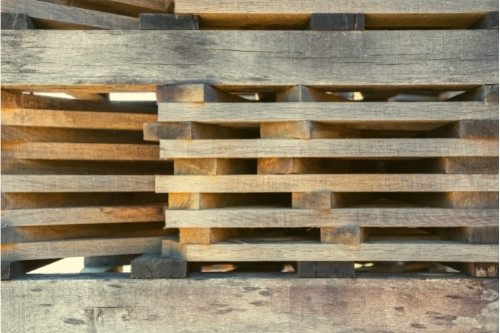
Depending on your weather and humidity, it should be at the right moisture content within two to three weeks. I’ve heard advice saying you need to leave the wood for six months, but I’ve never found that to be true.
If you’ve already built your structure and now wish to stain it, the same rule applies regarding moisture content. Leave it for two to three weeks to let the moisture stabilize. However, if you leave it too long, I’m talking months here, the wood will naturally crack and split, requiring a more thorough application of stain to get the same protection.
How To Stain Pressure Treated Wood
Step #1: Prepare the surface
Unlike paint, a stain doesn’t need a keying surface as it soaks into the timber rather than forming a film on the top. Therefore, sanding may be unnecessary and can be done more for aesthetic purposes than any mechanical need.
You may have heard that you shouldn’t sand pressure-treated wood as it damages the protection given by the chemicals. This is not correct. Some cheaper wood for exterior use is protected by spraying a surface finish onto them to resemble pressure treatment, and sanding would remove the protective layer. However, if you have true pressure-treated timber, the chemicals have been absorbed deep into the structure of the wood and cannot be damaged by surface sanding.
With that said, observe precautions if you decide to sand pressure-treated timber. The chemicals used to preserve the wood should not be inhaled or come into prolonged contact with your skin. Be sure to wear a dust mask and long-sleeved shirts when sanding. Also, don’t burn shavings or offcuts, as the fumes can be dangerous.
Step #2: Clean the wood
This step applies if the timber is old, has been outside, or walked over. Use a mild soap and water mixture to scrub and brush the surface of the wood to remove any dust, dirt, and oil. Wipe it dry with a cloth and dry it fully for a day or two. Any dirt on the surface of the wood will interfere with the stain absorption and may make the finish patchy.
You may have heard of people using pressure blasters to clean the deck; if you’re in no rush, you can do this. However, I find it saturates the wood, requiring a far longer drying time. It also fluffs up the surface of some woods. I don’t use this method myself and I don’t recommend it.
Step #3: Apply your stain
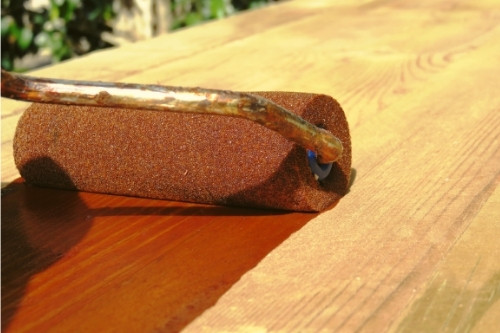
I strongly suggest using oil-based stains for exterior use, particularly with pressure-treated timber. If the wood is at the right moisture content, it absorbs the oil-based stain deeply into the structure of the timber. The latex-based stains obscure the grain a little more due to the pigments in suspension, and the water-based stains dry rapidly, giving less absorption.
You can apply the stain using a brush, roller, or sprayer. Always have a brush handy to feather out any drips or runs, whatever application method you choose. Stir your stain thoroughly, and be sure to read the application instructions on the tin. Apply two thin coats, allowing about one hour between each coat. Allow the stained wood to dry for 48 to 72 hours before use.
One tip to remember when applying stains is that you can end up with lap marks, where two application areas meet and overlap. This doubling up on the layers gives you a denser coat at that point, leaving a darker shade. To avoid lap marks, do not apply too much stain at one time. I work linearly, keeping the edge wet and not overlapping too much. This technique allows the stain to blend and gives a more consistent finish.
Related: How To Stain Wood
What To Do If You Stained Pressure Treated Wood Too Soon
If you apply stain on pressure-treated wood too soon, you will have a blotchy finish, or the wood will not absorb the stain properly. To fix this, you need to start the process again, allowing the moisture content to reduce to around 12%.
Once the wood is properly dry, you’ll need to sand the wood to remove as much of the stain as you can. A belt sander or hand-held orbital sander would be fine for this, depending on the size of the surface you need to sand. Remember to wear a dust mask and a long-sleeved shirt because pressure-treated wood contains preservatives that are toxic.
Start sanding with 50-grit sandpaper and only go as fine as 100 grit. You don’t need a hugely smooth finish, as the stain absorption reduces if you go too fine with the sandpaper. Once sanded, follow the steps above to reapply the stain.
Maintenance Of The Stained Wood
To maintain the look and protection offered by the stain, you will need to reapply it periodically. A reapplication every two years is the rule, although annually is advisable if the wood is in particularly harsh sunlight or moist conditions. Follow steps two and three above to reapply the stain and maintain adequate protection.
Staining Versus Painting
Pressure-treated wood can be stained or painted; the decision on which to choose comes down to the look you’re after and how often you wish to reapply the finish. Painting allows a wider color palette and, when properly applied, lasts for between five and seven years, but it obscures the grain of the timber. Stains have a more limited color palette but allow the grain to show through. Stains need reapplication every two years.
I’m not a great fan of paint on decking, as the constant foot traffic and chair scraping will wear away the paint, making the deck look shabby quickly. My choice for a deck would always be a stain.
Related: How To Paint Pressure-Treated Wood
FAQs
How long to wait before you can stain pressure-treated wood?
If the wood is freshly treated, allow at least two weeks for the chemical treatment to dry and for the wood moisture content to reach 12 to 14%.
What happens if you stain pressure-treated wood too soon?
The finish may look patchy, with insufficient absorption into the wood, requiring reapplication in about six months or less.
What is the best stain to use for pressure-treated wood?
Use an oil-based stain for best absorption.
How many coats of stain do you apply to pressure-treated wood?
One coat of stain is usually enough for pressure-treated wood.
Summary
Staining pressure-treated wood is a straightforward process. However, ensure the wood has dried sufficiently from the pressure treatment to enable maximum stain absorption.
Always clean the wood well. If you decide to sand the wood, take personal safety precautions against copper or arsenic-laden dust. If you follow the steps above and correctly apply stain to your pressure-treated wood, you can expect it to last two years before a maintenance reapplication is required.

