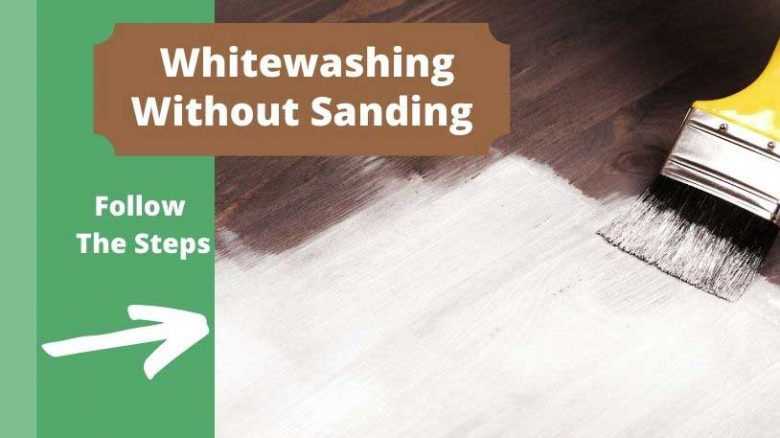
The whitewashing technique can breathe new life into old pieces of furniture. As a simple DIY task, it’s quickly done at home without any special tools or expensive equipment, making it an excellent project for a novice DIYer. Whitewashing might be the best way to do it if you’ve got an old piece of furniture that needs rejuvenation.
Whitewashing is a pretty straightforward task and, when done correctly, can really change the look of your furniture. The rest of this article will discuss the above steps, whether you can whitewash over varnished wood, and why it might be better to sand before whitewashing.
Here’s how to whitewash furniture without sanding:
- Understand the difference between whitewash and paint.
- Get all of your tools ready for whitewashing.
- Clean and prepare your surface.
- Whitewash the furniture.
- Use a sealant to finish the piece.
1. Understand the Difference Between Whitewash and Paint
Whitewashing is an excellent way to bring a bit of farmhouse charm into your home. Whether you’ve decided to whitewash exterior brick, indoor or outdoor furniture, or even a fireplace, the finished look will give your home some country vibes.
While whitewash and paint are similar in many ways, there’s one key difference: whitewash is diluted. You can make your own whitewash yourself at home using just paint and water.
However, the premixed whitewash you can purchase in DIY shops is made of liquified chalk and water. The two mixes will provide the same finish, and the finish you choose can be easily changed using more or less water.
White paint isn’t the same thing as whitewash. When we talk about whitewashing furniture, we’re talking about giving it a rustic, white-ish finish that doesn’t have the same thickness as white paint. Additionally, white paint dries into a solidified paste, whereas whitewash simply grazes the surface of your furniture with a watery white finish.
When making your own whitewash at home, you can mix water-based paint with water to create your desired finish.
2. Get All of Your Tools Ready for Whitewashing

As I mentioned before, you don’t need any pricey materials or specialized tools to whitewash your furniture. Whether you’re new to at-home DIY projects or a seasoned professional, getting the tools together is a simple and inexpensive process.
You can choose to buy a premixed whitewash solution at your local DIY store or make your own at home. It’s often easier to make your own whitewash at home since you may already have white paint leftover from your last project.
Here are the tools you’ll need to whitewash furniture without sanding:
- Water-based white paint
- A bucket or large pail
- A damp cloth
- Dish soap
- Scrubbing brush
- Gloves
- Polyurethane sealant
These are the only materials you should need to whitewash furniture. You can also choose to sand down the surface of your furniture beforehand since this will likely make the finished piece much more aesthetically pleasing – but this is optional in most cases.
3. Clean and Prepare Your Surface
Since you’re not sanding down the furniture beforehand, you’ll need to take extra care to clean it well before you start whitewashing. This helps to get rid of any dirt, jagged surfaces, and dust that may have accumulated on the facade. Doing this will ensure that the finished product will be as smooth and polished as possible.
Here’s how to clean and prepare your surface:
- Mix together dish soap and water in the bucket. Make sure the mixture is foamy, and dip your scrubbing brush into the bucket.
- Using circular motions to scrub the surface of the furniture. Press down firmly, but don’t push too hard, as you don’t want to damage the wood. You’ll need to ensure that you get into all of the crevices, including inside the drawers (if there are any).
- Re-soak your brush from time to time to ensure you’re getting everything as clean as possible. Once you think it’s clean enough, rinse out the bucket and pour in clean water.
- Use a cloth to wipe down the surface of the furniture. You don’t want to have any soapy residue left over, since this will make the finished product look uneven, so make sure you’re getting into all those crevices.
- Once the piece has been thoroughly cleaned, you can either wipe it down or leave it to dry. You need to ensure the furniture is completely dry before you begin whitewashing. At this point, you can empty out the bucket or pail.
The cleaning process shouldn’t take more than 30 minutes – possibly much less if it’s just a tiny chair or bedside table – but you need to ensure you do it properly. The whitewash doesn’t have the thickness of standard white paint, so it won’t hide dirt or debris well. Cleaning the furniture mitigates the risk of you having to start all over again.
4. Whitewash the Furniture
Now, onto the fun part – mixing the whitewash and applying it to the piece. You’ll likely want to wear gloves at this point since you may get paint all over you. Remember that whitewash is much more watered-down than regular white paint, so it will probably splash you a bit. Therefore, be sure to wear something you don’t mind getting dirty.
Follow these steps to mix whitewash:
- Depending on how watered-down you want the finished product to be, you’ll need to decide on your desired paint-to-water ratio. You can start with one part water and one part paint and go from there.
- Once you’ve decided, mix up the paint and water solution in the bucket. You can use a long stick (or even a wooden spoon if you haven’t got anything handy) to mix up the solution well.
- If you’re going for a glossy finish, use a cloth to coat the surface with whitewash. If you want something a bit more rustic, you can use a regular paintbrush. You’ll want to move quite fast at this stage since you’ll need to wipe down the excess whitewash before it dries thoroughly.
- Leave this first coat to dry completely once you’ve wiped down the excess whitewash. It’s always much easier to fix mistakes if you go one step at a time, so don’t get impatient and apply a second coat too soon.
- When the paint is fully dry, figure out if you want to apply more coats. If you do, repeat steps three and four until you’re satisfied with the finish.
Remember that you’ll need to leave the final product to dry completely before moving the furniture. You might ruin the finish if you touch it prematurely, so practice a bit of patience at this stage.
5. Use a Sealant To Finish the Piece

- PROTECT WOOD SURFACES – Minwax Oil-Modified Polyurethane Wood Finish protects and adds beauty to interior projects, including woodwork, floors & more. The water-based clear top coat combines...
- OIL-BASED DURABLE FINISH – Clear finish provides long-lasting protection and warm beauty to both finished and unfinished wood projects. Protective coating is ideal for woodwork, furniture, doors,...
- SATIN SHEEN – Give your wood projects a sleek finish with this satin clear varnish. It not only protects the natural beauty of the wood, but offers a soft, unique sheen for a modern, cozy and...
It’s essential to use some kind of sealant to keep your furniture looking smooth and finished. This will come in handy since it should help keep the whitewash intact for at least 20 years.
However, you shouldn’t just use any old sealant for whitewash. The best sealant to use is a polyurethane sealant. This is designed for use on wooden floors and furniture. The Minwax Oil-Modified Polyurethane is an excellent choice because it’s purpose-built for wooden surfaces, leaves a lovely glossy finish, and doesn’t smell strong.
How to Use Sealant Correctly
You’ll need to apply polyurethane sealant quite generously on your furniture when you’ve finished whitewashing. Follow the instructions below to apply your sealant:
- Depending on how watered-down you want the finished product to be, you’ll need to decide on your desired paint-to-water ratio. You can start with one part water and one part paint and go from there.
- Once you’ve decided, mix up the paint and water solution in the bucket. You can use a long stick (or even a wooden spoon if you haven’t got anything handy) to mix up the solution well.
- If you’re going for a glossy finish, use a cloth to coat the surface with whitewash. If you want something a bit more rustic, you can use a regular paintbrush. You’ll want to move quite fast at this stage since you’ll need to wipe down the excess whitewash before administering it. Ensure that there isn’t too much sealant dripping off the brush before you administer it. This will make cleaning up more difficult. Instead, apply thin layers.
- Using a brush (preferably a broad bristle brush), spread the sealant over the length and width of your piece of furniture. Use long, broad strokes to achieve the correct consistency, and make sure you’re getting the sealant in all the tiny crevices.
- For the Minwax oil-based sealant, you’ll need to leave the furniture for a day or so. This will ensure that it dries evenly.
- If you want to apply another sealant layer, you can do so after 24 hours. Don’t apply it straight after the first layer.
Can You Whitewash Over Varnished Wood?

The answer to this question is quite simple. You’ll need to remember that any prior finishes on your furniture won’t allow the whitewash to conform correctly to the wood, making the result more likely to peel off over time.
You can’t whitewash over varnished wood. Whitewashing should only be done on untreated wood, either in its native form or stained. Any other treatments used on wood will obstruct the whitewash and the wood, so the finished product won’t last and could end up cracking or peeling.
Additionally, whitewashing can be done with any type of wood, so the specific material of your furniture shouldn’t really matter – the only thing that matters is any prior treatment that you’ve applied to your wood.
This means that, instead of whitewashing your cabinet, you’ll be whitewashing the varnish, which may be prone to peeling as it ages.
Pros and Cons of Whitewashing
Whitewashing may be a simple task, and the end result might be aesthetically pleasing, but there are a few drawbacks to whitewashing your furniture. Bearing the advantages and disadvantages of whitewashing in mind will help you make the right choices for your home.
Pros of Whitewashing
- Whitewashing is an excellent technique for both small and large pieces of furniture.
- Whitewashing can be used on any interior fittings.
- You can whitewash exterior and interior brick.
- Whitewashing brightens up the space and gives a rustic appearance.
- Whitewashing doesn’t do any damage to the surface underneath.
- Whitewash lasts a long time.
- Whitewash is safe to use around children and pets.
Cons of Whitewashing
- Whitewash might not stand up well in rainy conditions.
- Whitewash might flake over time if you only apply one layer.
- Whitewash may leave a white residue against your clothes.
These are essential to remember, especially if you plan to whitewash any outdoor furniture or wall fittings. If you live in an area with very few rainy days, you should be fine – but if you live somewhere that experiences seasons of heavy or regular rain, you might want to apply it in thicker layers.
To offset the chances of your whitewashed furniture flaking or peeling, it’s essential to use sealant. Otherwise, all your hard work might go to waste.
What’s the Best Type of Paint for Whitewashing?
The best type of paint for whitewashing is latex paint. You can also use acrylic paint, but it may not work as well as latex paint on wood surfaces. Alternatively, you can purchase premixed whitewash from Home Depot or Amazon.
If you want to buy latex paint to mix it to your preferred consistency at home, this Rust-Oleum Painter’s Touch Latex Paint in white is an excellent choice. It’s relatively inexpensive and suitable for use on wood, metal, and ceramic surfaces. Additionally, it’s safe to use on most types of furniture.

- Use for a variety of indoor and outdoor project surfaces including wood, metal, plaster, masonry or unglazed ceramic
- Water-based acrylic formula is low odor, resist chips and provides long-lasting protection
- Covers up to 120 sq ft and dries to touch in 30 minutes for quick project completion
Is It Better To Sand Before Whitewashing?
Although you can whitewash furniture without sanding, the truth is, it’s usually better to give it a good sanding beforehand. This pre-treats the wood to ensure that the finished result is entirely smooth and buffed and doesn’t have imperfections.
It’s better to sand before whitewashing because it ensures there are no jagged edges or flaws in the wood. If you don’t mind these imperfections and you’re going for a rustic appearance, you may not need to sand. However, if you want a completely smooth surface, it’s better to sand beforehand.
Can You Paint Over Whitewash?
If you’re not happy with the whitewashing result, or you’ve just acquired a new piece of furniture that has been whitewashed, you might be wondering if you can just paint over it.
You can paint over whitewash. However, the best way to do this is to ensure that you’ve completely removed the top layer (in this case, the top layer is likely sealant). Once you’ve done this, you can paint over whitewash without worrying about damaging the material.
Getting rid of the topcoat might require a bit of work, but it’s worth it in the end if you want to paint over it. In this case, sanding is essential; otherwise, you risk the paint peeling or chipping over time.
Tips for Whitewashing Furniture Without Sanding
If you’re new to all this, the whitewashing procedure might seem a bit overwhelming. The main thing to remember is that whitewashing tends to be quite a forgiving experience.
Here are a few tips to remember when whitewashing furniture without sanding:
- Always remember to wash the furniture beforehand. Doing so mitigates the risk of any dirt or dust getting trapped under the whitewash layer, thereby leaving noticeable marks on the finished product.
- Make sure you test the whitewash mixture before applying it to your furniture. Doing this stops you from making mistakes and allows you to change the mix if need be. If you start whitewashing and then decide you want the paint to be thinner, you’ll be stuck.
- You can whitewash without sanding, but if you happen to have a piece of sandpaper lying around, it certainly won’t go amiss. Sanding helps keep the edges really smooth, so if this is something you care about, I recommend it.
- Make sure you use sealant on the finished product. This will ensure that it will last a long time and the integrity of the wood stays intact. Even if it’s a piece of furniture that gets used all the time, the sealant should prevent it from chipping.
- Wear gloves and clothes you don’t mind getting dirty. When you’re whitewashing your furniture, you’ll probably get paint everywhere. Wear something you don’t mind getting a bit messy.
- Cover the floor with a tarp or something equivalent. You’ll likely get whitewash and paint flecks everywhere, so make sure you cover the floor and maybe any surrounding furniture.
- If your piece of furniture has a lot of tiny crevices or holes, use a small paintbrush to coat them evenly with whitewash. Doing so ensures that the finished work is entirely even and not patchy.
- If you’re looking for a farmhouse aesthetic, you can use a scraper instead of a rag or brush to create a more washed-out appearance. This will make the paint appear thinner and give you that old rustic charm.
If you’re more of a visual learner, watch this YouTube video from Click2Restore to see the best techniques for whitewashing without sanding:
Final Thoughts
You can easily whitewash your furniture without sanding at home. It’s the perfect DIY project for both newbies and professionals, and the end result is incredible. Your furniture will look expensive and have that glamorous, antique look that all your friends and family envy.
Just remember that while you can whitewash your furniture without sanding, it’s recommended to sand the furniture at least a little. Otherwise, you can offset the chances of an uneven finished product by giving the piece a little wash and scrub at the beginning of the process.

