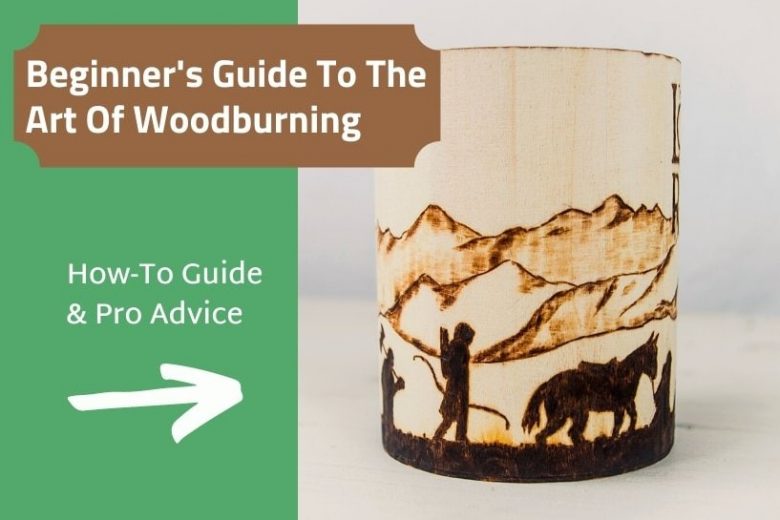
Woodburning or pyrography is an art form where getting a sick burn is the name of the game! It is one of the easiest ways to decorate any woodworking project, one that will easily outlast any paint or stain. It is faster than carving or whittling and easier to get intricate details with. You can get painterly results with enough practice and patience.
I love using pyrography on wood because I can directly translate my drawing skills onto the wood. I don’t have to wake up the household with my rotary tool buzzing like a cloud of angry hornets or chip away slowly with my carving tools. If I don’t like the work, I can easily sand it off and try again (up to a certain limit of course).
In this article, you will learn:
- Choosing your woodburning kit
- Which materials to burn on
- How to be safe while burning (wood, that is)
- How to use the various tips
- How to maintain your tips
- Pro tips for success and common mistakes
Are you ready to heat things up? Let’s begin!
Choosing Your Woodburning Kit
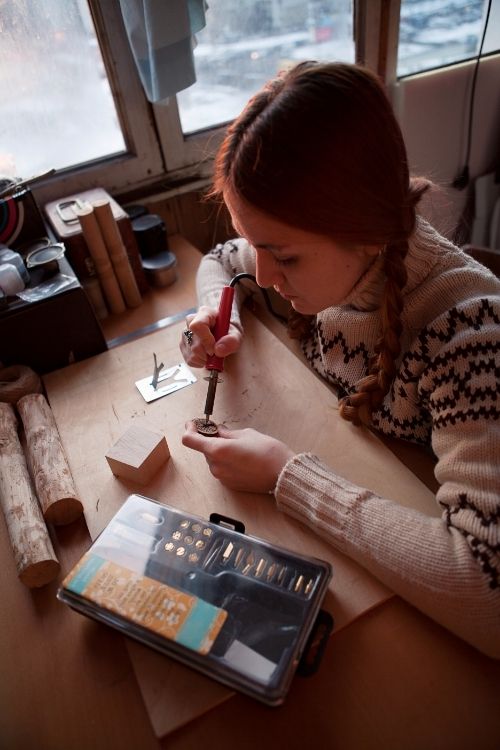
Pyrography kits are varied and aplenty if you take even one look online. Luckily for you, I have a buying guide for just this reason. The tl;dr of the guide is that there is one well-balanced kit that I do recommend for all experience levels, but you can start off really cheap if you want to or need to; you can also go all out expensive if you are getting serious about your burning.
I recommend closed-grip wands with professional wire tips and a separate, adjustable power supply. Dual wand kits are ideal. This is not a compact setup though, so if you are okay with a high grip like most soldering irons, you can go for the beginners’ kits with the power transformer built-in. Avoid gimmicky kits that sell you 100+ pieces for $20; they are mostly useless junk. You can also use portable butane torches for burning, such as the Dremel Versatip.
Material For Woodburning
Do Use:
- Basswood
- Popular
- Maple
- Pine
- Other Light-Colored Woods
- Bamboo
- Leather
Don’t Use:
- Engineered Wood (Plywood, MDF, etc.)
- Plastic
- Walnut
- Exotic Woods
Use solid wood only. No fiber, plastic, plywood, engineered wood, or MDF, please. Those things give off toxic fumes. You want to live long enough to learn to create the artwork of your dreams.
Light-colored wood like Basswood. Poplar, Maple, or whatever is native to your area is the best option. Avoid walnuts because the fumes are carcinogenic (cancer-causing). If you are unsure, just choose wood that has a tight grain, light color, and is not finished or treated. You can also repurpose finished wood by sanding the finish off of the wood first.
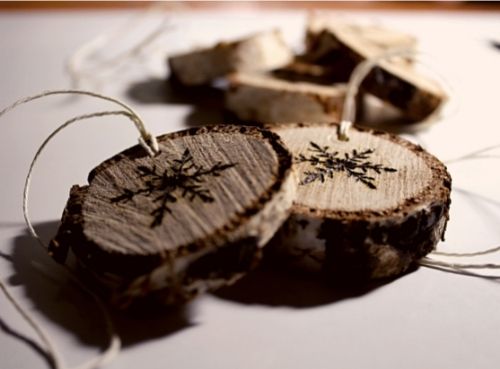
Don’t use exotic woods from endangered areas like the rainforest. Apart from being needlessly expensive, it also pushes these delicate habitats towards extinction. Let them be a safe haven for indigenous people, plants, and animals while you source wood that is easily and cheaply available in your own backyard.
Bamboo is a fantastic sustainable material that has been traditionally used for burning artwork all over Asia and other parts of the world. Use raw, untreated bamboo. Bamboo composite boards or any kind of treated bamboo should be avoided.
You can also do pyrography on leather. It is a different material with unique challenges (such as stretch and wrinkling tendencies). Just make sure you are burning on vegetable-tanned and not chrome-tanned leather because the latter will produce toxic fumes.
Related: Best Woods To Use For Pyrography
Choosing Your Design And Getting Started
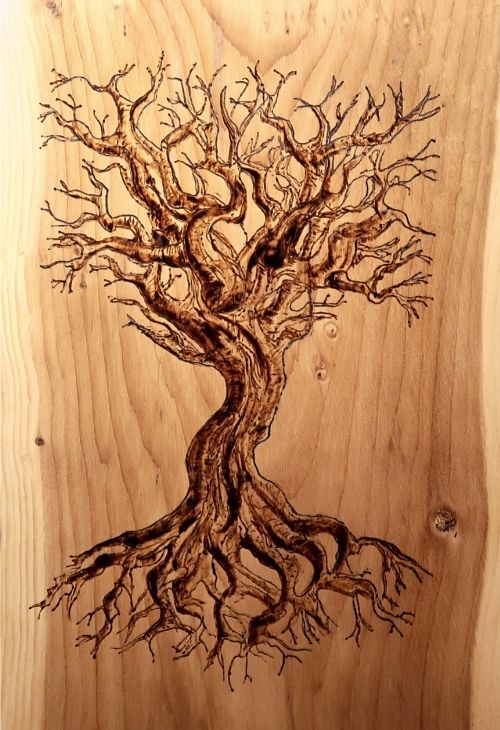
Knowing how to choose the right designs for your level of interest and experience is half the battle won. Choose designs that give you some freedom to modify and turn mistakes into art. Natural textures, structures, and shapes are always changing, and each one is unique. So just have fun with creating a basic outline and then fill it up to the best of your abilities.
Different tips give you different strokes. This results in different textures. Experiment with all the tips you have to understand the possibilities of each one. Just have fun with making a bunch of shapes, textures, and shading on a practice piece.
It is okay to have variations when repeating a design across multiple pieces. It will take a lot of practice to be able to produce perfect copies every time. Besides, any machine can do that. Just like nature, every piece of art you make should be unique, even if the pattern or design is being repeated. Don’t be afraid to give it your own spin or a new spin each time you repeat it.
You can also sand off the design and start fresh if things go sideways too many times. Wood is good that way! Start with around 80 to 100 grit and finish off with 120 to 200 as suitable. Larger grit numbers mean a smoother finish. Always start from lower numbers and work your way up.
Best Practices:
- Make sure the wood surface is smooth and free of dirt and rough patches.
- Draw or print out a design that you like.
- Use any transfer paper or carbon paper for tracing your design onto the wood or just pencil it in freehand.
- Be gentle! The lighter you press, the lighter the burn mark. You can always darken a light spot, but it won’t go the other way.
- Lower your temperature if your lines or strokes are darker than you want.
Common Mistakes To Avoid:
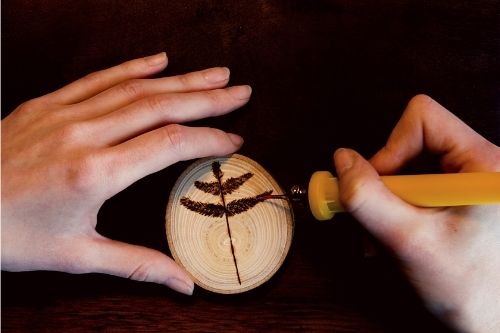
Straight lines and perfect symmetry are hard for beginners, even with traced outlines from a printed copy. So, choose organic shapes like a tree, a bird, or similar instead of perfectly formed geometric shapes and designs. In short, precision comes with practice, so choose easier designs when starting out, especially if you are working with a beginner’s kit with a high grip.
Pressing too hard on the wand damages the nib and the wood surface (you could literally burn a hole into it!). Too much pressure will also create a ‘bleed’ effect, creating a kind of halo around the edges of your strokes. This takes away from the aesthetic appeal of your work. So just practice a light touch from the very beginning, and you will be fine. Use a shader if you want to create a halo effect.
Don’t try to work in one orientation only by twisting your arm without moving your piece. Instead, move your piece around and maintain the same arm position. This will help you get more consistent-looking artwork. There are specially-made turntables that you can use for easy turning and tilting up your piece as you work on it. Turning is also useful when you are trying to get your lines to taper off at the end, like when drawing hair or whiskers.
How to Use Professional Pyrography Woodburning Wire Tips
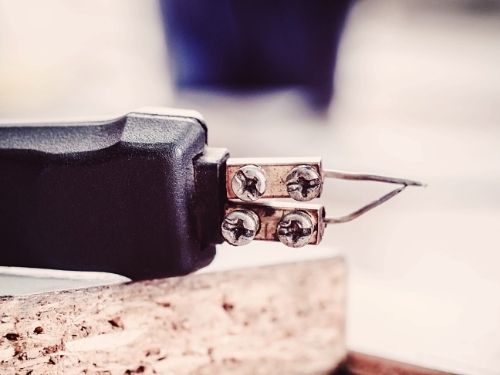
Skew Tips
The sharp skew point tips are used to cut into the wood because they have knife edges. You can create precise straight lines or arcs but not smooth full circles and tight curves. If you press down on this trip, it goes deeper into the wood, and it will break when you try to turn it this way. You can create a circle with these if you need to, but you need to do it in segments and turn your wood piece around as you do it.
Writer Tips
For creating smooth strokes, you can use the bent wire, the ball-point, the pointed bent wire, anything with a rounded tip will do. Tips like these, ones that have any sort of curved or rounded points, are called writer tips; they can easily sweep and slide around to create a script or complex curves. The narrowness or broadness of the tip, along with the angle at which you hold it, will determine the thickness of your stroke.
Shading Tips
The third major category of tips is called shaders. They are used for, you guessed it, shading. They are the same as skews, but their knife edges have been bent at around a 45° angle, allowing you to hold them flat against the wood while still holding your wand/pen at a comfortable angle. They can be used to create brush-like strokes on the wood.
Branding and Specialty
The fourth category is branding and specialty tips. Branding tips are stamps that you press onto the wood to create premade shapes or motifs. You can buy them separately, and sometimes they will come with your kit. They are useful if you want to create quick patterns by stamping shapes onto the wood. Specialty tips are used for creating specific textures, like a coiled tip that creates broad strokes made of fine lines, which are useful for creating fur, feather, and hair textures.
Best Practices For Great Pyrography
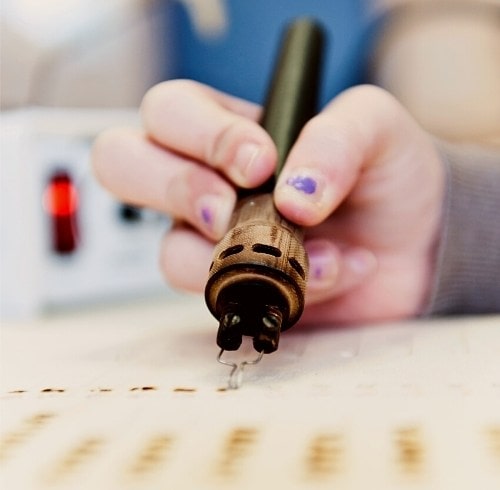
Smooth, short, and even strokes are ideal with all tips. Don’t hesitate. If you spend a moment too long on the spot, it will burn a blob into the wood and ruin your perfect stroke. If you put your tip down and then pull, there will be a blob at the beginning; if you stop at the end of the line, a blob will appear there. Begin and end in a fluid motion, then lift it up, all without stopping. This might sound hard, but it just takes a little practice, and soon, it becomes second nature. You won’t even have to think about it after a while.
When working across the wood grain, you will get bumpy lines with certain tips if you are pressing down. The trick is to lighten up again and allow the tip to brush across.
Remember to burn slowly. This is not a ballpoint pen (even IF you are using the ballpoint tip!). Slow and consistent motion will give you nice and even strokes. To get the perfect even stroke, you need to maintain the same rate of movement from start to finish. Otherwise, your line will be thicker where you slowed down and thinner where you sped up.
You will be tempted to turn the heat up, but resist this urge. Around 50 to 60% of your heating range is ideal. Extreme temperatures will make your work that much more difficult to control, and the heat will start to make your grip uncomfortably hot and then cause it to scald. Slow down instead. Meditate on the motion, young grasshopper!
Shaders
Using shaders can be challenging at first. With these tips, you need to hold the face down flat to get an even burn. You will get thin strokes instead of broad shading if you tilt them in any way.
Shaders have fine Ni-Chrome wires that fast to heat and cool. In the air, they turn hot quickly, and then as you touch it to the wood, there’s an immediate dark burn. Then, the wood absorbs all the heat, and your strokes go from very dark to barely there. To avoid this, keep your tip up in the air and then gently touch it to the wood with a pulling motion. The idea is to keep repeating this at various intensities to get used to create the desired level of burns.
Short overlapping strokes are the way to go. Alternate between air and wood, and soon, you will develop a rhythm that works. Make multiple passes to get darker shades. Make them at different angles to even out patchy areas.
As you pull your shader, it will fade out, creating a gradient. This is useful when creating light and shadow effects for a 3D scene. Always pull away from your lines when you want to maintain a clean edge. If you try to end up in the line, it will be unclean, and you won’t be able to stop at the correct spot.
Maintaining Your Tips
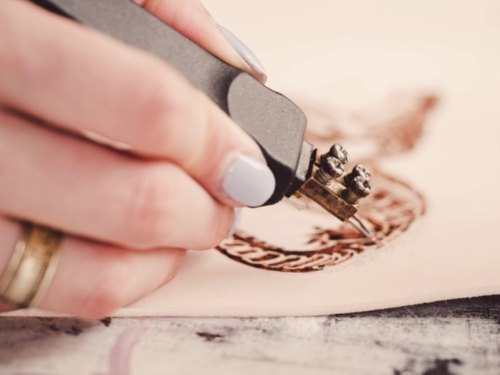
Both solid tips and wire tips need to be cleaned periodically or once after every long-burning session. One of the best materials for this is pieces of regular cotton denim (be sure it is not the stretchy mixed type that has lycra in it). You can have a damp (not wet) piece of denim next to you while working on a particularly messy wood to wipe the tip as needed.
Every once in a while, your skew and writer tips will need some honing or smoothening, as the case may be. I recommend a leather honing strop and stropping compound, which are the same ones that I recommend for knives and chisels. You will know it is past time you did it when you start to see black flakes appear on your burn work even though you just cleaned your tips.
Make sure your shader or writer tip is cold when you hone it. Unlike a knife, you can move your tip back and forth because it is small enough. And only hone the side that goes on the wood for shaders. With writer tips, make sure you are honing evenly on all sides. Wipe it on your denim cloth before using it again.
Don’t go overboard. Hone your tips only when you need to; otherwise, you will lose the sharp edge or smoothness of the tip.
With Skew tips, you will need to hone it as you would a knife. Lean it to the bevel of the knife edge and pull away on the strop. Read the sharpening section of my whittling knife guide to learn how to hone properly.
Woodburning Safety
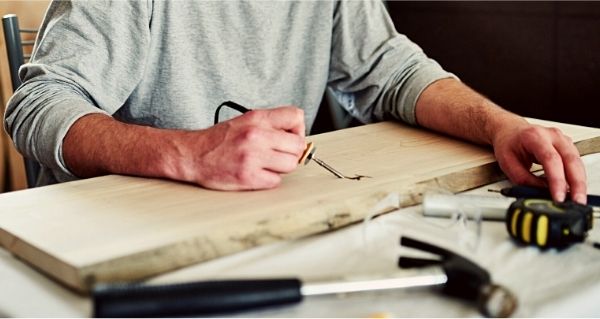
I want you to live a long life with all your limbs unscathed. This is why I want you to read the safety tips below before you get started.
Material Toxicity
Avoid all materials apart from raw wood, raw bamboo, and veg-tanned leather. Look at the materials section of this guide. Never burn over epoxy, glue, or adhesive of any kind. They are toxic when burned.
Always check your wood for toxicity before starting. Certain tree resins are toxic when burned. Just Google your wood for toxicity reports, and you will know.
Ventilation
Ventilate well and use an exhaust fan and a respirator for vapor (not dust) if required. Open all doors and windows. Use a fan to draw the smoke away from you and blow it in the opposite direction. Keep your face well away from the workpiece. Lift and tilt it towards you for better visibility and ergonomics.
There are special exhaust fans that have activated carbon filters that suck in and trap the fumes before passing cleaner air out the other way. You will have to change the filters once they get all clogged up, but these are the best options when you cannot open any doors or windows (probably because it is blistering hot or freezing cold outside).
Maintain a moderate temperature and make sure there is not much smoke coming out in the first place.
Turn It Off
Turn off your wand or pen as soon as you are done. If you are not burning, it should be off. Whether you are changing, cleaning, honing, storing, or swapping mid-session – always turn it off.
Solid tips need a few minutes to cool off. Allow them this time before you do anything with them. Just hover your hand over the tip and see how hot they feel; it is the same as handling hot kitchen items. Or just use a timer to check back in 5 to 10 minutes, depending on your tips.
If you use pliers to twist off hot tips, be warned that they can break. Hot metal is more brittle and bendy than cold metal. You could completely ruin your wire tips if you try to do anything with them while hot. You can wipe them gently while in use, but that’s all. Even then, be gentle and do it only if absolutely necessary.
Set it Down
Use a proper holder. Some kits come with well-ventilated but fully covered-metal holders. These are the best. You can also DIY them with a little bit of from a welder friend. Whatever you are using, just make sure you have something good and sturdy.
Always, always set your wand down on the holder. Make this a habit even if the wand is cold. You do not want to burn anything that is nearby, such as electrical wires, phones, body parts, plants, pets, or furniture.
If the cord or the handle/wand gets hot, switch off and unplug the unit immediately. Something has gone wrong with the unit. This is NOT supposed to happen. It might cause an accident. If you’re unsure, take it to your nearest electrical repairs man. Only the tip and the metal part of a solid tip burner are meant to get hot.
High heat settings might cause close-gripped pro-burner wands to get uncomfortably hot near the tip. Turn it down to avoid burning or blistering your skin. Slow down your burning or use high settings in short bursts.
Pro Tips for Beginners
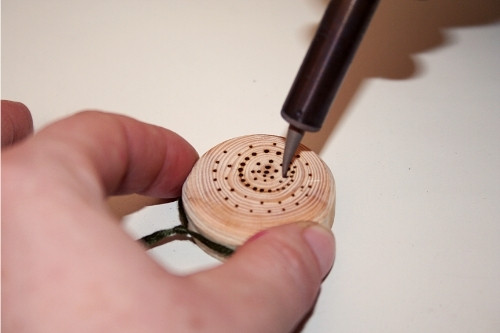
- Use the right tip for the right results.
- The slanted ‘nib’ is ideal for most basic maneuvers when using solid tips.
- Start by gently brushing the wood to see its effect. Ease into the process. Patience is key here. Breathe in, breathe out.
- Adjust the temperature after you make a few test passes.
- Make fresh test passes each time you change wood or tip.
- Work from darker to lighter parts of your artwork. This makes it easy to hide mistakes as you begin to get into the flow. Starting with the outline is usually a good idea.
- If the lines are not dark enough, increase the temperature. If the temperature is maxed out, do multiple passes or move slowly to give the tip more time to burn the wood. This applies mostly to lowe-powered burners.
- Avoid pressing down hard. It will ruin your control and cause uneven burning.
- Follow professionals for ideas and inspiration. Join online and offline communities to find like-minded people for information, camaraderie, and ideas. Burning and barbeque can go hand in hand!
Conclusion
That’s it for my guide to woodburning for beginners. Remember that this is just the beginning, and there’s a lot of ground yet to cover. For further study, look at various techniques in detail, such as shading, lettering, and texturing. For mind-bending designs, look at Celtic knots. For the spiritually minded, check out sacred geometry mandalas. Most importantly, have fun!

