One way the internet helps your woodworking hobby is through the free woodworking jig plans available online.
As a less-experienced woodworker, you might wonder which jigs will improve your woodworking and which ones are useless. I felt the same way when I first started, so here is a closer look at a handful of projects that will improve your work.
5 Free DIY Woodworking Jig Plans
Easy Table Saw Sled from Mikesaurus
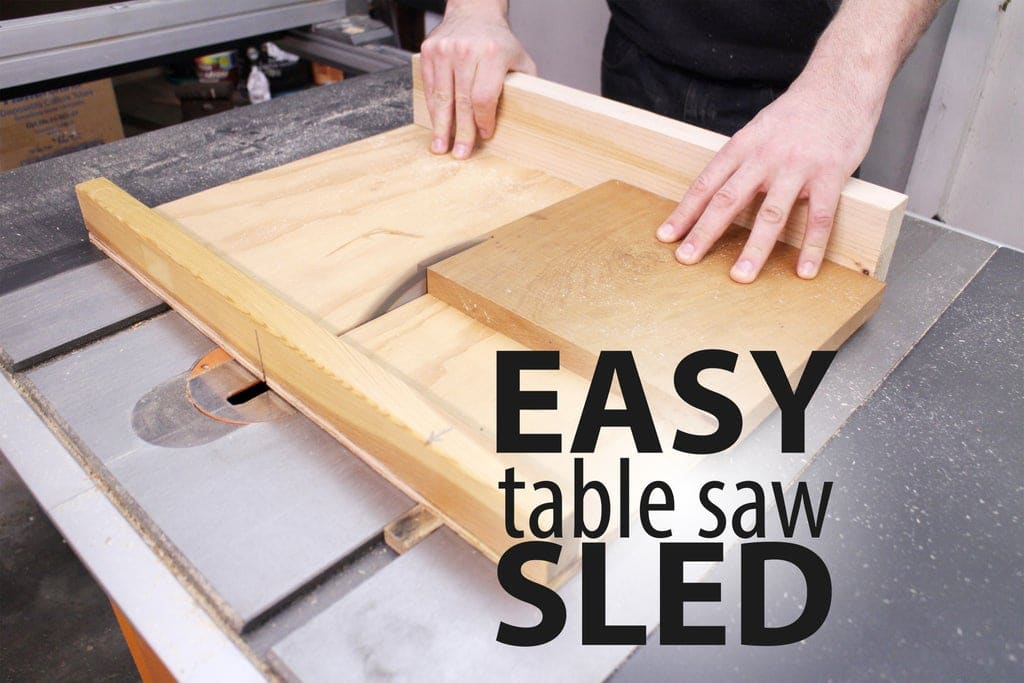
Novice woodworkers can improve their cutting with this easy-to-make jig. A sled makes cuts easier than when using a miter gauge. The support it offers makes it a safer option as well.
A sled’s main purpose is to aid in making cross-cuts on a table saw. It uses a fence to keep the board aligned through the cut. The board sits on the sled’s table for additional support and smooth movement.
Another job this sled excels at is safely cutting small pieces of wood. The jig holds the piece and keeps your fingers away from the saw blade.
This project can be built from scrap wood. The only hardware you need is fasteners. If you don’t have scraps, a cheap piece of hardwood and a half-sheet of plywood will cost little.
The most time-consuming aspect of the build will be measurement and alignment. Calipers and a tri-square will offer accuracy and keep the wood perpendicular to the blade during alignment.
A key concept that helps beginners is using the 5-cut method to determine accuracy.
This project is great for woodworkers making lots of repeated cross-cuts and those using their table saw on small pieces of wood.
At-A-Glance
- Project Complexity Level: Beginner
- Tools Needed: Calipers, Tri-square, Drill bits (including Countersink), and Wood glue
- Time Needed: 2.0 hours or more
- Approximate Cost: $ (Cheap)
Table Saw Jointer Jig from The Spruce
Intermediate hobbyists wanting straight lumber but lacking a good jointer will find this table saw jig useful. A straight board becomes a necessity as your woodworking skills increase. If you are not ready to spend money on more exotic wood species, you will need to find a way to make the lumber you buy straighter.
The jointer jig holds boards in place as you cut straight edges along them. This project uses toggle clamps with quick-release mechanisms to prevent the board from moving as you slide the jig parallel to the saw blade.
You will need to purchase some of the wood unless you have materials on hand. This, along with the need for more specialized hardware (and extra tools) adds to the project’s cost.
It is also a project that novice woodworkers may find difficult. This plan requires slot cuts using a router. Positioning and marking is more complex as well. That is also the reason it will take longer to make.
This project is ideal for shops lacking a good benchtop jointer or the space required for one.
At-A-Glance
- Project Complexity Level: Intermediate
- Tools Needed: Tape Measure, 1/2-inch Chisel, Drill and bits, Router and bits (1/2-inch straight cut), and two open-ended Wrenches
- Time Needed: 3.0 hours or more
- Approximate Cost: $$ (Moderate)
Table Saw Box Joint Jig from Family Handyman
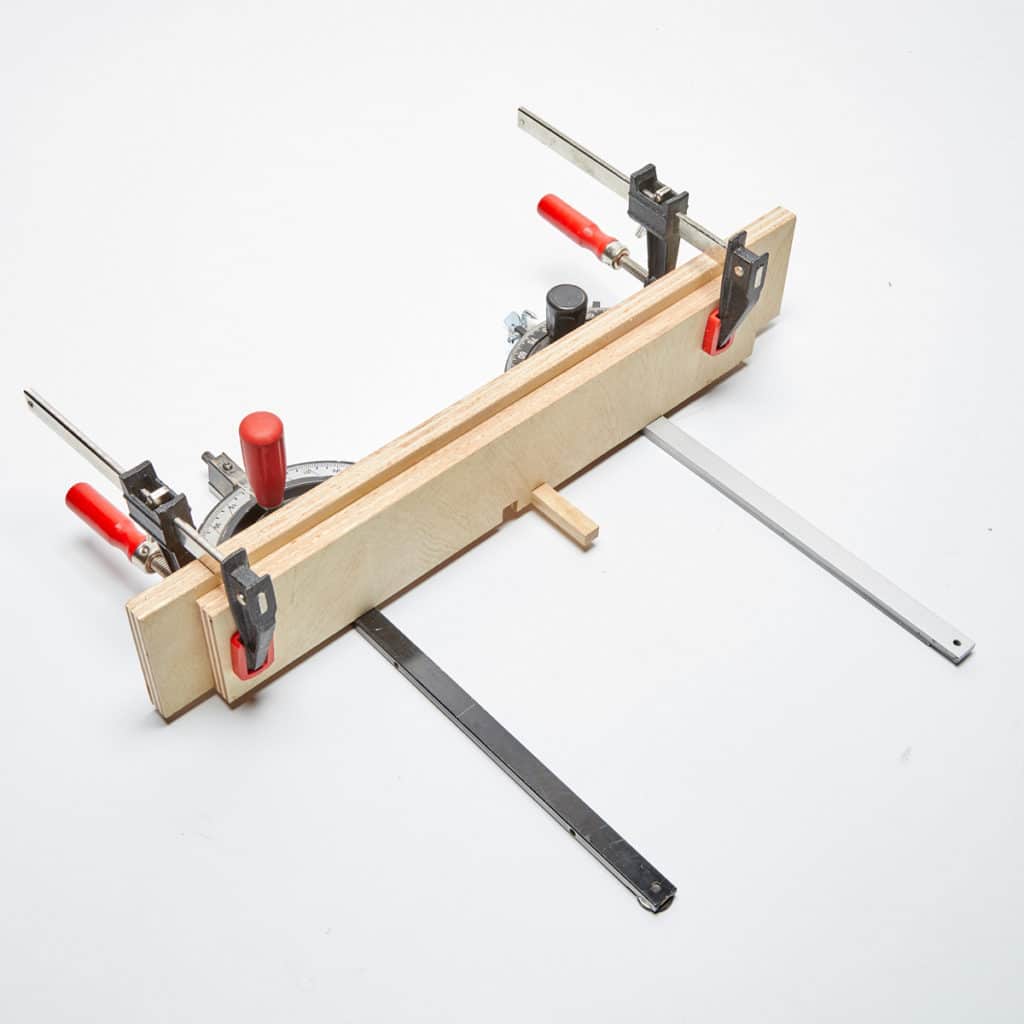
Another jig that can speed up your woodworking is the box joint design for the table saw. It allows you to make repeated joint cuts along the edge of boards that will fit together tightly.
This table saw accessory allows you to hold a board perpendicular to the table as you cut pins on the edges. You can then adjust the stock position so that you cut the inverse pins and sockets on the boards you are joining together.
The project requires 3/4 inch plywood. You can use scraps, clamps, and miter gauges from your shop for the other components. Most woodshops are stocked with a majority of the items needed, keeping the price for this item low.
An important consideration with this woodworking plan is the use of a good dado stack. This jig uses dado cuts to make fast and repeatable pins and sockets.
Another thing to keep in mind is that you may need to make several test cuts to adjust the pin size. This shouldn’t be an issue for woodworkers with some experience.
Box makers will appreciate the consistency and speed this jig provides.
At-A-Glance
- Project Complexity Level: Intermediate
- Tools Needed: Clamps, Dado Stack, Framing Square, and Miter Gauges
- Time Needed: 1.0 hours or less
- Approximate Cost: $ (Cheap)
Table Saw Tapering Jig from Diymontreal
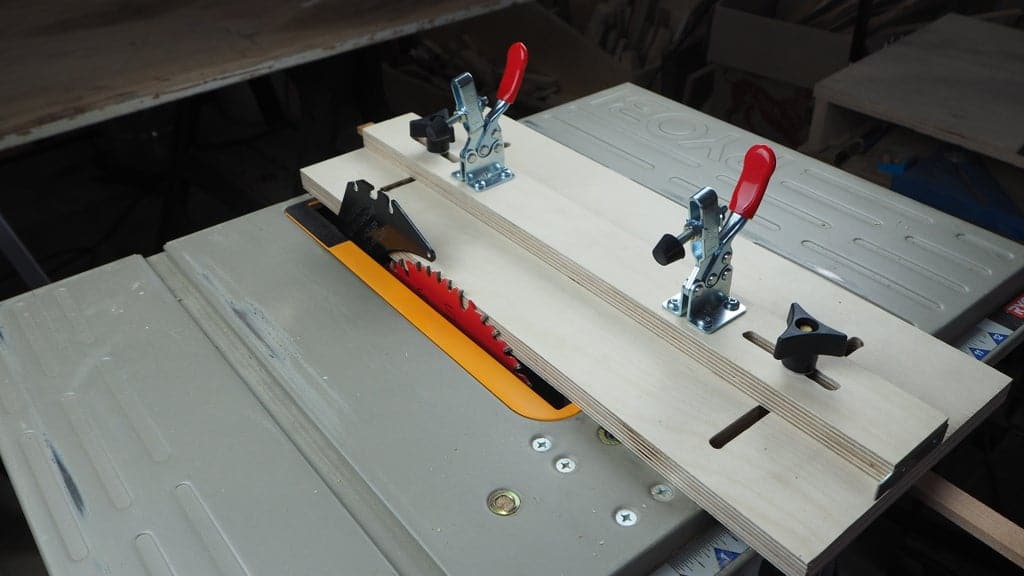
Cutting tapers on furniture pieces is easy when you use a tapering jig. This project aids in making consistent tapers and can be adjusted to fit your needs for many projects.
The purpose of the jig is to allow you to safely and accurately cut angles along a board edge. This taper is used in legs on various woodworking projects, adding to the overall look.
The plan suggests using 3/4 inch Birch Plywood. This material is readily available and provides durability. You will also need extra hardware that will likely require a trip to the store, adding to the overall cost.
This jig uses groove cuts, so you will need a router to be comfortable making those cuts in your expensive Birch Plywood. Alignment is important, but the bolts and knobs can compensate if you are a little off.
Toggle clamps are included to keep the wood in place. This plan adds a backstop, something that you will want to include to prevent the leg from sliding out from the clamps.
Furniture makers will find this jig indispensable for making legs.
At-A-Glance
- Project Complexity Level: Intermediate
- Tools Needed: Drill/Driver and bits, Palm Router and bits (spiral and straight), and Wood Glue
- Time Needed: 2.0 hours or more
- Approximate Cost: $$ (Moderate)
Pocket Hole Jig
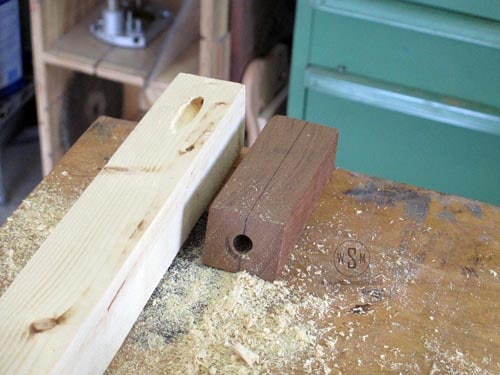
A simple and effective jig that can be used for all sorts of cabinetry work is the pocket hole jig. This project allows you to quickly create an angled hole that can be used to fasten the boards together.
The jig is clamped to the face of a board near its edge. A drill is inserted into the hole and is guided into the wood at an angle. This results in a hole that will accept fasteners and provide superior strength compared to standard butt joints.
A small scrap of wood can be used, but it should be a hardwood species that can provide some durability. This plan does not use a sleeve, but you can add one. It will keep the guide accurate and make it last longer.
Using a clamp or bench vise to hold the piece will help prevent an injury. It will also prevent the piece from twisting or slipping as you drill. A T-Bevel can be used to mark or guide your drill angle.
Pocket hole jigs are something all shops should have, especially if you make bookshelves or other projects using butt joints.
At-A-Glance
- Project Complexity Level: Beginner
- Tools Needed: Clamp (Cam/C/Quick-Grip or Vise), Drill and bits, T-Bevel
- Time Needed: Less than 1.0 hour
- Approximate Cost: $ (Cheap)
Planer Jig For A Router from Well Done Tips

Routers are another power tool that finds multiple uses in a woodshop. This jig allows you to use your router in place of a thickness planer to create a consistent board thickness.
Creating a universal thickness on boards makes it easier to work with them, and it improves the look and function of your joinery. This jig keeps your router bit at a consistent height, removing high spots on a board’s face.
Pieces of scrap plywood and framing timber can be used to make the housing of this jig. A handful of fasteners help with assembly, and adding some wax or finish will improve the look of the jig (and distinguish it from other scrap wood).
New woodworkers will find that using pre-dimensioned lumber saves time and makes this a jig that requires minimal construction techniques. The only tricky part here will be making a hole for the router bit to poke through. A hole saw bit can make the proper-sized hole quickly and safely.
This jig is great for hobbyists who don’t have a good thickness planer. It is simple to make and will expand your router’s versatility.
At-A-Glance
- Project Complexity Level: Beginner
- Tools Needed: Clamps, Drill and bits, and Palm Router and bits
- Time Needed: About 1.0 hours
- Approximate Cost: $ (Cheap)
The Best Laid Plans Of Mice And Men…
Remember, these free DIY woodworking jig plans may not be as useful or fun to make as designs that you can purchase. They will, however, provide inspiration and give you something to practice on between projects. The jigs might also take your enjoyment of woodworking up a notch or two!

