Using polyurethane over the stain is a great way to seal the timber, enhance the woodgrain, and add richness to the color of the stain. However, it can get confusing these days with the multitude of clear topcoat products on the market. Readers are often unclear on what products can be used in conjunction with other basecoats.
I began woodworking over 40 years ago, and they were simpler times. Choices of surface covering were limited, and there were clear rules for use. However, today, selecting the correct products can be a minefield with many environmentally friendly products and advanced chemical compositions offering diverse benefits.
While there are many different polyurethane products on the market, you can use them for most products, with one or two exceptions. Let’s step through all you need to know about using water-based polyurethane over oil-based stain.
Can you use water-based polyurethane over an oil-based stain?
Yes, you can apply water-based polyurethane over oil-based stains. However, the oil-based stain should be completely dry before top-coating with polyurethane. Be aware that drying times for oil-based stains vary. Apply the polyurethane too soon and it may not dry correctly and ruin the finish. If it dries, it will have poor adhesion to the stained surface.
How to apply water-based polyurethane over an oil-based stain
We’ve written this article on applying polyurethane if you’d like an in-depth look at some tips and tricks, but here is an abbreviated step-by-step guide. You’ll need the following tools:
- A synthetic bristle brush with fine bristles or a short-nap microfiber roller
- Rubber gloves and a face mask
- A container to decant into or a roller tray
- A clean stirring stick
- Lint-free rags
- Painters tack cloths
- A drop sheet if you’re coating furniture
- 220 to 240 grit sandpaper or a sanding sponge
- A sanding block or a palm sander.
Step-by-step instructions:
- Ensure the oil-based stain is completely dry before applying polyurethane. See my comments later in this article on the drying times I recommend you should allow.
- If you’re coating furniture and working indoors, place a drop sheet under the item to prevent drips and spills from damaging your floor.
- Vacuum the surface and wipe it all over with a painter’s tack cloth to remove all traces of dust and dirt.
- Put on your gloves and mask, and decant the polyurethane into a clean container or the roller tray if you’re using a roller. I always decant the product even when using a brush, as it prevents you from contaminating the tin contents with dust and dirt from the brush.
- Do not thin the polyurethane. Water-based products are thin enough to apply directly without further thinning.
- Stir the polyurethane gently but thoroughly with a clean stirring stick. Do not agitate the polyurethane or shake the tin, as you’ll introduce air bubbles to the product, which will ruin your finish.
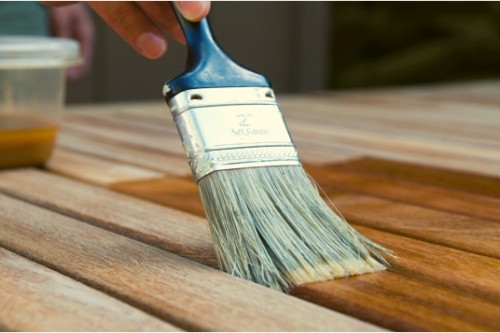
- If using a brush, dampen the brush first by dipping it into water. Squeeze out the excess. Dip the first half-inch to an inch of the brush into the polyurethane. Do not wipe off the excess on the side of the tin; hold the brush over the tin and allow the excess to drain back naturally before applying the polyurethane to the stained surface using light pressure. Angle the brush 10 to 15 degrees in the direction of travel and brush along the wood grain.
- The polyurethane will dry rapidly, so work outwards from a point, being careful not to overlap an edge of dried polyurethane with wet polyurethane as it can cause banding.
- Do not overwork an area. Once you have the coverage you need, move on.
- If using a roller, dampen the roller sleeve with water. Remove excess water by squeezing out the sleeve.
- Load the roller with polyurethane from the roller pan, ensuring complete sleeve coverage. Gently roll on the pan slope to remove excess before applying it to your stained wood.
- Roll in the direction of the grain. As with a brush, work quickly to get the coverage you need, as the polyurethane will dry quickly. Try not to overlap dry polyurethane edges with wet polyurethane, as it’s possible to get banding. Wet edge-to-wet polyurethane allows better amalgamation of the surface coating.
- Once the first coat is complete, wait for the manufacturer’s recommended drying time.
- Some water-based polyurethanes do not need sanding between coats, while others do. However, I strongly recommend lightly sanding the surface with 220 to 240-grit sandpaper to smooth the surface before applying the next coat. Be gentle; you’re only looking to smooth the surface, not remove everything you’ve just put on.
- Again, gently vacuum or wipe the surface with a tack cloth to remove all traces of sanding dust and dirt.
- Repeat from step 4.
- Once you’ve applied the desired number of coats, usually three to four, do not sand the topcoat, but leave it to dry for a minimum of 24 to 48 hours before using the item.
How long to let the stain dry before applying polyurethane?

Many factors affect the drying time of oil-based stains, including external factors such as being indoors or outdoors, the ambient temperature, humidity, and airflow. In addition, there are different chemical compositions of the stains from different manufacturers, and there is no one answer to drying times.
However, we can give you broad rules of thumb to apply and some factors to consider to ensure an oil-based stain is properly dry before top coating. All drying times given by manufacturers are based on an ideal temperature and humidity range of 70 to 80oF and 50% relative humidity. If your climate is colder or damper, drying times will increase rapidly, with 10 degrees of difference almost doubling the drying time.
When indoors, most stains are touch dry in 1 to 2 hours, ready for recoat in 4 to 6 hours, and dry enough to topcoat with water-based polyurethane in 12 to 24 hours.
Outdoors, the drying time takes longer. Assume a minimum of 24 hours before applying water-based polyurethane, with some manufacturers’ technical datasheets suggesting 48 to 72 hours. When in doubt, check the stain manufacturer’s recommendations. Have a read of this article if you’d like to know more about the drying time of stains before applying polyurethane.
Do you have to sand stain before applying polyurethane?
No. I’m assuming the surface was sanded and smoothed sufficiently before you applied the stain. If you sand the surface, you may remove the stain unevenly, damaging your finish. Just ensure that before you begin, the surface is clean, dry, and dust-free, using rags, a vacuum, and painter’s tack cloths.
Will polyurethane affect the color of the stain?

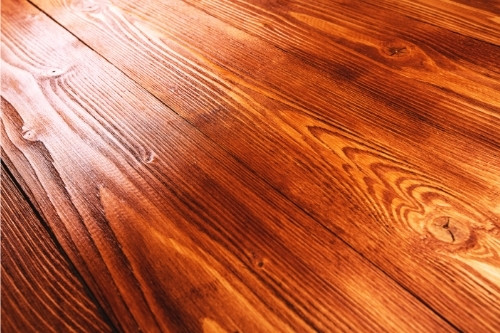
Water-based polyurethane will not affect the color of your stain. While it can look a milky color in the tin, it dries clear. Oil-based polyurethanes add a light amber color, enriching and deepening the stain color, but water-based products maintain the stain’s natural tint. Water-based polyurethane is ideal for lighter coloured woods and stains.
How many coats of polyurethane to apply?
The number of coats depends on the use of the stained object. Furniture that isn’t subject to hard knocks will need a minimum of three coats. Stair treads or wooden floors should receive five to six coats. The great thing about water-based polyurethane is that you can’t apply too many coats as you can with an oil-based product. Your only constraint is cost. We wrote this article to provide an in-depth look at the number of coats of polyurethane to apply.
FAQ
Can you mix oil-based stain with water-based polyurethane?
No. If you try to tint water-based polyurethane with an oil-based stain, you’ll end up with a globby mess that won’t apply well and doesn’t dry properly. You’re trying to mix oil and water, which science tells us doesn’t work.
Can you use polycrylic over an oil-based stain?
Yes, you can. Once an oil-based stain is properly dry, polyacrylic can be applied similarly to water-based polyurethane. Simply follow the instructions above for the best results.
Water-based poly over oil stain: final word
The key to successfully applying water-based polyurethane over an oil-based stain is to ensure the stain is fully dry. While the manufacturer’s recommendations will guide you, remember that the temperature, humidity, and airflow at your location will dictate drying times. Ten degrees colder than the manufacturer’s ideal temperature, and your drying time can almost double.
My advice is to err on the side of caution. If you try to be too hasty in top-coating the stain with polyurethane, you’ll need to remove everything, including the stain, and start the process again. Allowing a few more hours of drying time is cheap insurance.
I trust this article has answered your questions. Good luck with your project. Thanks for reading.

