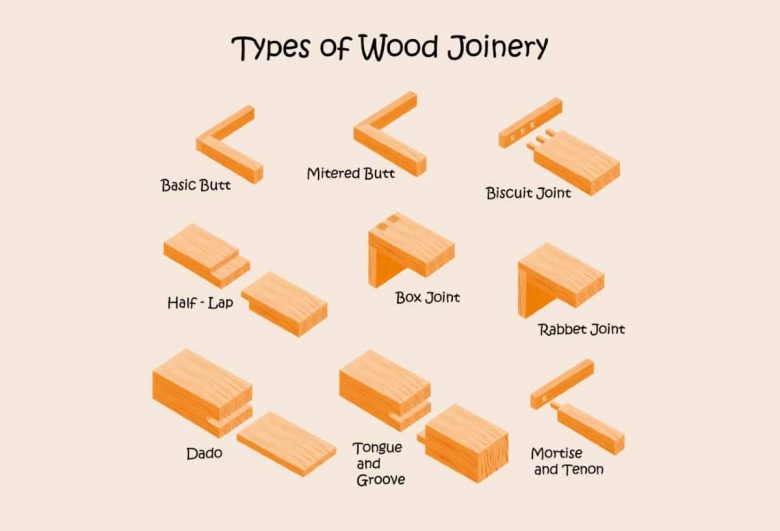
Understanding what different wood joints there are and how each one of them can be used in your projects is key to getting the most out of your woodworking hobby. They provide strength to your assembly while adding to the overall appearance and function.
The 14 joints that follow represent a few of the more popular techniques used in woodworking. Take a look at each one to determine what will work best for your future builds.
Woodworking Joints Explained
Butt Joint
Level of Complexity: BEGINNER
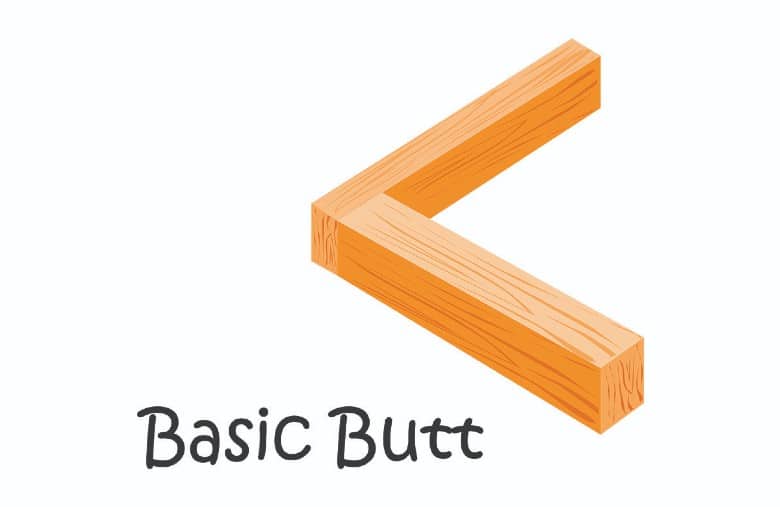
This joint is one of the oldest and most basic designs that can be used in simple projects. Butt joints are a simple construction that is fast to make. Most hobbyists begin their joinery because of these features.
How it is made
As the name implies, this joint butts the edges and ends of boards together. Glue and fasteners keep the joint in place. It is worth noting that gluing edges together produces a stronger bond than gluing two ends (or an end to an edge) together.
Tools needed
One reason that this woodworking joint is so popular, especially among beginners, is that you need very few tools. You will need a saw and wood glue to assemble pre-dimensioned boards and some way to clamp them as they dry. Rough-sawn timber requires extra tools to create clean edges to butt together.
Many hobbyists and professionals use fasteners for assembly. You will need a hammer (or a drill and bits) for this.
Other considerations
The weakest point of connection will be the open grain on board ends. Add strength by using biscuits or dowels. Pocket holes are a popular option for added strength as well. We will talk more about biscuits, dowels, and pocket joints further in this article, so make sure to keep reading to the end.
Best uses in the shop
This is ideal for your first projects. It is also an option when using a pocket hole jig on furniture pieces.
Pros
- This is fast to make
- You need minimal tools
- It can be reinforced
Cons
- These are a weak design
- Aesthetically less-appealing
Miter Butt Joint
Level of Complexity: BEGINNER
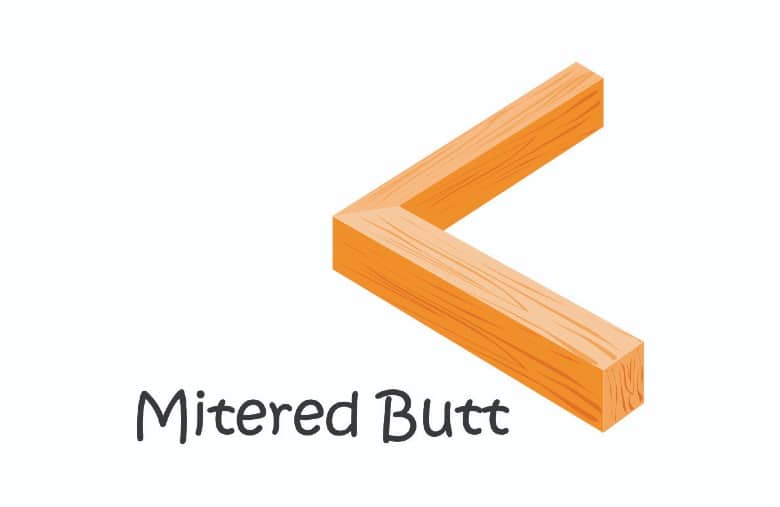
Also called a miter joint outside of North America, this design improves upon the butt joint by hiding the end grain of boards. It is used to form a corner on projects and provides a flush surface for similar angles to connect.
How it is made
You will mark the desired angle across the surface of your boards. Cutting along the line will create the miter you need. The joint fits together with glue, but adding a spline of some type will increase its overall strength.
Tools needed
You will need a miter box, combination square, or T-bevel to lay out the desired angle. Pencils can place the line, but a layout knife will create more accurate results.
A miter saw, or a table saw can be set for angled cuts, while hand-held tools will need a guide to cut straight. Traditional hand saws can easily follow a knife trench as you saw.
Other considerations
Reinforcement is critical to make this joint serviceable. Placing a spline along the end of the boards or on the face of the connecting boards provides durability.
Best uses in the shop
It is the go-to joint for picture frames. You will find it handy to use for geometric shapes on projects with more than four sides. DIYers can use it outside of the shop.
Pros
- Cleaner looking than a butt joint
- Useful for geometric shapes
- Easy to cut
Cons
- Requires additional support
- Limited use outside of framing
Dowel Joint
Level of Complexity: BEGINNER
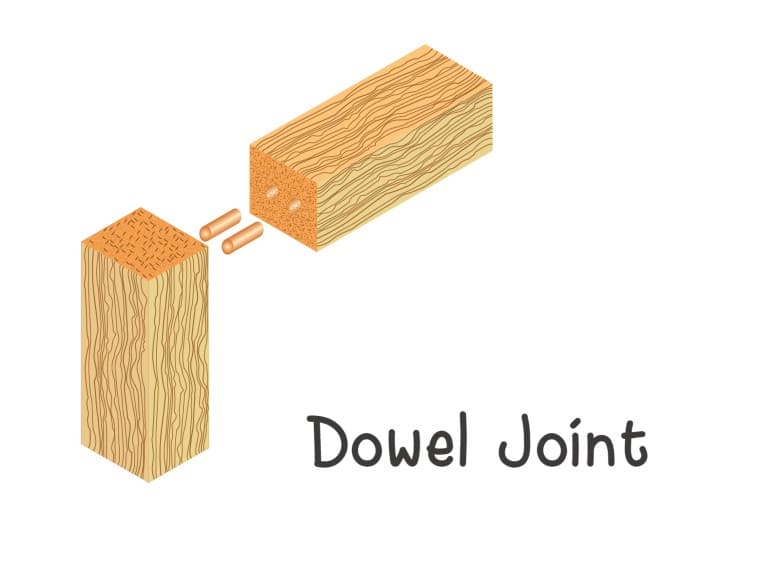
Another simple technique is using dowels to strengthen butt joints. Wooden dowels have reinforced furniture joints for many years and are used to help maintain alignment during glue-ups as well. A dowel can also replace stripped fasteners to remove play in butt and miter joints.
How it is made
Dowel joints are made along the edges or ends of boards. Holes with a dimension similar to the dowels are placed evenly along both mating surfaces. You will insert half of the dowel into one piece of wood and the other half into the other.
Pushing the boards together seals the joint, hiding the dowels inside.
Tools needed
Your layout is critical to keeping the holes aligned on each piece of wood. That will require a measuring rule and something to mark holes. A drill and bits are needed too.
Dowel jigs save time and create accuracy by maintaining bit alignment.
Other considerations
Adding glue to the dowel hole adds to its holding power. Remember to provide approximately 1/16-inch extra depth to the hole for the wood glue to gather as you push the dowel into place.
Best uses in the shop
A dowel’s width creates a better hold than nails or screws. Use it over other fasteners unless speed is a factor.
Pros
- Helps with board alignment
- Thicker than nails or screws
- Can replace stripped screws
Cons
- Misalignment can be difficult to fix
- They take longer to set up
Rabbet Joint
Level of Complexity: Beginner
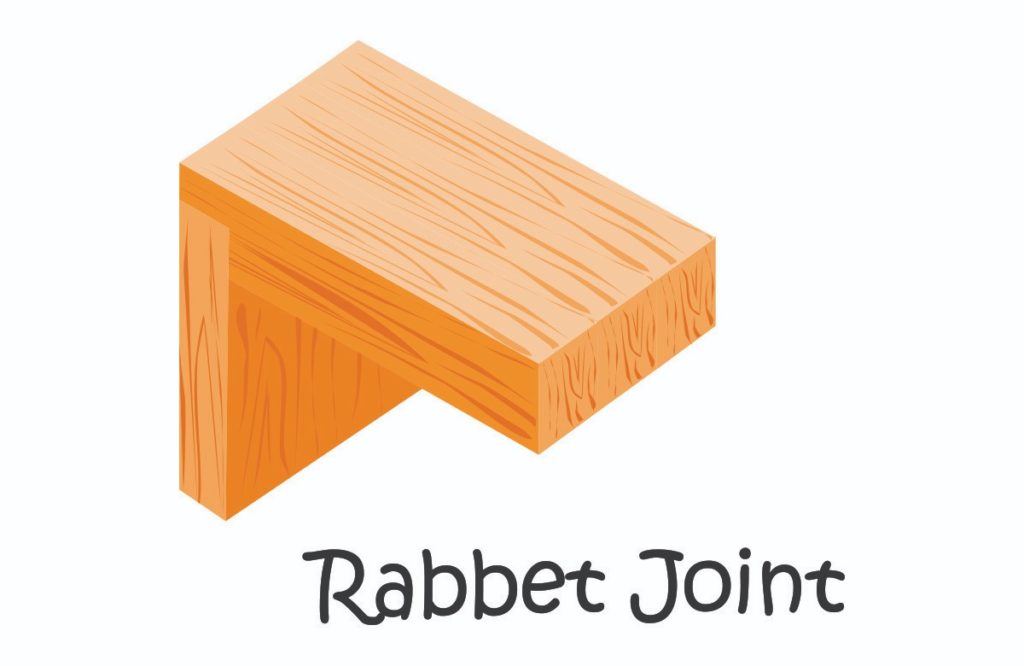
Many woodworkers graduate from the butt joint to the rabbet joint early in their journey. This design is simple to make and provides hobbyists with a fast joint with 3/4 less end-grain exposure than a butt joint.
How it is made
You will cut a channel on the face of the board near its end. This groove will be the width of the material it is connecting with, providing two surfaces to hold the joint. Using dowels or fasteners adds to its overall strength.
Tools needed
Traditional hand tool users need chisels, saws, or a rabbet hand plane to make the groove. Using a power saw will be faster, with a dado stack in a table saw, making this a one-cut process.
Other considerations
Gluing both faces of the channel offers a stronger hold than a single face can. The rabbet does create a portion of end grain that is thinner and easier to damage, so caution is needed when adding fasteners through this section.
Best uses in the shop
Novice woodworkers will appreciate the joint’s ability to hide end grain. The only section visible will be the end grain on the rabbet (half of what a butt joint exposes). That makes it applicable to the quick box or cabinet designs, including chest of drawers, that beginners will want to make.
Pros
- It can be made quickly
- Provides more gluing surface
- Less end-grain exposure
Cons
- Requires reinforcement
- Channel cut weakens end grain
Tongue and Groove Joint
Level of Complexity: INTERMEDIATE
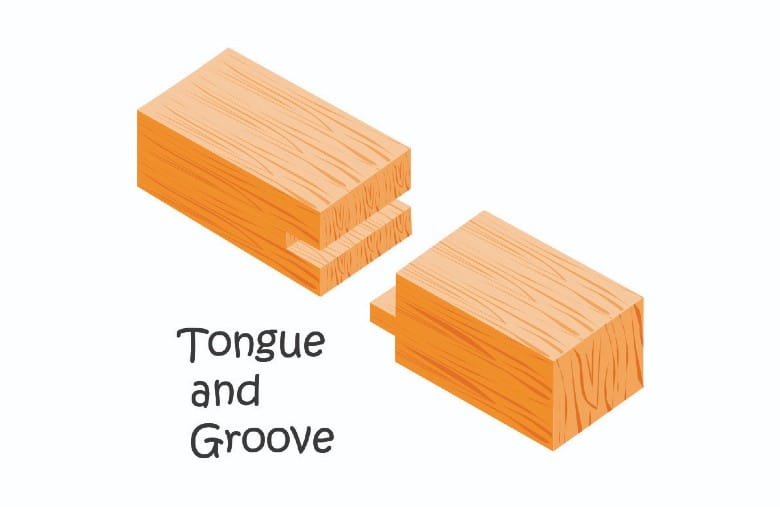
Larger projects, including wood flooring or wall panels, are easier to create using the tongue and groove joint. Each board has a tongue on one edge and a groove that fits it on the other. The lumber is slotted together to form a larger panel piece.
How it is made
Hand or power tools remove wood from both edges of the board. The tongue or groove shape runs the entire length of your timber, allowing you to slot the tongue of a board into the groove on another.
Tools needed
Tongue and groove joints were common before plywood became popular. Many specialty planes are available to create these joints. A wood router is the go-to power tool for most woodworkers, though. A good router table speeds up the process and is safer.
Other considerations
This joint does not require glue. The movement offered here is good at handling wood movement. A groove should be deep enough to accept the tongue and provide an extra gap at the bottom.
Best uses in the shop
It should be used on joints in wood pieces with interior angles greater than 180 degrees (reentrant angles). These joints are a good choice for large panel projects around the house and can be used for cabinets or boxes.
Pros
- Creates solid floor and panel joinery
- Handles wood movement better
- Good for use on reentrant angles
Cons
- Requires a router
- Best suited for edges
Lap Joint
Level of Complexity: BEGINNER/INTERMEDIATE
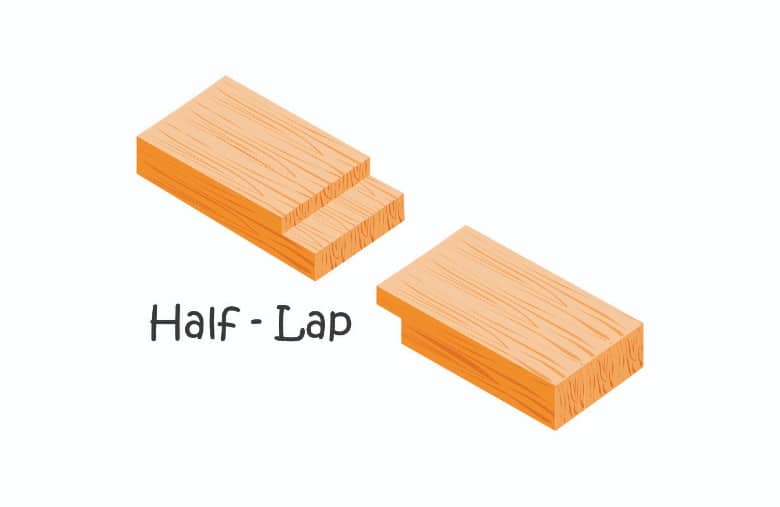
The lap joint offers the ease of a butt joint, but it uses the face as a gluing surface instead of the end grain. Two boards lap over each other at the joint and are cut to keep the pieces flush.
How it is made
The half-lap joint removes half of the board’s thickness, allowing the pieces to remain flush as the ends overlap. A mitered version creates a 45-degree angle on the joint, providing a mitered look with a less gluing surface.
A cross lap creates a half lap on the end of one board while cutting the opposing lap along the length of the other piece. A more intricate dovetail can be cut for the cross-lap joint, preventing the tail from pulling from the cross-lap it sits in.
Tools needed
You will need marking and layout equipment, as well as cutting tools to make lap joints. Table saw sleds designed to make these joints will produce clean results. Hand planes and chisels work as well, but they will take longer.
Other considerations
Adding dowels to pin the lap joint together will add considerable strength. Adding different colors of wood dowels provides visual contrast.
Best uses in the shop
This workhorse joint is ideal for cabinet-making or temporary framing projects.
Pros
- It can be made quickly
- Surfaces are easy to access
- It can be made temporary
Cons
- The basic design is brittle
- Boards need to be of similar dimensions
Dado Joint
Level of Complexity: INTERMEDIATE
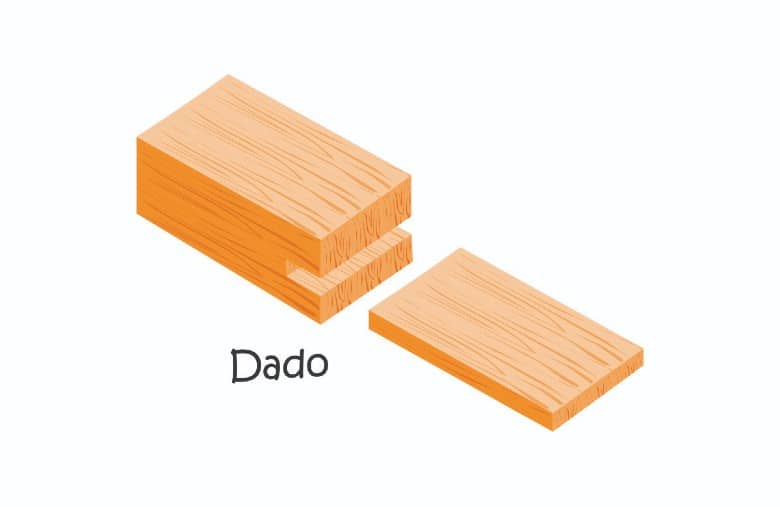
The dado joint is similar to a rabbet joint, with the difference being location. It is cut on the face of a board instead of the end, like a rabbet joint.
How it is made
The joint’s width is equal to the thickness of the board that will rest in the dado. Layout and marking tools will indicate the location of each dado on the board.
Multiple passes with a standard saw blade (or single cut with a dado stack) establish the walls and clear out material. A chisel can break away standing fibers and smooth the bottom of the groove.
Tools needed
Layout tools measure distances, and marking tools will indicate where to cut. Hand-made dados will require chisels and saws.
Making a dado with power tools requires a circular saw blade. The table saw is faster (and safer) than a circular saw. Dado blades come as a stacked set or as a single wobble design.
Other considerations
A through dado is the most common, but other designs can hide the joint. Stopped and blind dado cuts hide the dado from one or both edges of the board.
Best uses in the shop
These are the go-to design for shelving. It can be used without extra support, giving a clean look without fasteners or brackets.
Pros
- Hides end grain
- Provides support for shelving
- It can be glued on three sides
Cons
- Requires more work
- Limited uses outside of shelving
Box Joint
Level of Complexity: INTERMEDIATE
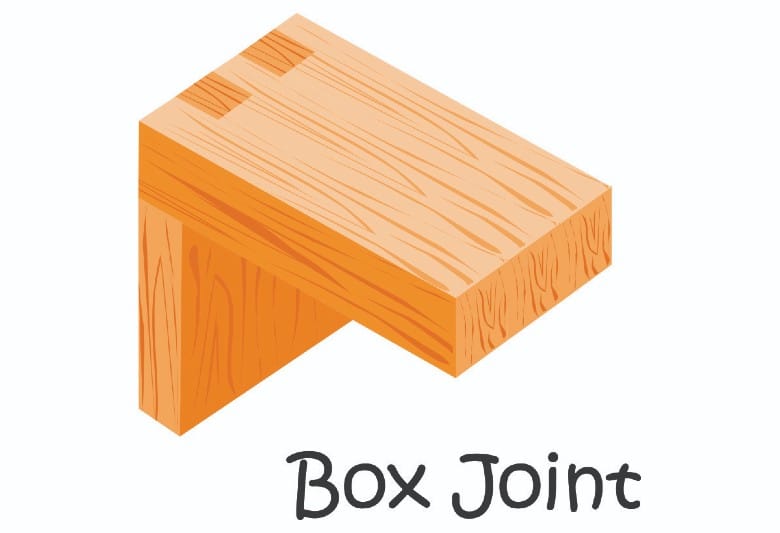
The box joint provides a strong bond due to its larger gluing surface. The fingers and grooves also provide contrast between the end and sides of wood fibers. The alternating grain direction creates a visual effect without using dyes or stains.
How it is made
Mark fingers at predetermined intervals. Sections of wood are cut out between each finger. The cuts shift on the mating piece, allowing the fingers to interlock when they are placed together.
Tools needed
Layout and measurement tools locate your cuts. Guides speed up the marking process. Use a marking knife to score across the grain if you are cutting with hand saws.
A table saw cuts quickly, especially if you make a sled that allows you to shift the workpiece as you cut. Here again, a Dado blade works faster. Single blades leave material behind that needs to be cleaned with a chisel or file.
Other considerations
Using the same wood for each side provides a lighter change between grain directions. Add more contrast by alternating the type of wood for each side.
Altering the size of the fingers (or grooves) changes the look of your joints.
Best uses in the shop
Woodworkers use this joint when connecting the walls of boxes. It can be used on tool chests or dressers, as well.
Pros
- Provides lots of gluing surface
- Uses straight cuts
- It can be varied for looks
Cons
- End grain stands out
- Does not lock like a dovetail
Dovetail Joint
Level of Complexity: INTERMEDIATE
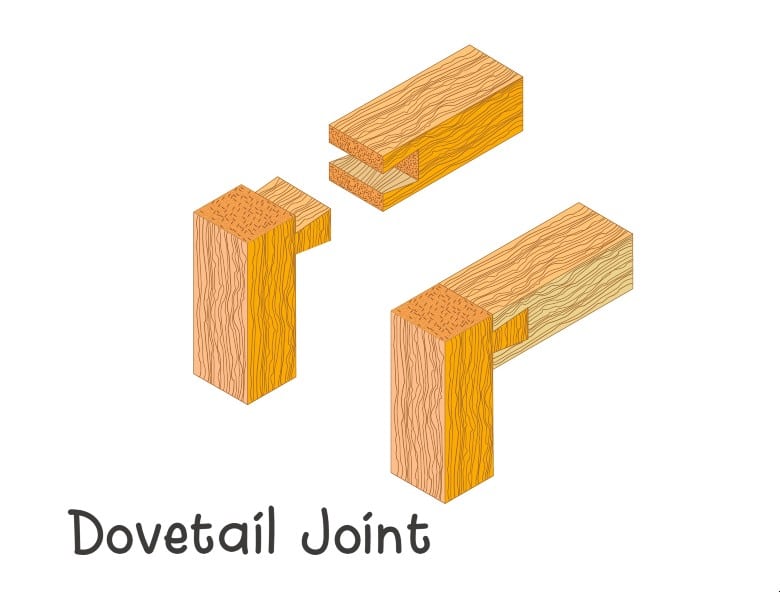
The tail shape of this joint naturally prevents the joint from pulling apart. It offers a variety of designs that focus on functionality and appearance. You can learn to make it early on in your woodworking journey, but you will also spend a lifetime mastering it.
How it is made
Pins and tails are cut into the end of your board. Connecting pieces use an alternating pattern that allows the wood to merge at 90 degrees, locking them in place.
This joint has a high tensile strength on its own, so glue is the only reinforcement you will add.
Tools needed
A router and dovetail jig cut each pin or tail at set intervals. A guide is mandatory here to keep things properly aligned and to prevent gaps in your fit.
Traditional hand tool users use marking jigs to offer spacing and the desired angle for each component. Once marked, use hand saws to cut the walls, and chisels remove the waste.
Other considerations
The research will tell you how hot of a topic dovetail angles are. The ratio will not matter for functionality. It comes down to what looks right to you.
Best uses in the shop
The looks and strength of this joint make it popular for all types of projects. Boxes, cabinets, and chest of drawers use dovetail joinery.
Pros
- It resists separation
- Various designs available
- Size and number can be altered
Cons
- Harder to align
- Requires angled cuts
Pocket Joint
Level of Complexity: BEGINNER
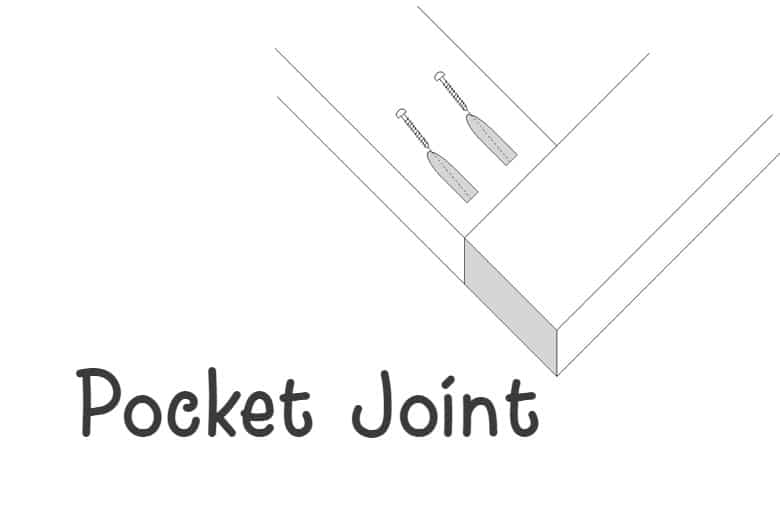
You will find many options to improve the strength of your butt or miter joints, including the addition of pocket joints. These add length to the fastener and allow it to penetrate the fibers at an angle, which adds strength when attaching the ends of boards. You can also install them anywhere on the wood’s surface.
How it is made
You will use a drill guide or pocket-hole jig to bore a hole at a predetermined angle. This joinery can be made on the ends, edges, and faces of a piece of wood.
Tools needed
A drill and bits are required to make the hole and to drive in the screws. A clamp will help hold the guide jig in place as you work. Finally, a drill guide or pocket-hole jig is required to make the pocket joint.
Other considerations
This design requires that you drill holes in the face of the boards. Drilling the on the interior board faces or the bottom of boards will hide the pocket holes from view. Some hobbyists also use putty to fill the pocket hole.
Best uses in the shop
You will use it to improve butt and miter joints. It is also a good option when connecting lumber that varies in thickness, as well as strengthening edge joints.
Pros
- Secures boards of different thicknesses
- Improves butt and miter joints
- Does not require glue
Cons
- Makes visible holes
- Requires a specialty guide jig
Biscuit Joint
Level of Complexity: INTERMEDIATE
A biscuit joint is no harder to make than a dowel joint is. The difficulty increases with biscuits, however, as they are often used to keep lumber straight during glue-ups.
That requires more holes along the edges than a butt joint at the end of your wood. You also need a specialty tool that is limited to this specific task.
How it is made
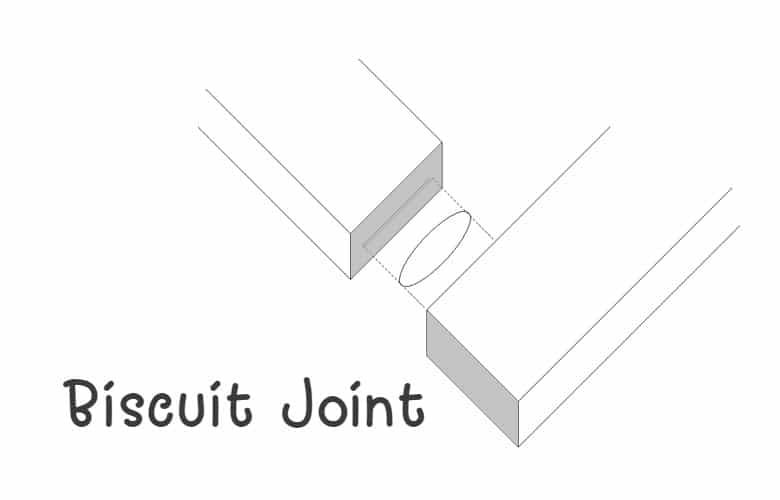
You will use a biscuit joiner to place grooves into the edge of boards about every six inches. Oblong biscuits (shaped like a football) are inserted into those slots and glued in place. Clamps or a hammer can force the boards together, sealing the joint.
Tools needed
Layout tools are needed to mark the holes consistently. You will also need a biscuit joiner. You can substitute your router on flat edges if you do not own a biscuit joiner.
While you could make your own, pre-made biscuits are available at reasonable prices.
Other considerations
Biscuit joiners have size ratings that indicate what biscuits to use. Also, try using masking tape to mark for alignment without marring your board’s surface.
Best uses in the shop
Biscuits keep boards from shifting. You will not need as many clamps or cauls with biscuit joints. They are also better than dowels or other fasteners in plywood or other sheet materials.
Pros
- Works in plywood
- Thinner than dowels
- Provides alignment for glue-ups
Cons
- Requires a biscuit joiner
- More room for errors
Bridle Joint
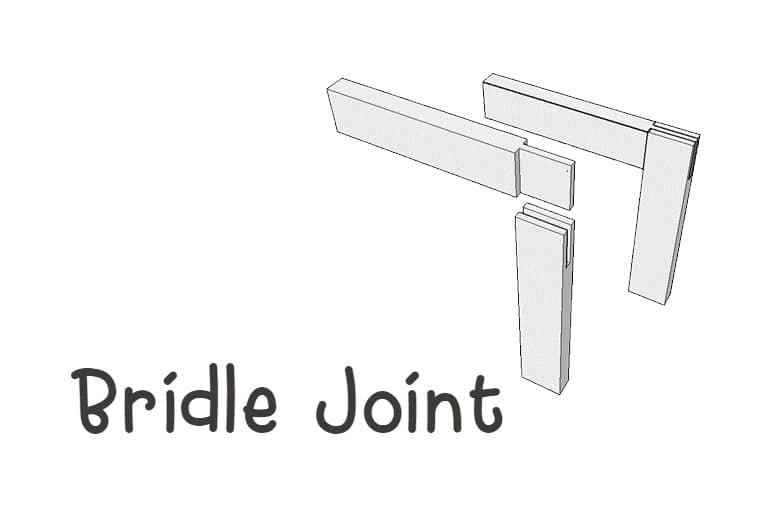
Level of Complexity: ADVANCED
The bridle joint connects two pieces of wood using tenon and mortise-style joinery. This joint runs the full width of the tenon piece.
A variation known as the T-bridle places the mortise in the middle of the board instead of the end.
How it is made
The corner bridle joint has the mortise and tenon carved into the ends. Approximately 1/3 of the material is removed from the center to form the mortise. The tenon requires you to remove 1/3 from each face of the board.
Tools needed
A variety of hand and power tools can be used to make the corner joint. A T-bridle tenon is made with similar tools.
Routers, saws, and chisels are popular choices. Saws will require multiple passes, and a chisel is a must for surface cleanup.
Other considerations
A good bridle joint is tight. Loose joints are weak, and they do not look as good as a snug bridle joint. Accurate measurements keep the boards flush during assembly, too.
It is best to remove less material as you work. This makes it easier to sneak up on a snug fit.
Best uses in the shop
These provide a stronger joint for picture frames. They can be cleaned up after assembly as well.
Pros
- Good for making workbenches
- A stronger corner option for frames
- The Joint is not visible on the board faces
Cons
- Takes time to set up and make
- Deep mortises are harder to clean
Mortise and Tenon Joint
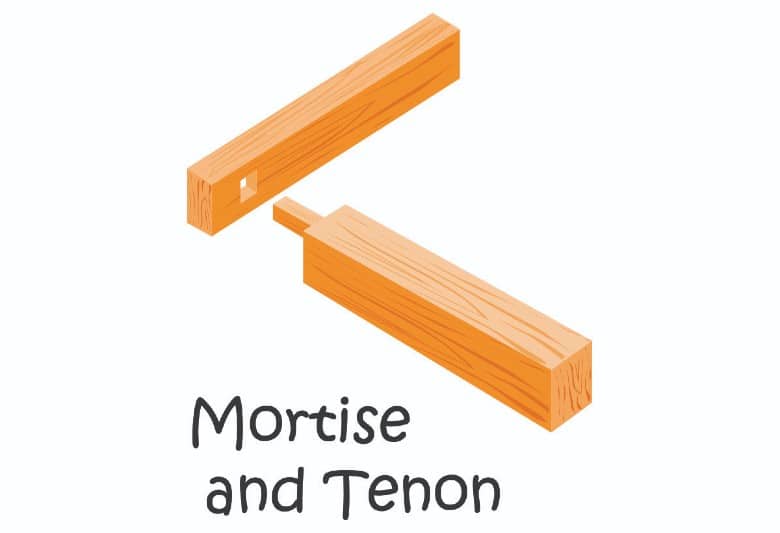
Level of Complexity: ADVANCED
The mortise and tenon are popular woodworking joints, especially when connecting two pieces at a right angle. Woodworking enthusiasts consider it one of the strongest joints when glued or locked in place. It is similar to the bridle joint mentioned previously, though it is better suited to thicker wood pieces.
How it is made
A mortise is cut into the board. The stub mortise is shallow, while the stub mortise is carved through the entire piece. You can taper a mortise to accept a wedge also.
Tenons stand at the end of the lumber. Stub tenons are short. Conversely, through tenons stick out from the back of a through mortise.
Tools needed
Planes, saws, and chisels cut the components. Power tools are a good option here, but this is a popular joint for traditional hand tool users as well. You will need a hammer and chisel to clean up the mortise, no matter what type of tools you prefer.
Other considerations
Sloopy fits make this joint less effective. It will not be as visible as a bridle joint, so you need to test it and fit it continuously as you trim.
Best uses in the shop
These ancient wood joints are usable in most projects. They are common on furniture legs and cabinet frames.
Pros
- Strong joint
- Lots of variety
- Can be made with or without glue/fasteners
Cons
- Mortise walls are hard to keep straight
- You will need some hand tools
Finger Joint
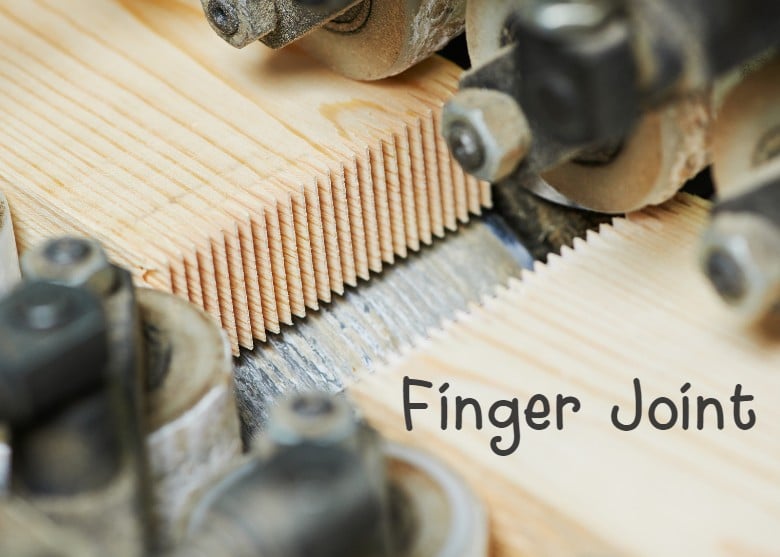
Level of Complexity: ADVANCED
Novice woodworkers often say finger joint when they mean box joint. Finger joints best resemble the fingers in a pair of clasped hands. This joinery extends the length of wood and provides a visual contrast when different species join together.
How it is made
The layout is similar to that of a box joint. Its design elements are thinner, so consistent spacing is necessary throughout the joint.
Material is removed between each finger. The pattern is rotated for the mating piece, allowing the fingers to slide together. Unlike a box joint, the finger joint connects boards in line with one another instead of an angle.
Tools needed
Dedicated woodworkers can cut the fingers with hand saws. Most woodworkers use a router equipped with a finger bit to make the thin cuts needed.
Other considerations
These joints take time to mark and cut, even with power tools. Use jigs when possible to speed up the marking process and to guide your router in creating proper spacing.
Best uses in the shop
It is useful for combining scrap pieces to make longer boards. You can also use different species to make decorative patterns for your project.
This joint is also useful outside of the shop. Use it to connect wooden floor slats or pieces for a door. It will also connect wall molding effectively.
Pros
- It is very decorative
- Makes longer boards
- Various applications
Cons
- Fingers are brittle until connected
- Time-consuming to make
Form And Function
These wood joints provide you with a variety of ways to assemble your projects. You can select easy patterns to get you started and progress to more advanced joints as your skill improves.
Speed and strength are two factors that will dictate which joinery you will use. A design’s overall appearance can also be a factor, especially with furniture pieces and boxes that serve as showcase items as much as they do for their functionality.

