This is an in-depth introduction to the fascinating and diverse world of woodcarving. This article will give you an overview of all the major parts of this craft – from styles to tools and types of wood.
As a long-time woodcarver, hobbyist, and general DIY enthusiast, I have had a lot of experience in the various woodcarving styles and the associated tools. I love the variety and possibilities involved, and I am sure you will, too.
What we will be covering in this article:
- Different woodcarving styles.
- The various tools used for carving.
- Safety measures and equipment.
- Types of wood and how to use them for woodcarving.
- Various kinds of wood finish and their properties.
- How to get started based on what you already know or don’t know.
- Related woodcraft styles.
Types of Woodcarving
Even though each artist has their own style when it comes to carving, we can break down the whole craft into four main types.
1. Whittling

Whittling is by far the simplest and possibly the oldest method. You take a knife and start to whittle away at a piece of wood till you are done. Sanding and smoothening are not very common here. Knife marks are often left in and create the unique, rough, hand-honed texture that you might have liked in some works.
2. In-The-Round

This is what you would refer to as a sculpture. We call it in-the-round because it is a 360-degree approach that creates the most realistic-looking results. A lot of finesse and finishing work goes into making the finest pieces.
3. Relief Carving

This is when you carve out something that seems to partially emerge out of the surface of the wood. Most surface carvings on flat boards would fall under this category or in the next one.
4. Chipping Or Chip Carving
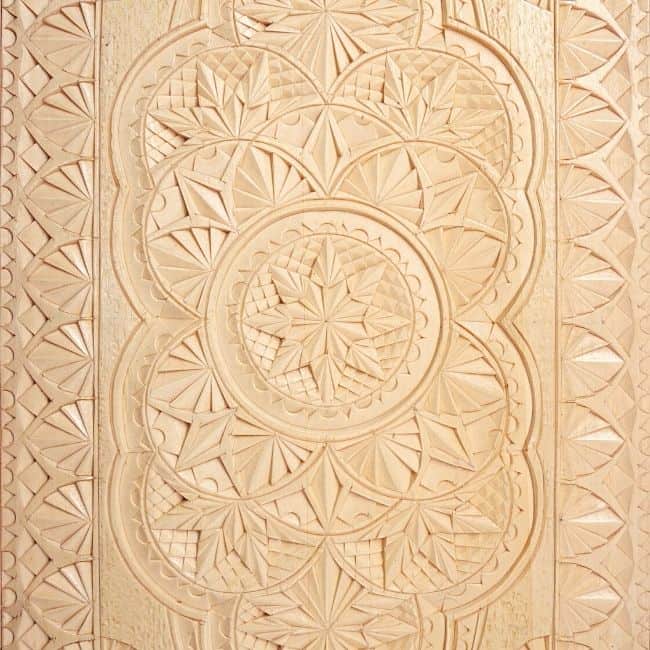
As the name suggests, you chip away at the surface of the wood to create shallow cuts. Artists use this technique to create highly refined designs using geometric patterns and/or organic motifs. Intricacy and precision are hallmarks of good chipping work.
Wood Carving Tools
Contemporary woodcarvers use an unending variety of tools to create a stunning range of works. Let’s look at the most commonly used ones.
Manual Tools
Chipping and Whittling Knives
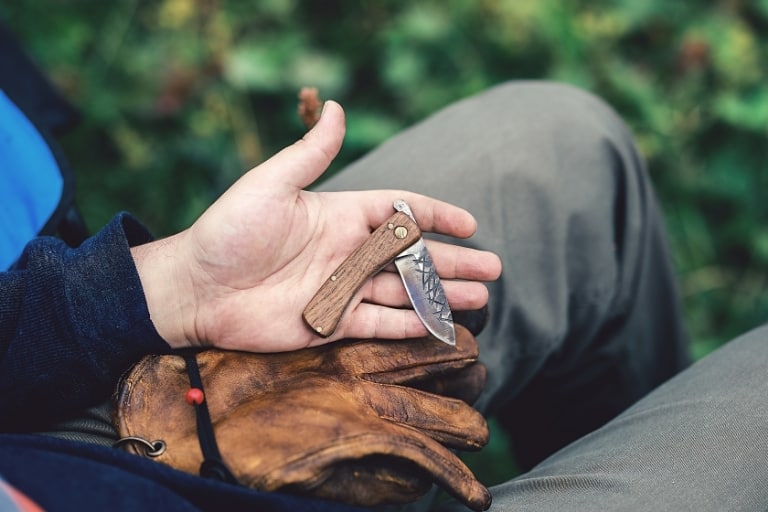
Technically speaking, you can get started with any sharp knife that is easy to hold in one hand and sharpen. That is how most of the old folks used to do it. The same goes for chip carving. When you really want to get into it, though, you can invest in a set of good whiting knives. These usually come in sets, but you can also buy some of them individually.
Read my review of the best whittling knives to learn more.
Chisels
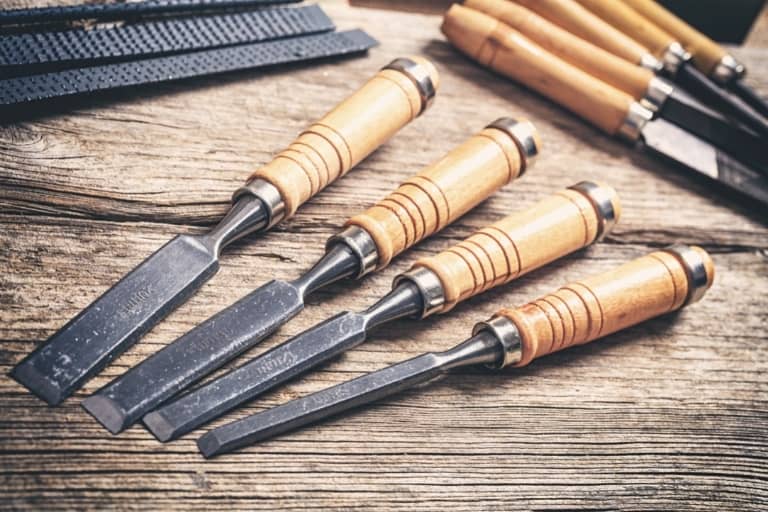
Right after knives, chisels have been used since the beginning of woodworking to carve patterns into the wood for functional and decorative purposes. Chisels are incredibly versatile and come in a wide range of sizes and types. Look at our guide for the best woodworking chisels to learn more.
Also Read: Best Chisels For Wood Carving
Gouges
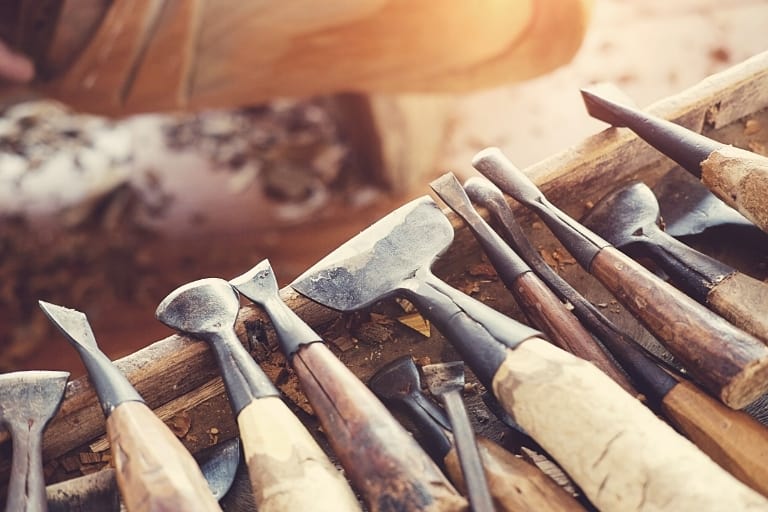
Gouges are meant for, well, gouging! These are, in principle, the same as chisels, but they are curved or angled to create various kinds of cuts. These, too, come in a wide variety of sizes and styles, much wider in range than your regular chisels.
Carver’s Mallet
Once you have your chisels and gouges in order, you need something to strike them with. Although some chisels and gouges are created with palm grips to use with palm pressure only, you will need some kind of striking tool for most of them.
No. Put that hammer down.
What you need is a carver’s mallet. Unlike the square joiner’s mallet, a cylindrical wooden mallet is basically a large wooden hammer. Its shape makes it easy for the user to vary the angle of the strike at will. These come in a wide variety of sizes, shapes, and weights.
Files, Rifflers and Rasps
If you have ever filed your nails (you dapper woodcarver, you!), you know what a file does. It’s like sandpaper but in a strip-like shape. A rasp is a similar tool but much harsher, meant for coarse removal of wood.
Depending on the variety, a riffler is a two-ended file or rasp or both in one, with a grip in the middle. They come in various shapes, and artists use them for tight spots and precision work.
Coping, Fret, and Scroll Saws
These are all various types of small hand saws that are meant for precision cutting. These are especially useful when you want to cut intricate curves and details out. For woodcarvers, these can be useful for creating a rough shape before getting into actual carving. An electric scroll saw can be a great tool to have if you are willing to invest a bit more money into your woodcarving hobby.
Sharpening Stones and Plates
Whether you are using chisels or knives, you will need to sharpen the edge and hone it often. To do this, you can invest in a combination stone for sharpening or in diamond-coated plates. The plates come in various grits. For sharpening, you are looking at a grit of 1000 and above.
Read More: Best Wood Carving Tools For Beginners (Buying Guide)
Woodcarving Power Tools
Electric Rotary Tools
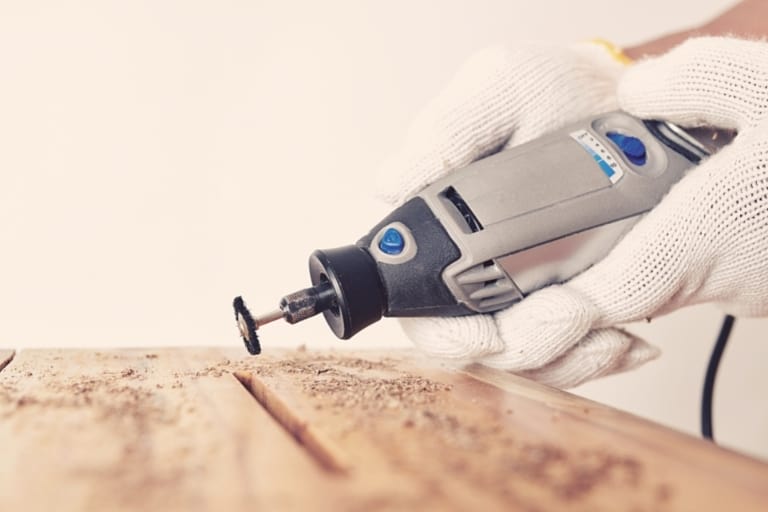
These are perhaps the most popular power tools amongst hobbyists and professional woodcarvers. Also known as mini die-grinders, in some cases, they come with an entire universe full of attachments and accessories of their own. Check out our guide for the best rotary tools if you are looking to buy one for yourself.
Electric/Power Chisels
You read that right. We can now get electric chisels that work on the same principle as a reciprocating or saber saw. You attach chisel bits just like you attach bits to power drills, and the machine moves them. All you have to do is guide it. You get the chiseled look (without going to the gym, might I add!) and save time and the physical labor of striking.
Router
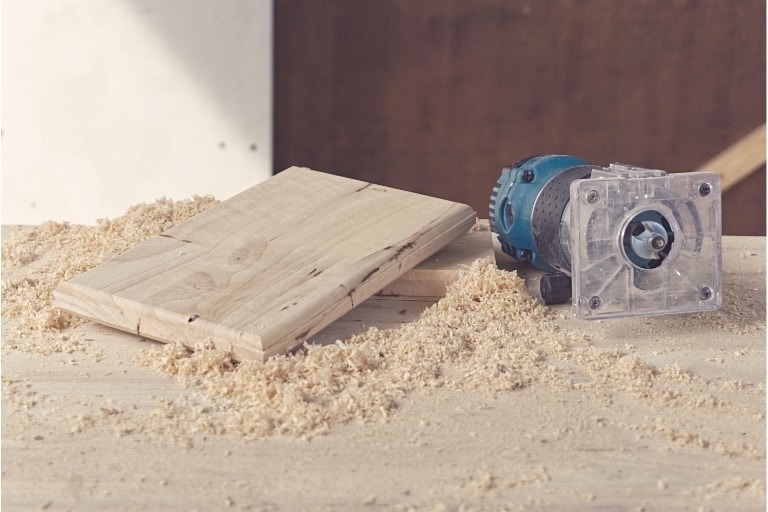
Woodcarvers generally use routers to finish edges and trims. But they are also a popular option for creating carvings on cabinets, doors, and headboards. They have many different shaped bits to choose from, giving the carver a broad palette to work with. Check out our review of the best wood routers if you are looking to buy one.
Angle Grinders
The humble angle grinder has become a favorite amongst carvers working on large pieces. There are various specialized cutting and grinding discs available for woodcarvers and standard attachments like flap discs.
Pneumatic Tools
Pneumatic tools are powered by air pressure and come in all varieties of standard power tools, including the rotary tool and power chisel mentioned above. You will need to invest in an air pressure pump and storage tank to use these tools, but they last much longer and are lighter in weight than standard power tools. They are often the choice for those who have long working hours with their wood carving tools on a daily basis.
Chainsaw
Despite what the horror movies will tell you, chainsaws are fantastic tools for carving humongous pieces of wood. Chainsaw carving is not for the faint of heart or the butter-fingered but is certainly in a class of its own. Carvers usually use a combination of sizes to get the desired effect and finish off with hand tools.
CNC Carving Machine
Some of us are just better on the computer than in the physical materials department. Do not worry; the CNC or Computerised Numerical Control machine is coming to our rescue. Just connect it to the computer, give it a 2D or 3D artwork, and off it goes, carving everything down to tiny levels of precision.
Safety
If you want to make a career or just live a comfortable life with all limbs intact, you should always invest in safety gear when working with tools.
Fingers
Since we can’t all insure our body parts for millions like some of the celebs do, precaution is the next best thing. You can buy special gloves and individual finger protectors designed to be used by woodcarving artists.
Eyes and Ears
When using power tools, the noise and dust levels can be extremely high, making eye and ear protection mandatory. In my personal experience, I find the tiny in-ear type of earplugs easier to live with, but if you want to take them off frequently, you are better off with the standard, over-the-ear headband type designs.
Other Body Parts
Make it a habit of wearing protective industrial shoes so that you don’t stub your toes all the time (unlike me in my sandals and perpetually painful toes!). Get a leather apron if you want to keep shrapnel and dust off of your body. Also, cover your head in some manner to prevent the wood dust from settling in.
Wood Selection
There’s a whole world of wood out there, but only two broad types – soft and hard. I know it’s not very nuanced, but it works. We will look at them through the woodcarving lens here to understand what wood to use for which project.
Types of Wood
Soft Wood
Softwoods are best for practicing wood carving for beginners, as well as fine, intricate carvings. As the name suggests, these are soft and easy to work with. It also makes them ideal for detailed work. They won’t last any wear and tear, so you will primarily use softwoods for practice and decorative purposes. Examples – Pine, Cedar, and Spruce.
Hard Wood
These are difficult to carve, but experts can make beautiful works on them for furniture, utilities such as handles and spoons, and decorations. Examples are teak, Mahogany, Walnut, and Oak.
Further Reading: Best Woods To Use For Wood Carving
Use Cases
Every woodcarving project has certain types of wood that are best suited for it. Here are some examples of the most common use case scenarios.
Furniture
It is best to use hardwood for furniture. The harder it is, the longer it will last. And the longer your work is, the more joy it will give people. Commonly used wood for furniture includes – Oak, Teak, and Mahogany. The same logic applies to doors.
Kitchenware
When making things like spoons, ladles, and bowls for the kitchen, the only extra consideration that comes into play is food safety and water retention. Hard Maple and Beech are excellent options for all the common kitchen utilities. You can use unique woods like birds-eye Maple for things like chopping boards to add an added layer of aesthetic appeal.
Sculpture
Softwood is generally more suited for smaller sculptures and figurines due to the tiny details that need to be included. For large sculptures, hardwood is preferable. Wood with fine grain that is easy to sculpt is preferable over others. Choose from Black Walnut, Butternut, Aspen, and similar.
Decorative
For purely decorative use such as knickknacks, wall hangings, etc., lightweight softwood is the best. Cedar is an ideal choice for this purpose as it is one of the lightest woods once it dries fully.
Wood Sourcing
Sourcing your wood can be an easy affair, depending on where you live. It can literally come from your backyard when you need to cut down a whole tree or portions of it. Or you can visit your nearest sawmill and get cool-looking odd parts that they have no use for. The latter is my favorite method, and they will be happy just to get rid of it in most cases.
Many local stores selling DIY-related goods will store some varieties of wood conveniently milled into boards and beams. Construction-related stores will likely have more options to choose from.
The best idea is to visit multiple places, including lumberyards, to decide which source suits your projects and budget the best. Finding a good source of wood is the best first step into wood carving for beginners.
Sustainability and the Environment
If you want to reduce your carbon footprint and make an effort to safeguard the environment for future generations, you can take a few essential steps while sourcing your wood.
Buy from sources that grow locally and replant responsibly to prevent deforestation and habitat loss. Use offcuts and non-millable pieces to help cut down on waste. You can also consider using more sustainable materials like bamboo for your projects or just for practice work.
Wood Finishing
In the world of woodworking and woodcarving, finish generally refers to a substance that you would use on wood to make a finished project last longer and repel water and insects. We also use finishes to create a different look or deepen the color and enhance the grain. Here are the most common types of finish.
Shellac
Shellac is a natural, sustainable finish derived from an insect that makes its nest out of a sticky material on certain tropical trees. It comes as flakes or buttons, which are then ground and diluted in alcohol (also called spirit). It is a fast-drying finish that comes in various shades, from blonde to deep dark red. It can also be used as a sealant in a pinch. Woodworkers have been using shellac for a very long time.
Oil
Various natural oils have been used for centuries to preserve wood. These include Tung Oil, Linseed Oil, and Walnut Oil. These are also called true oils because they turn solid through polymerization when they dry, enhancing their protective qualities.
Wax
In conjunction with oil, natural beeswax, soy wax, or petroleum-derived synthetic wax is a common way to make wood waterproof. We also use wax as a final finish on Shellac-finished wood to give it superior water protection.
Varnish
Varnishes come in various compositions these days, and the most popular one is polyurethane blended with oil. It is a synthetic finish that is exceptionally hardy and long-lasting, especially compared to the natural finishes, which need to be reapplied at least once a year in most cases. Urethane-based varnishes not only last long but are also scratch-resistant.
Lacquer
Lacquer has been in use since the olden days, and many professionals still hold it as the best all-around solution for finishing wood. It seals in the wood completely, gives it a brilliant depth, lasts really long, and you can rub it off easily if required. The only downside is that it has a slight amber tint and can also turn yellow over time.
Acrylic
Acrylic is often a modification of ordinary lacquer so that it has a clear white look and doesn’t turn yellow with age. These have excellent sealing and water-repellent properties and can last exceptionally long.
Water-Based Finishes
These are modern, complex formulations made to be less toxic alternatives to oil-based varnishes. If it has urethane as a component, the finish will be the same as oil-based urethane varnishes.
Natural Vs. Synthetic
I am a big proponent of non-toxic finishes like shellac, true oils, and natural wax. This is because I like to eliminate all toxic chemicals from my life. That said, if you want to make pieces for the outdoors or need a solution that you can apply and then completely forget about, synthetic finishes are the way to go.
In certain situations, though, natural finishes such as wax and oil combinations are better options in the long run. Synthetic finishes often need a lot of work to rub off and reapply, whereas you can just add oils and waxes over whatever amount of the previous finish is left in the wood, topping it off. Wood exposed to intense UV radiation is usually better off with oils and wax.
Pigments and Color
Certain projects may call for coloring or tinting of the wood. Acrylic colors are an easy option for this purpose. You can apply varnish or shellac (but not wax) on top of fully colored surfaces. I have also used things like acrylic markers to create designs on smooth wood surfaces.
You can also use tinted finishes like Shellac, lacquer, or specific synthetic varnishes that will give a particular tint to your wood. This is especially good if your wood is light in color. A host of natural substances, such as coffee, turmeric, cranberry juice, etc., have natural solid pigment and can be used for staining wood naturally.
How To Start Wood Carving?
Absolute Beginners
If you have never touched a woodworking tool before, there are two easy options to start with – whittling knives or a rotary tool. You can sharpen any old knife to get started on whittling or chip carving. Given that you have a knife you can use and something to sharpen it with, you can get started without spending a single dime.
Rotary tools come in various budgets and can be as cheap as $20 with a complete kit. Buying a set of whittling knives can be an even cheaper affair.
Existing Woodworkers
If you have been woodworking for a while, you probably already have a few tools you can start with, such as chisels or a router. All you need is a little inspiration and some practice. Using any tool you choose, you can find ideas and inspiration from lots of projects online that are dedicated to wood carving for beginners.
Existing Artists
If you are a sculptor, painter, or designer, you might find woodcarving extremely satisfying as a hobby or your next career move. Anyone who is used to a pencil will have an easy time adjusting to a rotary tool with a flex shaft that gives a pen-like grip.
Clay sculptors and the like might find it easier to get used to chisels, powered or otherwise. Again, looking at beginner or intermediate woodcarving projects is an excellent way to get inspired and begin.
Related: Easy Wood Carving Projects for Beginners
Related Disciplines
Here are some wood-crafting techniques that are closely related to woodcarving. Like siblings and cousins, almost!
Woodturning
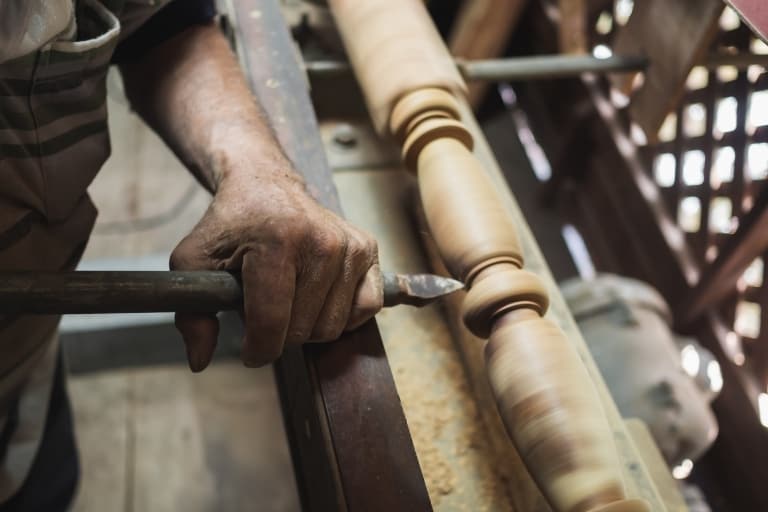
Using a lathe, you turn a piece of wood rapidly while using a gouge to take off material inside and outside. Examples of resulting pieces are vases, bowls, beads, and pillars.
Inlay Work
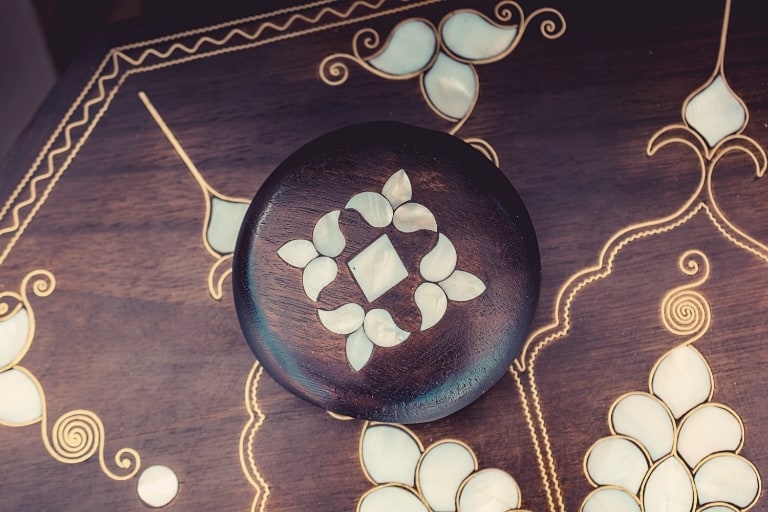
Carving out a design and then ‘inlaying’ with a contrasting material to fill up the carved area, creating a seamless look.
Engraving
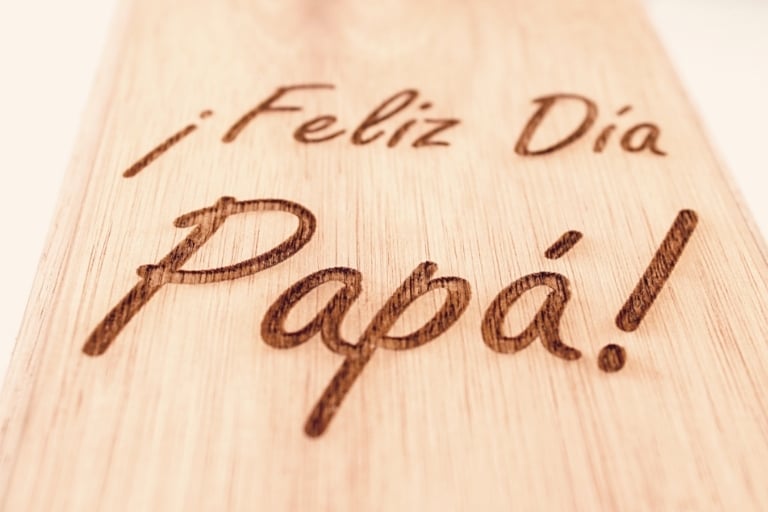
Most often used for ‘woodcut’ printmaking, this is simply about craving wood to create patterns, similar to chip carving. Engraving is a technique artists use to create decorations and illustrations.
Scrollwork
Scrollwork is a technique where the artist creates intricately designed pieces of wood that are then used for decorating the top edges of cabinets, headboards, undersides of handrails, and so on.
Marquetry
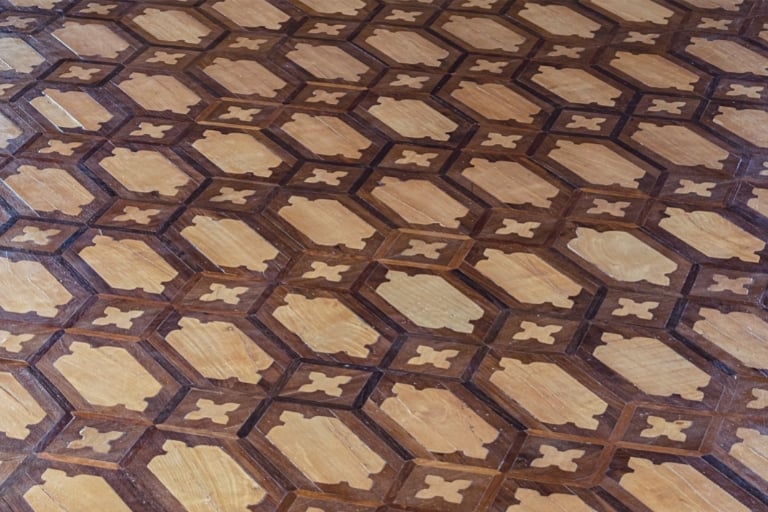
Marquetry is extremely precise work that takes a lot of skill, patience, and practice. Marquetry artists use thin slivers of various colored wood to create flat, intricate patterns.
Pyrography
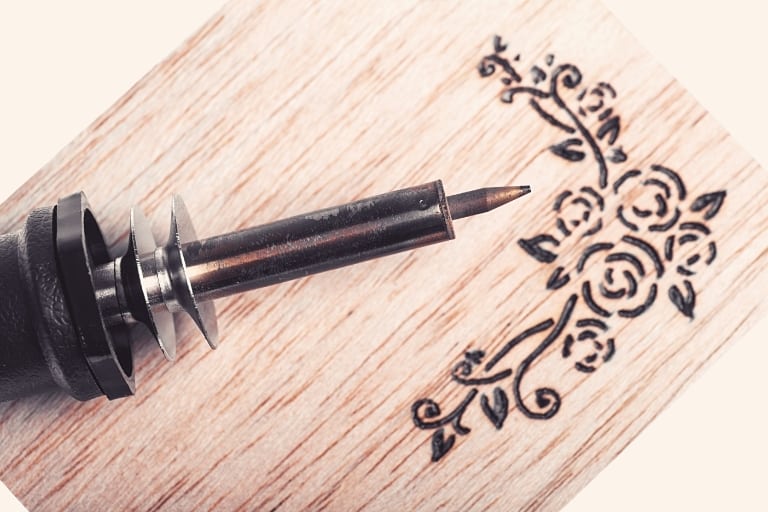
We can literally translate the name as writing with heat/fire. A metal-tipped pen-like tool is heated (electrically these days) to burn the surface of the wood. It looks especially good on light, unfinished wood. Using a computerized laser engraver can produce similar results.
Final Word
And so we come to the end of this guide on woodcarving for beginners. To be completely honest, the subject of wood carving is so vast that we have barely started to scratch the surface. I hope it has at least piqued your curiosity or even helped you decide your next step. Where are you on the journey right now? Tell me in the comments section below.

