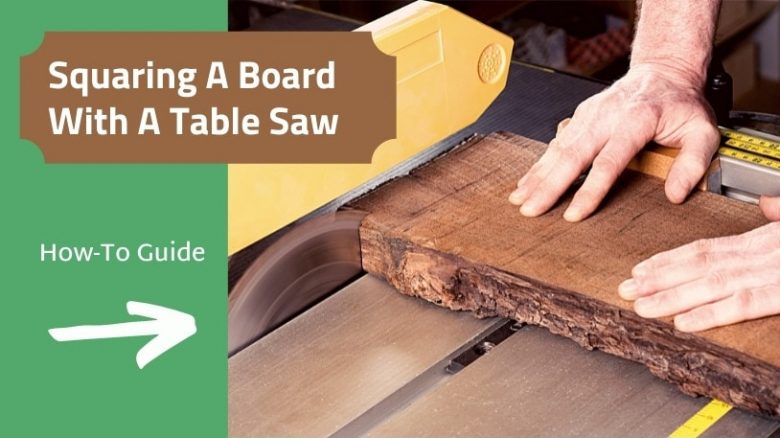
You own a table saw to make accurate, square, and parallel cuts to timber using the rip fence and miter gauge. When we work with shop-bought timber, even rough-sawn pieces, dimensional accuracy is rarely a problem for us. However, if you’re like me, you have a pile of off-cuts and salvaged timber stacked in the corner of your workshop.

Over time, with temperature and humidity changes, stored timber warps and twists. Or, perhaps, you’ve bought a natural-edged piece of timber from which to make your next masterpiece. Without known flat and straight reference faces to use as a datum, using warped timber against the rip fence won’t allow us to square up the timber with any accuracy. I’ll show you the method I used to fix that.
For this example, I will assume you have something close to 3″ x 5″ timber that is warped and needs truing on all four sides. The solution is to attach our twisted or wavy timber to a known straight-edged board, allowing us to use that known edge against the rip fence. Let’s step through the process.
What You’ll Need
Find a board with a known straight edge. A piece of plywood is ideal, as the plies help maintain dimensional stability and prevent warping. It should be as wide and long as the piece of timber you wish to square up.
Don’t forget, safety first. Ensure you have your ear protectors, gloves, and safety glasses at a minimum. If you’d like your lungs to keep operating correctly when you’re as old as I am, you might also consider a dust mask unless you have an efficient dust extractor.
You’ll also need a few screws that are long enough to go through the plywood base and into the timber you’re squaring.
Finally, make sure you set the blade of the saw at right angles to the table surface. Use a manual or digital square to ensure this is so. If you have some scrap timber, make some test cuts to allow you to measure the squareness of the cut.
The Process
The entire basis of making square and accurate cuts with a table saw requires at least one, preferably two, reference faces on the timber. Take a look at the photo below, and you can see one flat face of the timber on the table surface and one flat and straight edge against the rip fence. These faces ensure the newly cut edge will be parallel to the edge against the rip fence and 90 degrees to the face on the table surface.

Given our piece of timber doesn’t look like the one in the photo, our job is to create these reference faces. If it’s only the edge of your timber that requires squaring, you’re in luck; the process is easier, requiring fewer steps. However, I will assume twists along the entire length of your board, so we’ll work through that process.
Step One – Attaching The Timber To The Plywood
This step aims to attach the timber that needs squaring to a plywood base and make a jig. However, the key here is to ensure the timber overhangs the plywood a little on the edge that you intend to cut. Here’s a diagram to explain what I mean.

If your timber is badly warped, as shown by my exaggerated drawing, you may need a packing piece of wood between the timber and the plywood to fill the gap. Use countersunk screws to screw up through the plywood base and ensure they are sunk beneath the surface of the ply to ensure a flat underside.
Step Two – Creating the first reference face
Run the jig through your saw, ensuring you keep the reference edge of the plywood firmly against the rip fence. Once complete, you now have one reference surface on your timber that is straight and parallel to the rip fence.

Now we need to create the second reference face. If you only need to true up edges, you can now unscrew the board from the jig and use the reference face you’ve just created to run along the rip fence as you trim the other edge. However, we’re assuming your entire board is warped, so we need the jig still.
Step Three – Creating the second reference face
Unsurprisingly, the process is the same; it’s just that now we need to rotate the wood 90 degrees to create the second reference face. Ensure the face you have cut in step two goes face down on the ply and is again screwed on for security.

You’ll need to deepen the cut depth to get across the width of the timber. If you need to straighten all four sides of your timber, the limit to what you can square will be the depth of cut your saw can manage. If you need only edges, the board can be as wide as the rip fence will allow.
Step Four – We’ve finished with the jig
At this point, you now have the two reference surfaces needed to complete the squaring. You can unscrew the jig and put it away in your workshop for the next time you need it.
Use the first reference face you cut against the rip fence and the second against the tabletop. Now, you can square up the third edge to be straight and parallel with the first.
At this point, you may need to use a push stick to ensure your fingers don’t get near the blade when pushing the timber the length of the cut. Just use any old piece of timber with a notch in the end to push against your board.
Step Five – The last long cut
Now, with three reference edges, life is easy. Just run the last wavy edge down the saw blade, keeping your other reference edges against the fence and the tabletop.

Now you have a squared piece of timber with all four sides at 90 degrees to the other. Depending on the timber’s warp or twist, you’ll turn a lot of your plank into sawdust. You’ll also end up with a smaller usable piece, so bear that in mind when doing this.
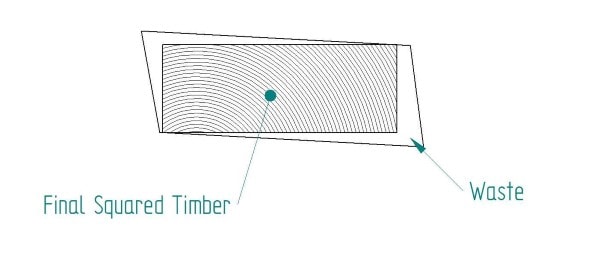
You don’t need to go to all this work only to find the piece is dimensionally too small for what you need. In truth, however, I find that you’re effectively using the blade as a planer when using this technique, just shaving off a sixteenth or so from each side. I’ve greatly exaggerated the drawings for clarity.
The Final Step – Squaring the ends
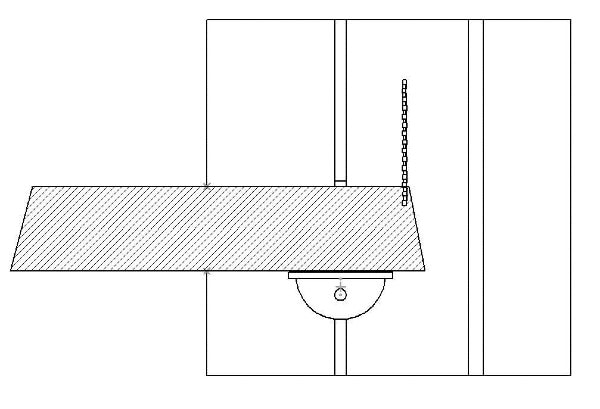
Squaring the ends is simple. Remember you have screw holes at each end of the plank on the first two reference faces, so you may wish to remove these when you square off.
Check your miter for squares before use. Place your square’s long edge against the face of the miter and the short edge against the rip fence and adjust the miter until true.
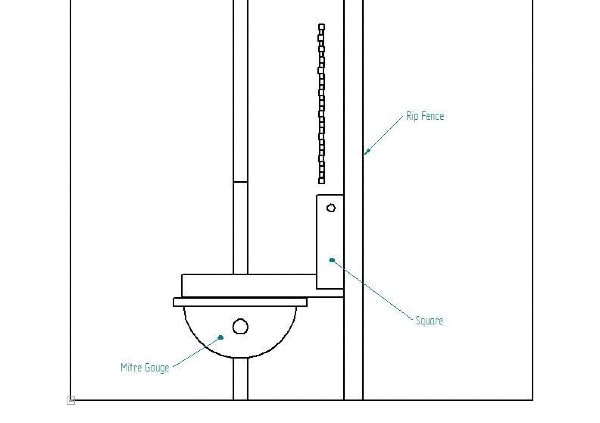
Then, use your miter gauge to run the plank through the saw, squaring off each end. Then you’re done!
In Summary
This process is for a board where you have no flat or accurate reference faces.
- You need to use some plywood with a known straight edge as a jig to get the first two faces flat and true, attaching your piece of timber with screws. Be sure to allow an overhang so that you cut only your timber and not the ply.
- I have heard of people using double-sided tape to fasten the board to the ply, but I’m not that brave. If you do decide to use tape, I strongly advise slow feeds and light cuts! I wouldn’t advise it, however.
- Use the known good edge of the plywood to run along the rip fence as you cut; this ensures that the first cut face will be accurate and parallel to the fence.
- Unscrew the board, turn it 90 degrees so the newly cut face is face-down on the plywood, and re-screw. Don’t forget the overhang! Once again, use the known good edge of the plywood to run along the rip fence as you cut. You will have a second cut face parallel to the fence and 90 degrees to the first cut face.
- Now you have your two reference faces; you can unscrew the jig and put it aside. Using the two reference faces, one against the fence and the other face-down on the table, cut your third face.
- You have three parallel and flat faces; cut the fourth face, then trim the ends using the mitre gauge. Be sure to square the mitre gauge before use.
- Remember that if you only want to trim off a board with a wavy edge, you can leave out steps three and five, as the top and bottom faces will already be flat.
I trust this article has been helpful and thank you for reading!

